Getting Started with vSphere 7.0 Lifecycle Manager
In the early days of VMware ESX and VirtualCenter Server (now called vCenter Server), patching and upgrading ESX hosts was a manual and challenging task that required a significant amount of time from a virtual administrator to complete. This process included manually staging patch files as well as executing install and reboot commands to each ESX host. To simplify virtual infrastructure management, in 2007, VMware introduced a new feature with VMware VirtualCenter Server 2.5 that automated these processes. This new solution was titled VMware Update Manager (VUM) Server. Since then, VMware has made numerous changes to Update Manager Server in some cases, introducing new features, while also removing features (guest operating system and application patching). However, the core functionality of Update Manager hasn’t changed much since the original 1.0 release.
With the release of vSphere 7.0, VMware has not only added new functionality to the Update Manager Server but has rebranded this great tool as vSphere Lifecycle Manager (vLCM). vSphere Lifecycle Manager introduces many new features that simplify the process of managing not only ESXi patching but also the full firmware lifecycle of the ESXi host’s hardware. In this post, I discuss the new features and how we can utilize them to simplify the management of your virtual infrastructure.
Overview of What’s New in vSphere Lifecycle Manager
Traditionally, VMware Update Manager Server supported the installation of ESX/ESXi patches, upgrading ESX/ESXi versions, upgrading VMware Tools, and upgrading of VM hardware versions. While this has taken care of many of the functions required to maintain a virtual infrastructure, it ignored a critical aspect of that infrastructure, the server hardware. With the introduction of hyper-converged features such as vSAN, ensuring that our server hardware is consistent and up to date is critical. vSphere Lifecycle Manager addresses this challenge by not only supporting the capabilities previously included in VMware Update Manager but also by introducing a new desired state model and by supporting updating of server firmware provided by the OEMs. These new capabilities include:
- Manging cluster software using desired state images
- Verification of host hardware against the VMware Compatibility Guide (VCG) and the vSAN Hardware Compatibility List (vSAN HCL).
- Automated Firmware Updates
Desired State Images vs. Baselines
In previous releases of VMware Update Manager, virtual infrastructure administrators managed ESXi hosts using a combination of host patches, drivers, and ESXi OS images configured in update baselines and baseline groups. vSphere Lifecycle Manager introduces a new method of maintaining all ESXi hosts in a cluster by defining an image for the cluster. Images represent the desired state specification that includes software, drivers, and firmware to apply to all hosts in a cluster. Installation of Software and firmware updates happen simultaneously, using a single workflow. This functionality allows you to take advantage of new functionalities, such as image recommendations, automated firmware updates, and hardware compatibility checks.
There are few items to consider regarding the use of vSphere Lifecycle Manager images vs. baselines. They include:
- All ESXi hosts must be version 7.0 or later
- All ESXi hosts must be stateful (most boot from a disk)
- All ESXi hosts must be from the same vendor
- Once a cluster is configured to use images, it cannot be changed back to using baselines
- The cluster must include only integrated solutions, for example, VMware vSAN and VMware vSphere High Availability (HA)
- vSphere with Kubernetes, VMware NSX-T Data Center, and VMware NSX for vSphere are not yet integrated and do not work with vSphere Lifecycle Manager
- Solutions that not integrated to work with vSphere Lifecycle Manager or standalone VIBs will be removed from the ESXi hosts during remediation
What is an Image?
vSphere Lifecycle Manager uses images to provide a precise, predictable result when remediating hosts within a cluster. This method differs from baselines as baselines only define a list of updates to be applied to hosts, which can produce unpredictable results after remediation. Images in vSphere Lifecycle Manage consists of four composing elements. They include:
- ESXi Base Image - is an ESXi release version that contains an image of VMware ESXi Server and additional components such as drivers and adapters that are necessary to bring up a server.
- Vendor Add-on - is a collection of software components for the ESXi hosts that OEMs create and distribute. This vendor add-on can contain drivers, patches, and solutions.
- Firmware and Driver Add-on - is a special type of vendor add-on designed to assist in the firmware update process. The firmware and drivers add-on contains firmware for a specific server type and corresponding drivers.
- Component - is the smallest discrete unit in an image. VMware and OEMs do not publish components. VMware packages components into base images. OEMs package components into vendor add-ons. However, third-party software vendors can create and publish components, for example, drivers or adapters, independently. You can add such independent components to your image.
Creating an Image
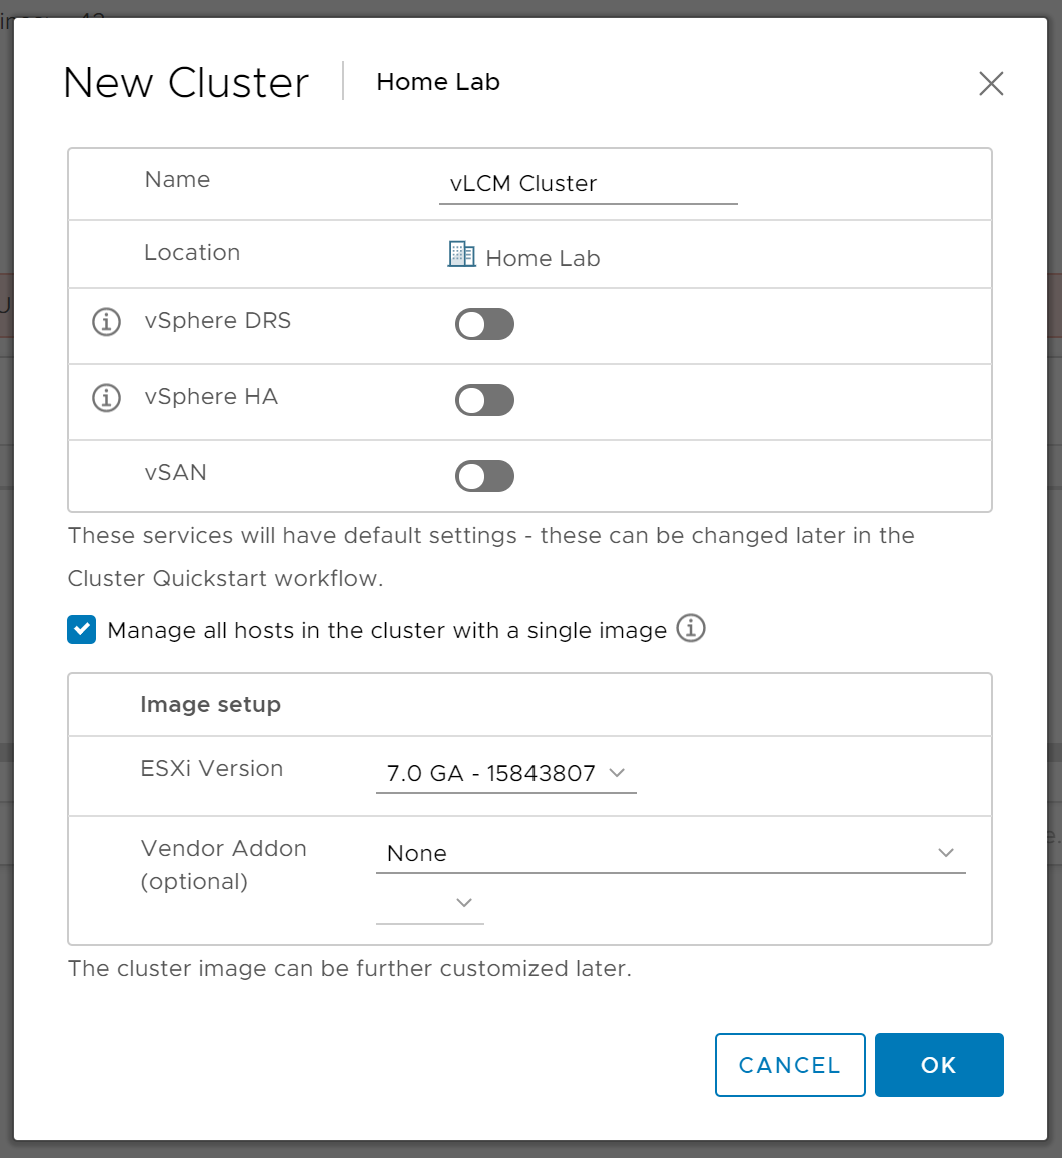
vSphere Lifecycle Manager makes the creation of a vSphere Lifecycle Manager image an easy process. The first step in the process is to enable the management of cluster ESXi hosts using vSphere Lifecycle Manager images. For new clusters, you are provided the option during cluster creation to enable management of the cluster using vSphere Lifecycle Manager images as shown below:
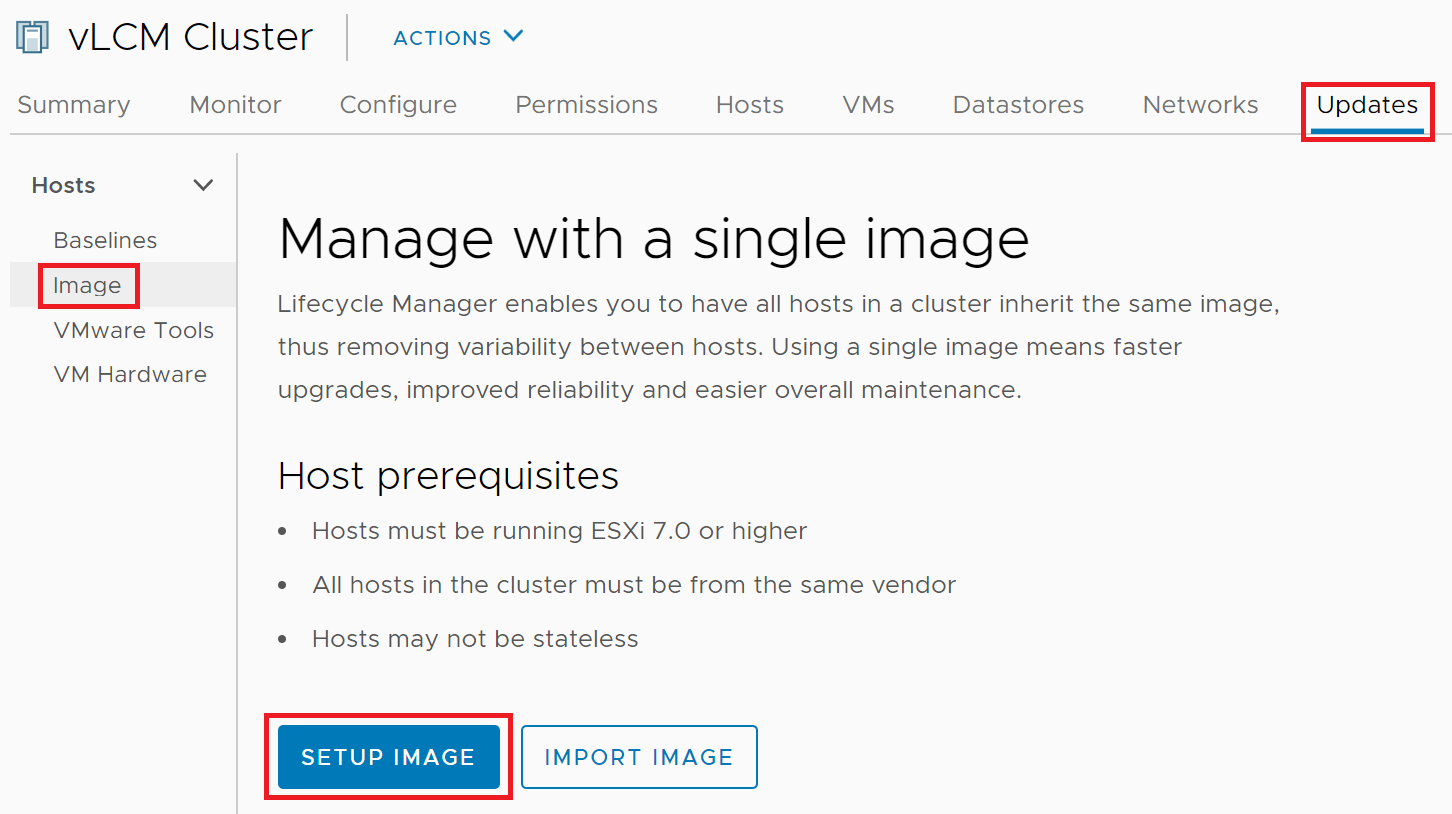
For existing clusters, you can enable image management within the Updates tab for the cluster by selecting Image on the left and then clicking the Setup Image button as shown:
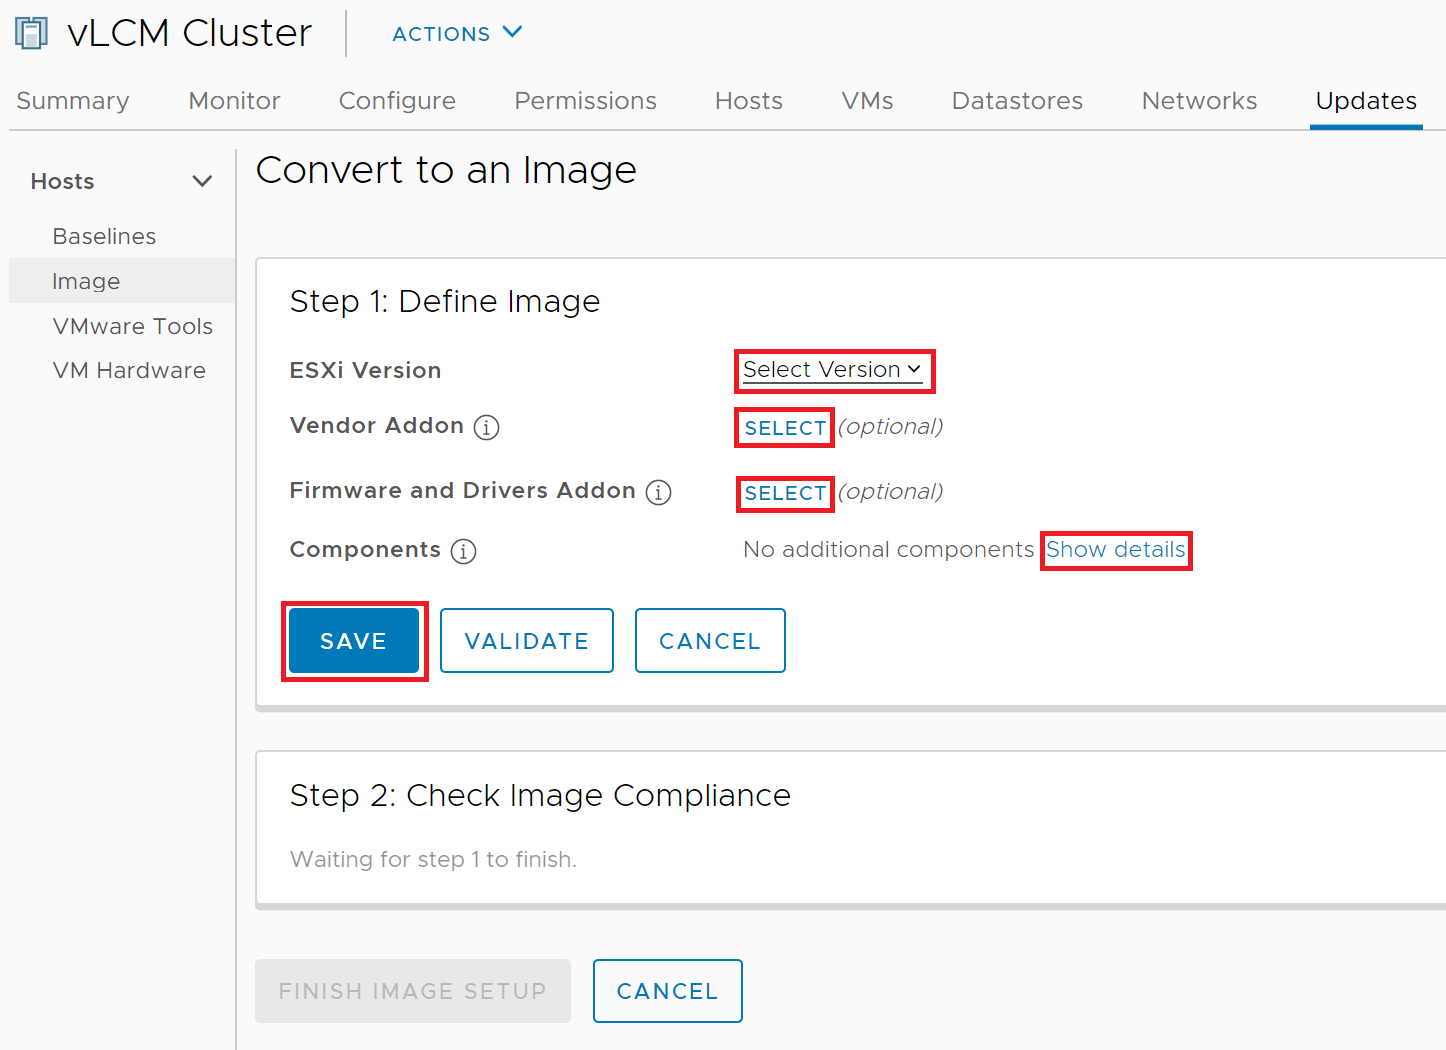
If you are converting an existing cluster to utilize images, you are presented with a screen to select the four image elements mentioned above. The only mandatory item on this screen is the ESXi Version. Once you have selected the image options applicable to your cluster, click the Save button.
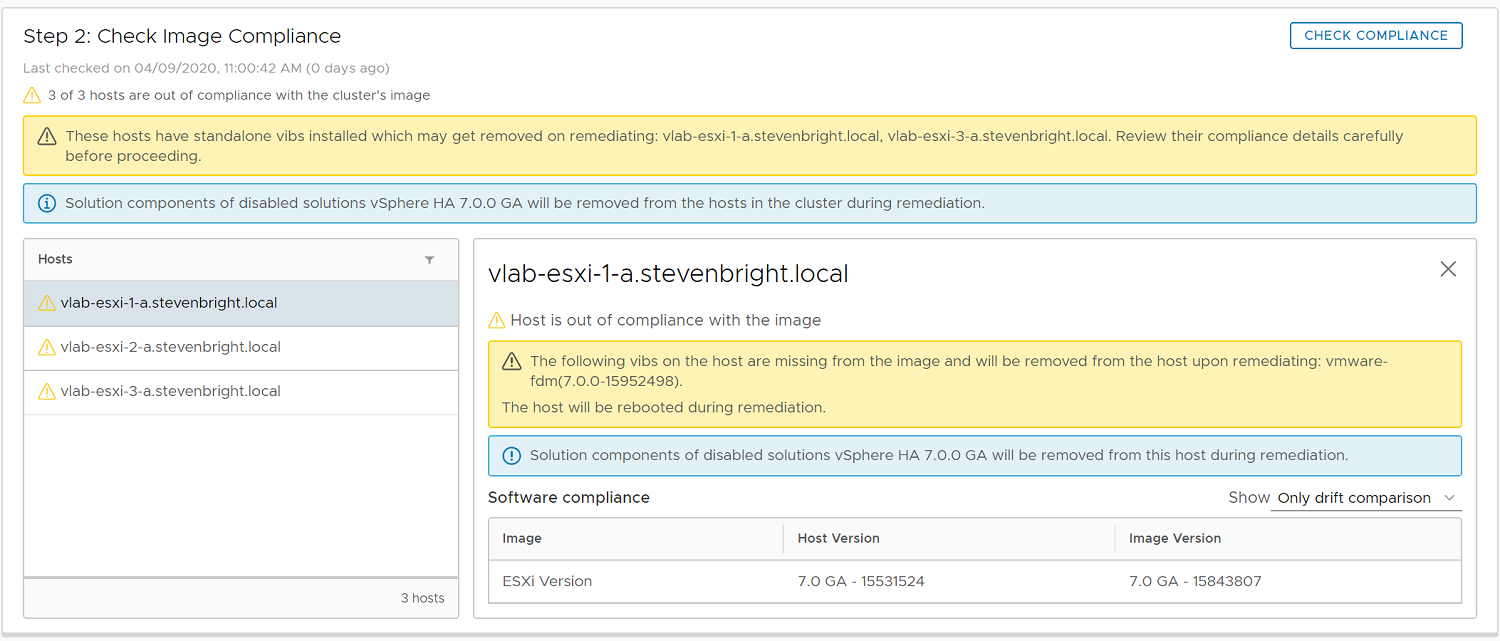
Clicking Save automatically initiates step 2 in the process, which is checking the cluster’s compliance against the image. If the cluster is not compliant with the chosen image options, vSphere Lifecycle Manager displays a list of the hosts that are non-compliant and lists the issues with each host as shown:
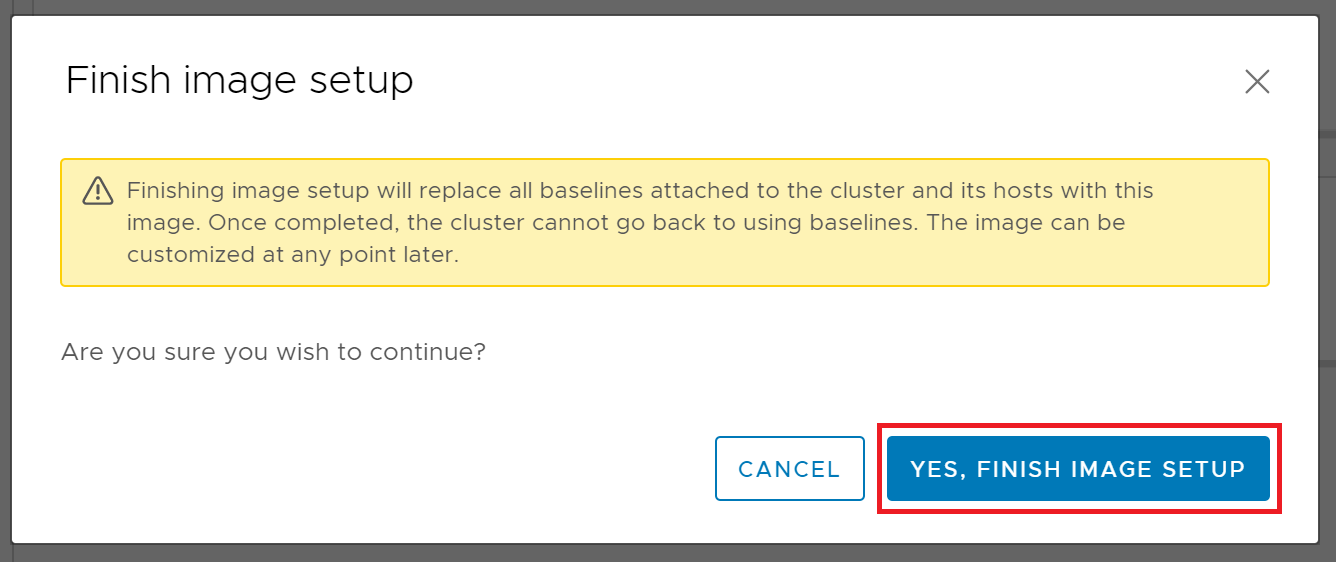
Once the check completes, click Finish Image Setup to save the image configuration to the cluster. Upon clicking Finished Image Setup, vCenter notifies you that finishing the image setup process will replace all baselines attached to the cluster and hosts. Clicking Yes, Finish Image Setup completes the setup.
Remediating a Cluster with an Image
Remediation of clusters using images isn’t much different from the process of remediating with a baseline. The process first begins by checking the cluster for compliance against the image. After the cluster compliance check completes, a list of non-compliant hosts is provided. vSphere Lifecycle Manager provides the option to either remediate individual hosts or all hosts. To remediate all the hosts, click the Remediate All button. If you wish to remediate individual hosts, click on the small button to the left side of the host and select Remediate from the resulting menu.
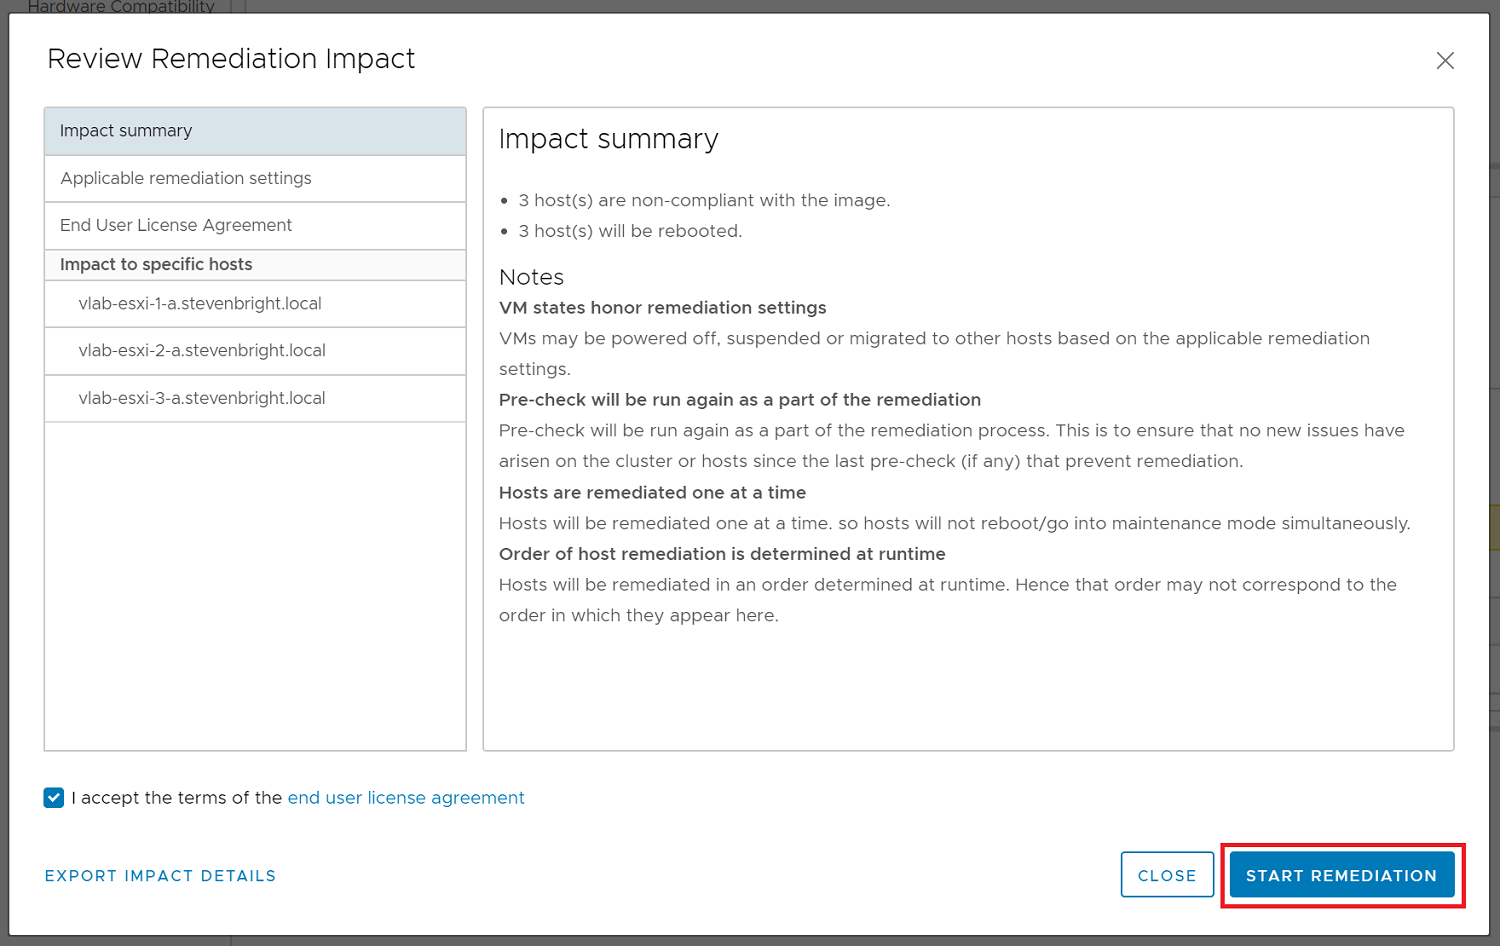
The next step in the process is to review the Remediation Impact report provided. This dialog box provides an overview of the impact that remediation will have, a more detailed overview of the impact to each host, as well as prompting you to accept license agreements and configure remediation options. After reviewing this information and agreeing to any required license agreements/terms of use, click the Start Remediation button to kick off the process. vSphere Lifecycle Manager begins remediating the hosts, removing any software from the host that is not included in your image to ensure that all hosts match your desired image configuration.
Exporting Images
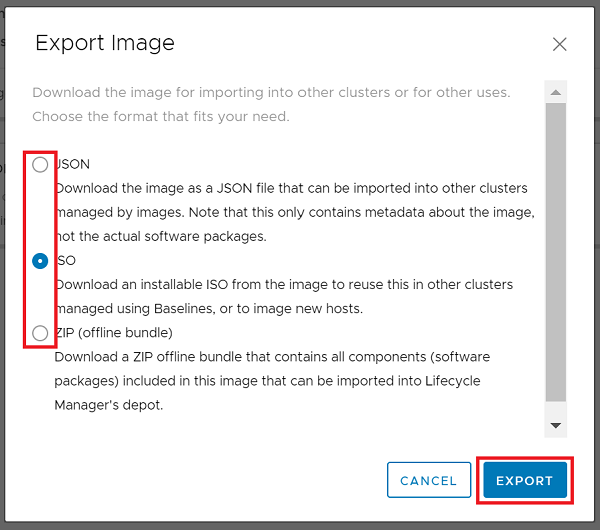
Another great feature of utilizing images is the ability to export your image in various formats. The available formats include:
- JSON - This option exports an image specification only. The image components are not included. You can import the image specification to other clusters.
- ISO - This option exports the image as an ESXi image. You can import this image into other clusters that are managed using compliance baselines (vs. image-based compliance) or use the exported ISO file to boot/build new ESXi hosts using your image.
- ZIP - This option exports an offline bundle containing all of the image components. The image specification is not included in the export. You can use the ZIP bundle to import the components into a different vCenter Server.
To export your image, click on the … button located in the top right corner of the vSphere Lifecycle Manager Image screen and select Export. On the resulting dialog, select your desired image format and click the Export button.
After clicking the Export button, vSphere Lifecycle Manager generates the image file in the format you requested and initiates a download of the file in your web browser.
Checking Host Hardware Against Compatibility Lists
As previously mentioned, vSphere Lifecycle Manager adds the ability to verify host hardware against the VMware Compatibility Guide (VCG) and the vSAN Hardware Compatibility List (vSAN HCL). To initiate this process, click on the … button located in the top right corner of the vSphere Lifecycle Manager Image screen and select Check Hardware Compatibility.
After clicking the option, a status of “Checking for HCL compatibility issues…” is shown at the bottom of the box.
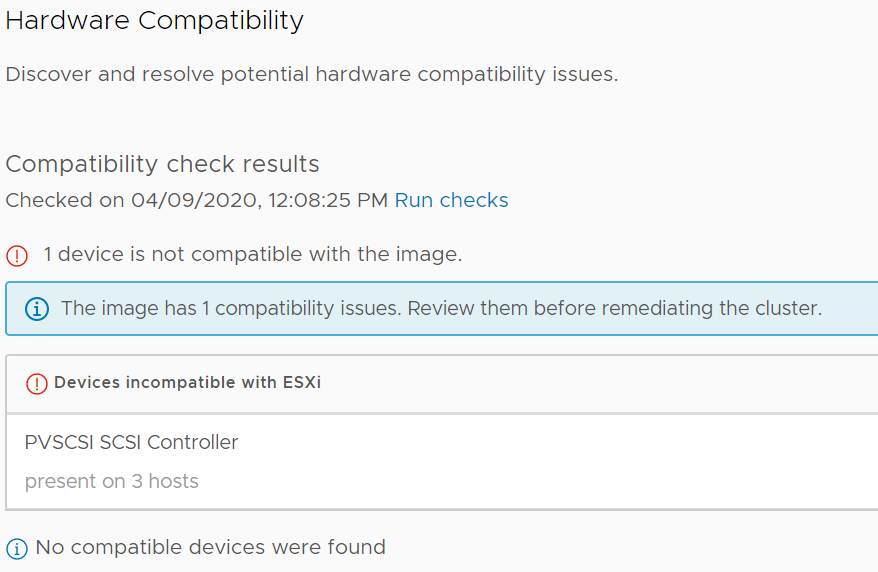
Upon completion of the check, the cluster compatibility status is listed at the bottom of the box. If compatibility issues are found, you can select the See details link or select Hardware Compatibility from the left side to see more details about the hardware compatibility issues.
Conclusion
The ability to manage ESXi hosts using desired state images is an excellent improvement over the baseline driven methods that we previously used. I know several times in the past, I’ve run into issues where host software configurations were just slightly off from each other. I often encountered this issue when a cluster contained hosts previously upgraded using vendor-specific builds as well as hosts built with the latest vendor-specific release.
Unfortunately, I do not have hardware in my lab environment that I can use to test the vendor-specific firmware update functionality or hardware support manager integration. I’ll be curious to see how these options work out as the various vendors begin to offer support for vSphere Lifecycle Manager (Dell EMC and HPE are already providing support at GA).
See Also
Search
Get Notified of Future Posts
Recent Posts
