Deploying VMware vRealize Automation 8.0
The latest release of vRealize Automation 8.0 is based on a completely rewritten codebase and is a dramatic departure from the previous versions of vRealize Automation. vRealize Automation 8.0 is an on-premise release of the VMware vRealize Automation Cloud SaaS offering that has been available for a while now. The platform consists of 3 components: Cloud Assembly, Cloud Broker, and Code Stream. The new vRealize Automation 8.0 virtual appliance includes these components as well as an integrated version of vRealize Orchestrator 8.0. However, the new vRealize Automation 8.0 appliance no longer includes an integrated instance of VMware Identity Manager (VMware Workspace ONE Access) and requires that you deploy a standalone instance to support authentication into vRealize Automation 8.0.
vRealize Automation 8.0 is a dramatic departure from the processes of deploying/upgrading (upgrades aren’t supported, only migrations are supported) that we used for previous releases. Starting with version 8.0, the only supported method for deploying a vRealize Automation 8.0 environment is to utilize vRealize Lifecycle Manager 8.0. While previous versions of vRealize Lifecycle Manager required you to go through the manual process of deploying and setting up the vRealize Lifecycle Manager virtual appliance, this new release has what VMware calls the “vRealize Easy Installer” which is an executable wizard that handles the deployment and configuration from start to finish for vRealize Lifecycle Manager 8.0, vRealize Automation 8.0, and VMware Identity Manager 3.3.1.
What Should I Know Before Getting Started With vRealize Automation 8.0
There are a few items that you should definitely be aware of before getting started with vRealize Automation 8.0:
- Only new deployments of vRealize Automation 8.0 are supported at this time.
- There is no upgrade path from a previous release of vRealize Automation 7.x to 8.0.
- There is no path to migrate from vRealize Automation 7.x at this time. Full migration service functionality is not available in vRealize Automation 8.0 but will be available with the vRealize Automation 8.1 release. (Update: vRealize Automation 8.1 was released, but no upgrade path was provided. Maybe we’ll see an upgrade path in the next release?)
- Previous vRealize Orchestrator integrations for vRealize Automation are no longer supported. If you are using the following integrations, you must rewrite all custom content in vRealize Orchestrator to use the new vRealize Automation 8.0 API interface:
- vRealize Automation CAFE plugin
- vRealize Automation .NET plugin
- vRealize Automation REST plugin
- vRealize Automation 8.0 does not include an approval policy engine.
Getting Started with the vRealize Easy Installer
The vRealize Easy Installer supports two situations: deploying a new instance of vRealize Lifecycle Manager 8.0 or upgrading an existing instance of vRealize Lifecycle Manager to version 8.0. For this walkthrough, we’ll assume that we’re deploying a new instance of vRealize Suite Lifecycle Manager.
Deploying a New Instance of vRealize Lifecycle Manager 8.0
After you’ve downloaded VMware vRealize Easy Installer from the VMware vRealize Automation 8.0 download site, mount the ISO file to your computer and launch the installer application that matches your operating system from the vrlcm-ui-installer folder. In the case of Windows, it’d be the installer.exe
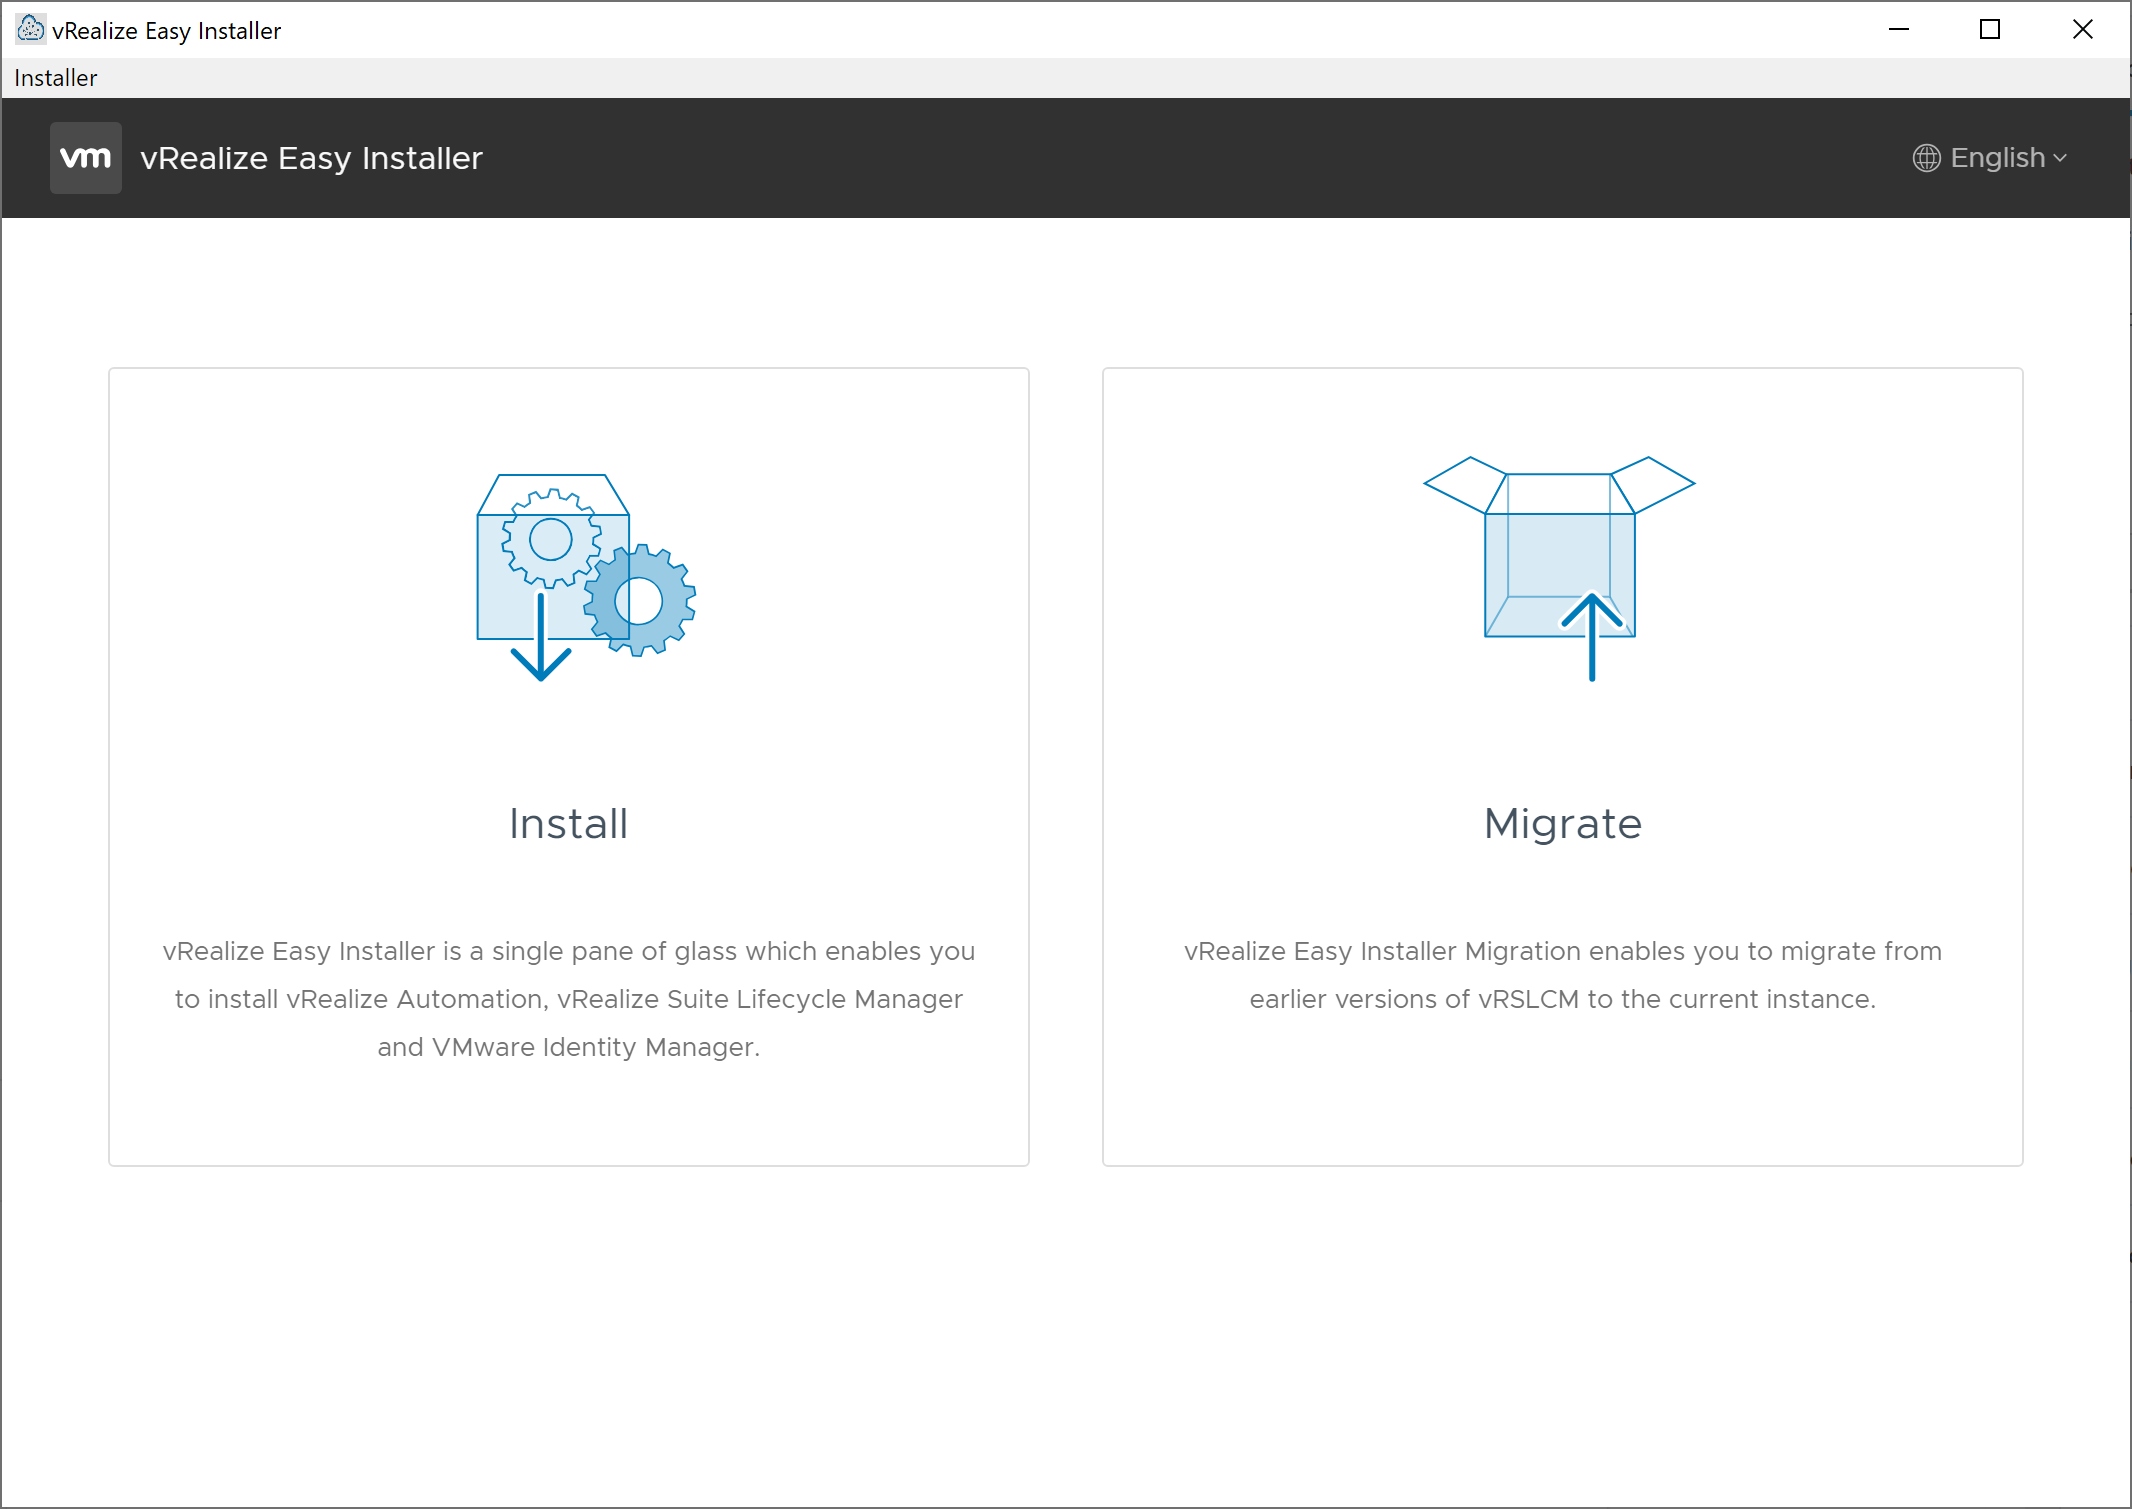
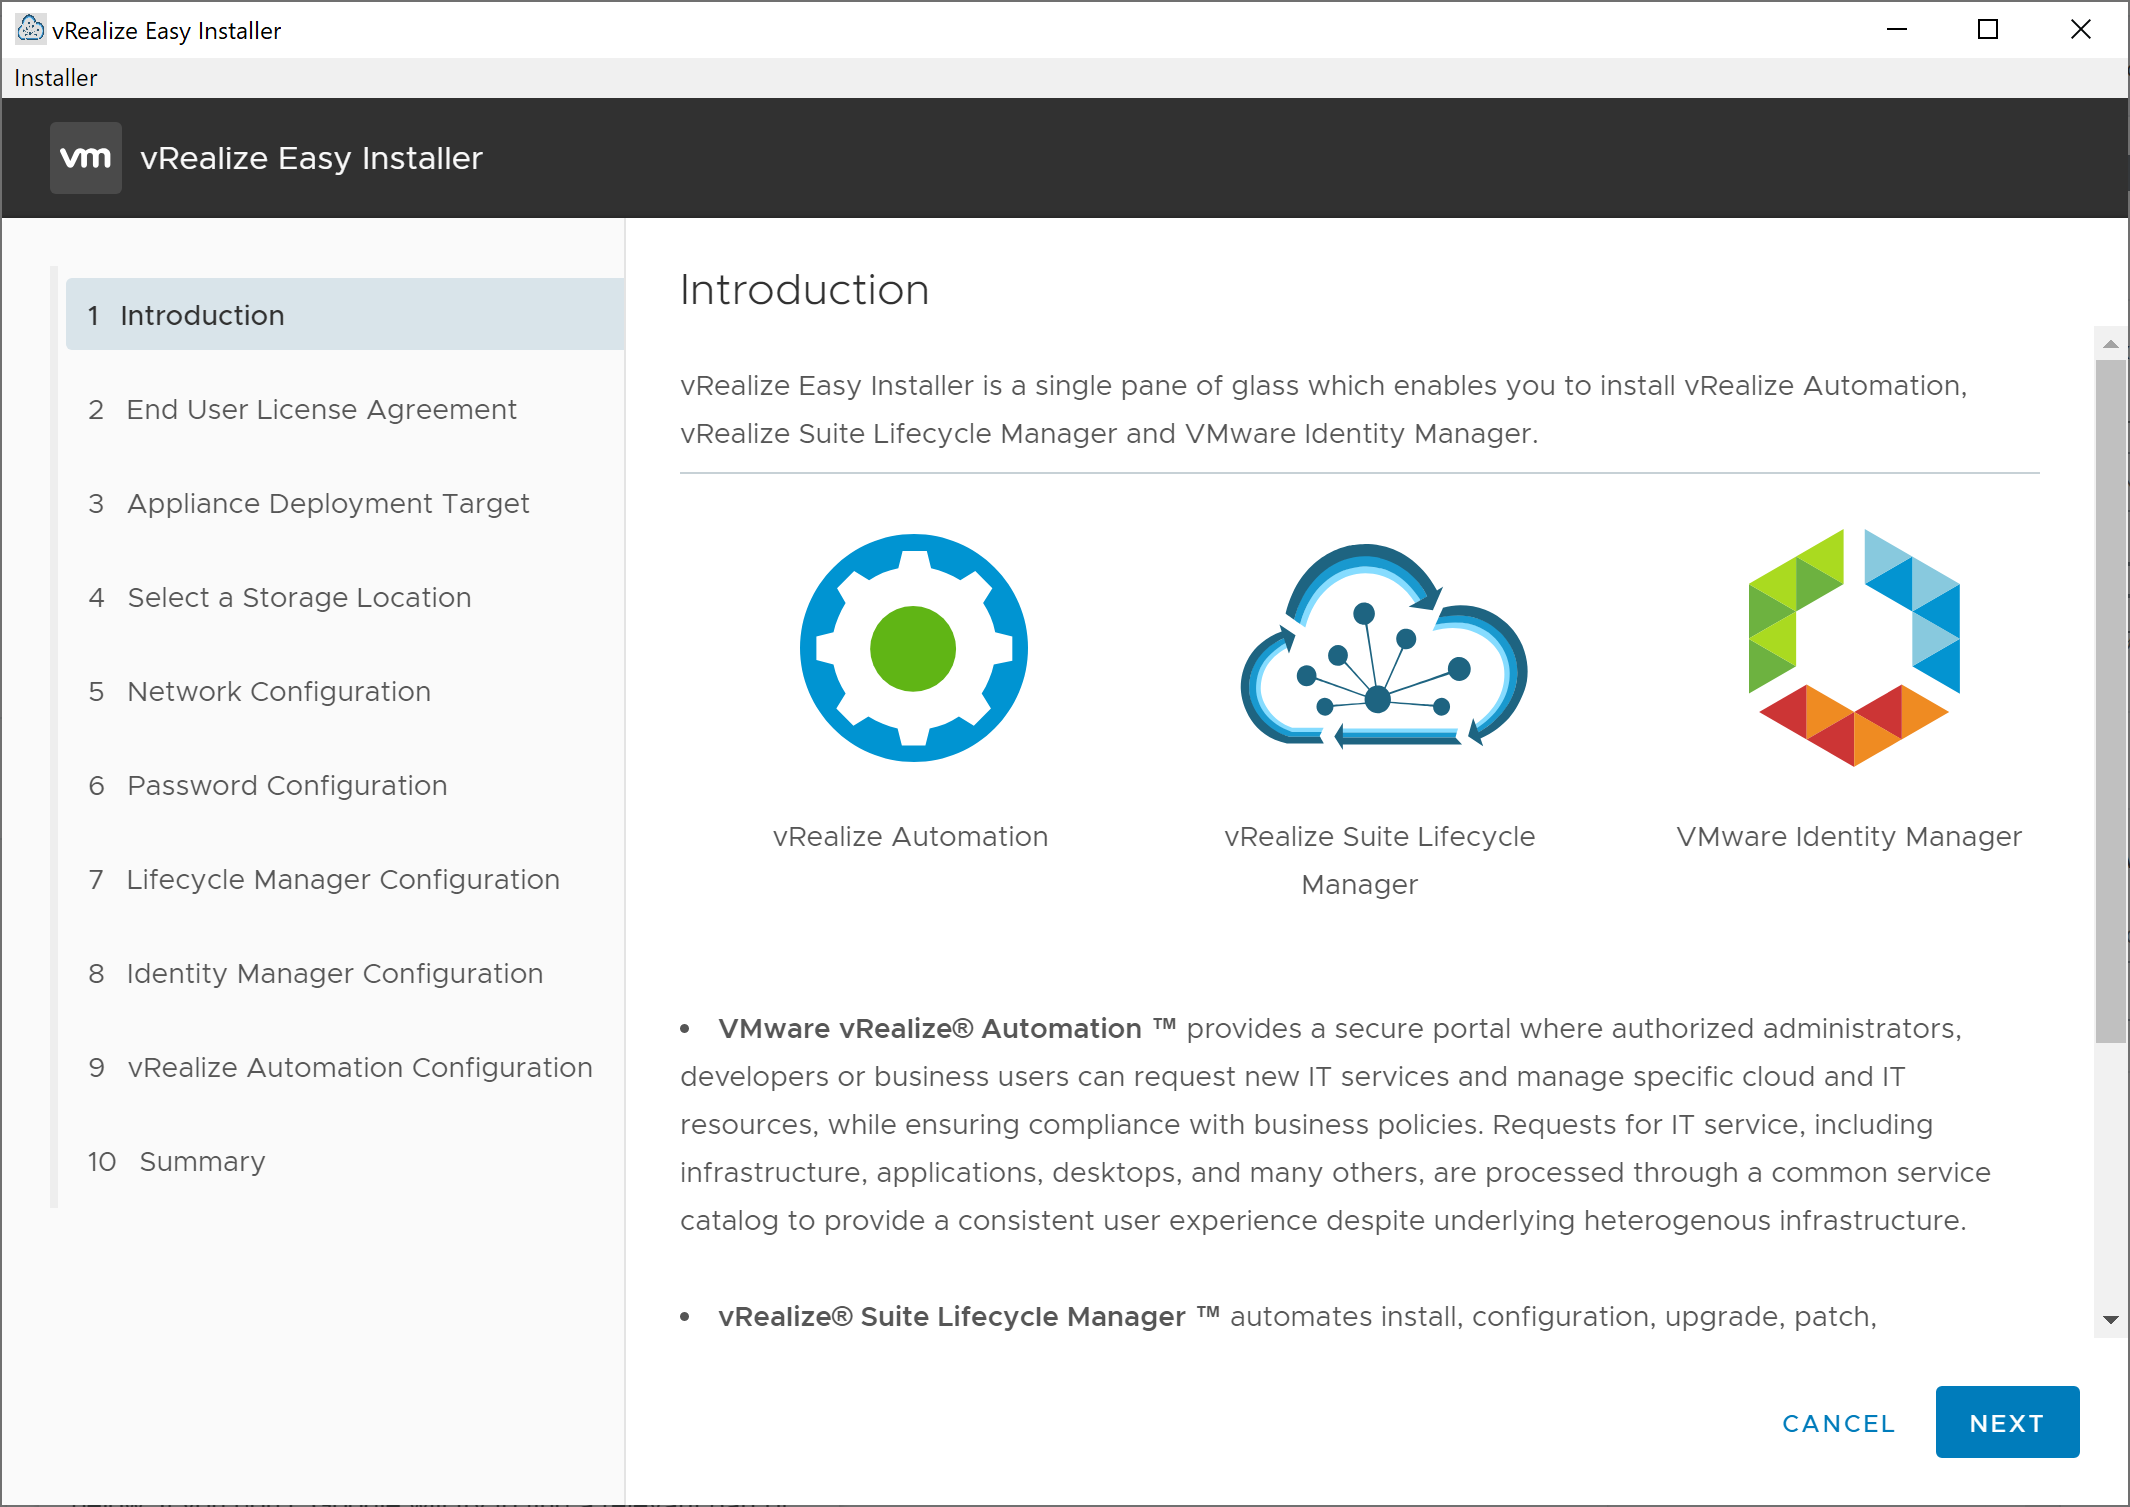
Since we are deploying a new instance of vRealize Suite Lifecycle Manager, we should choose the Install option. The first screen provided is the Introduction, which explains what the installer does.
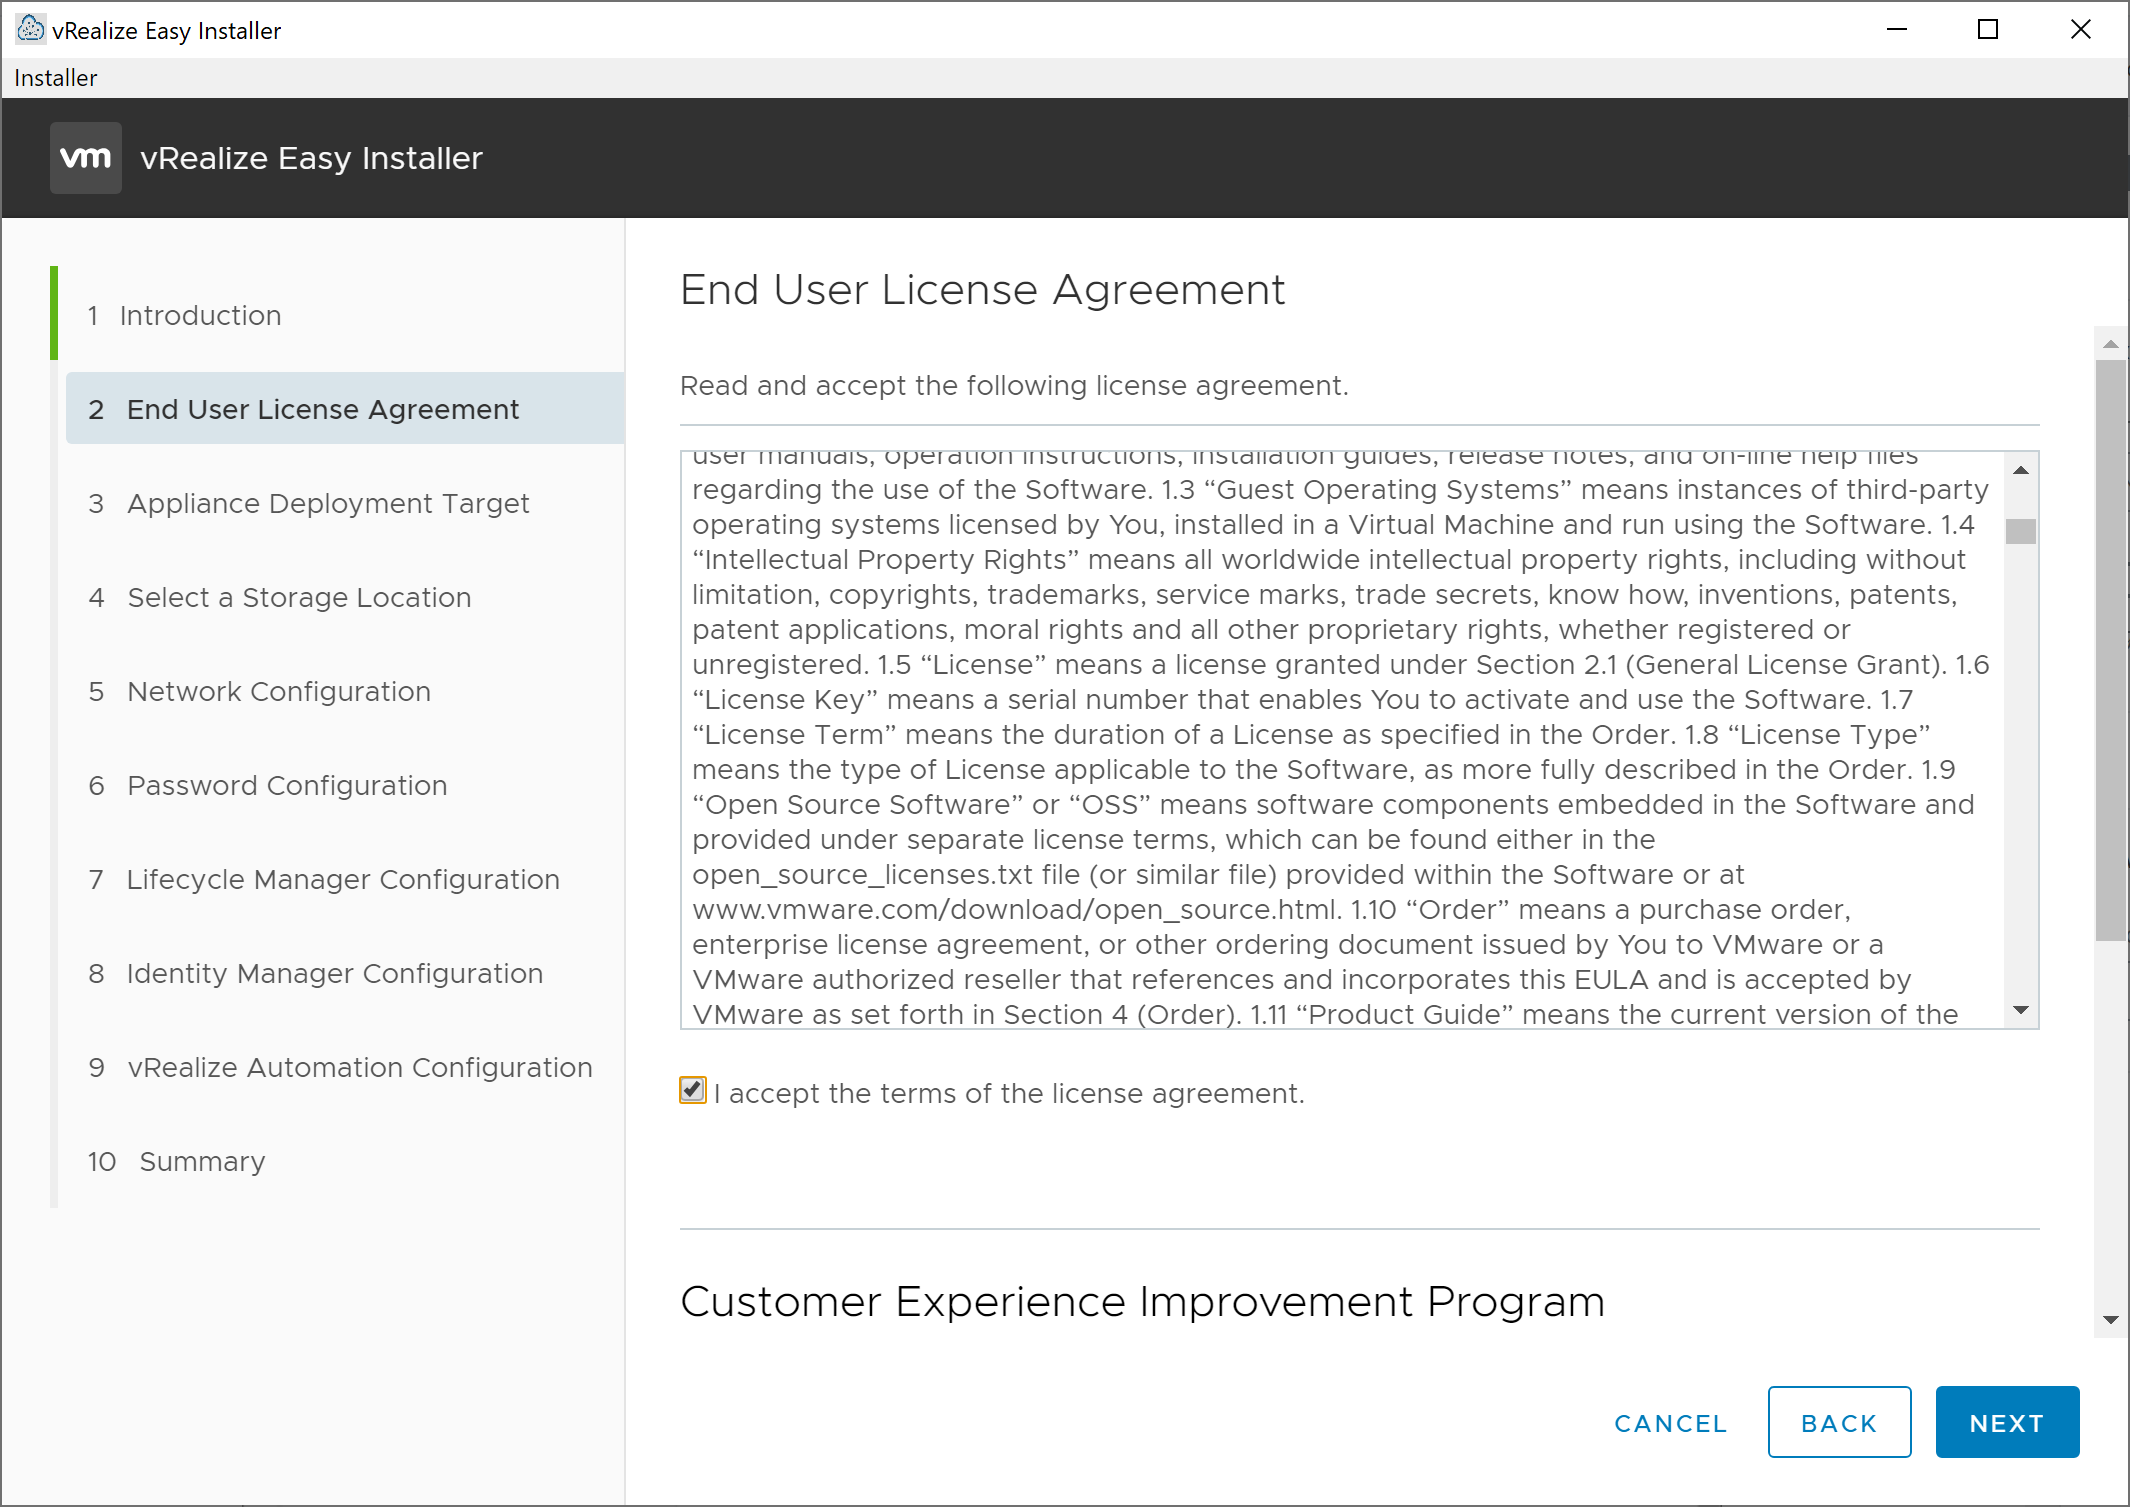
We click Next to move on to the End User License Agreement screen where we accept the license agreement and specify yes or no to participating in the Customer Experience Improvement Program.
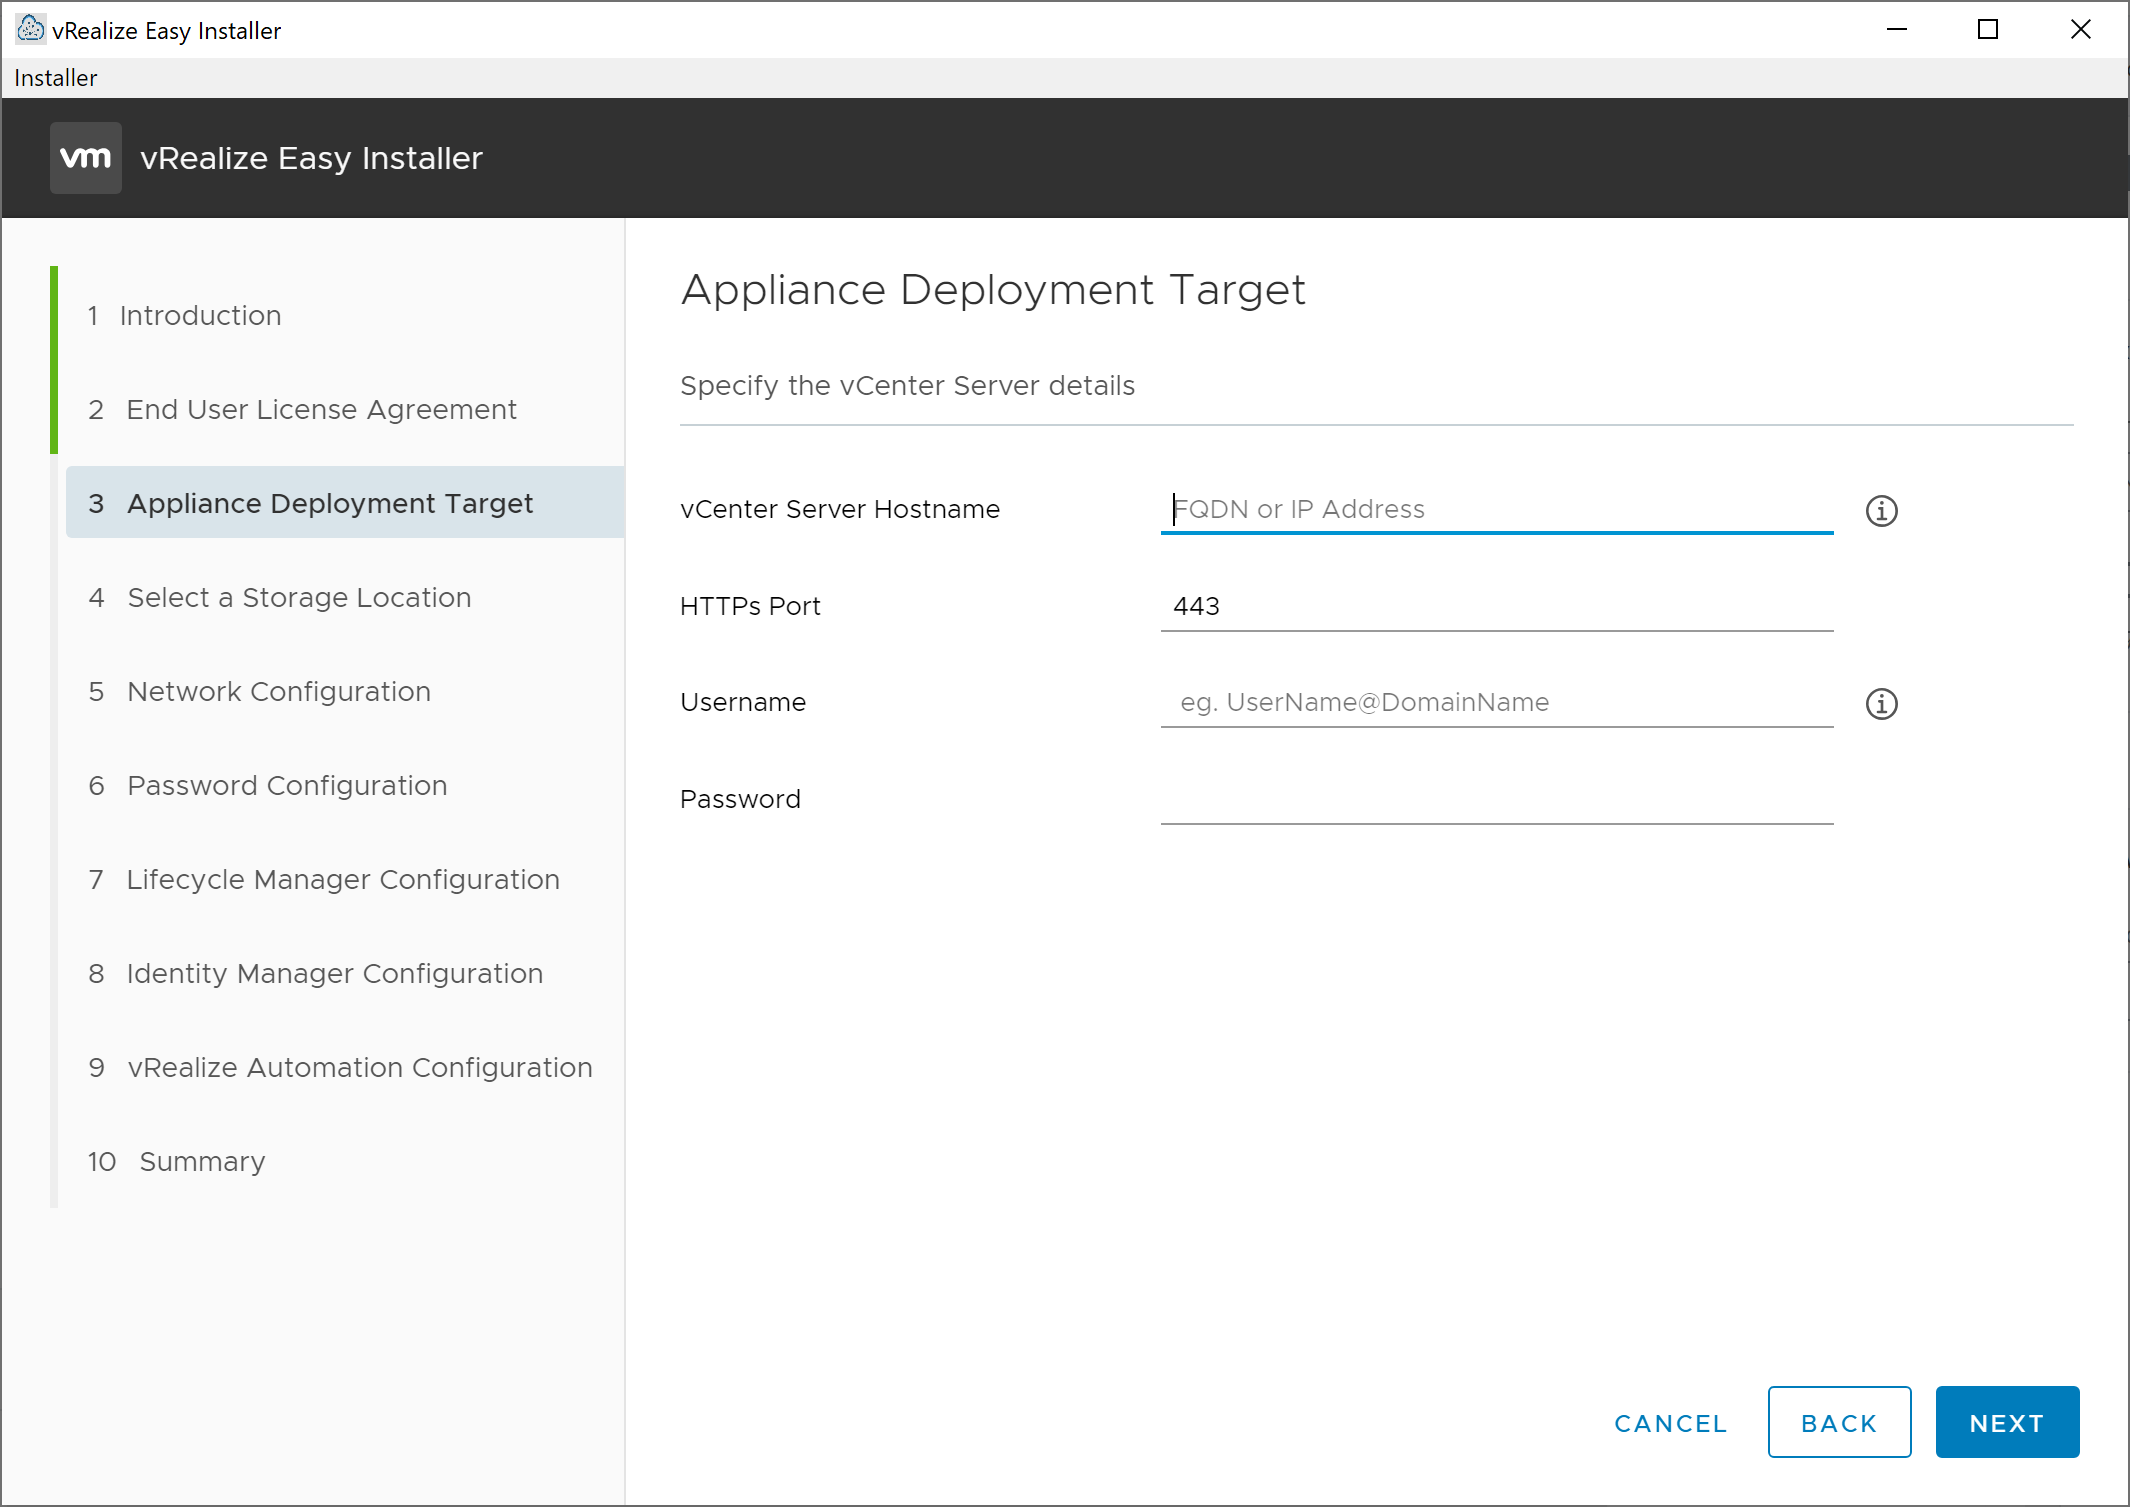
We again click the Next button to move on to the Appliance Deployment Target screen. On this screen, we provide information regarding the vCenter server where we plan to deploy the vRealize Suite Lifecycle Manager virtual appliance. You need to provide the vCenter Server’s hostname, port, username, and password, then click on the Next button. If you receive a Certificate Warning dialog box asking that you confirm the SHA1 thumbprint of the SSL certificate provided by your vCenter server, do so and click Accept to continue. After the installer validates your credentials, you are presented with the Select a Location screen.
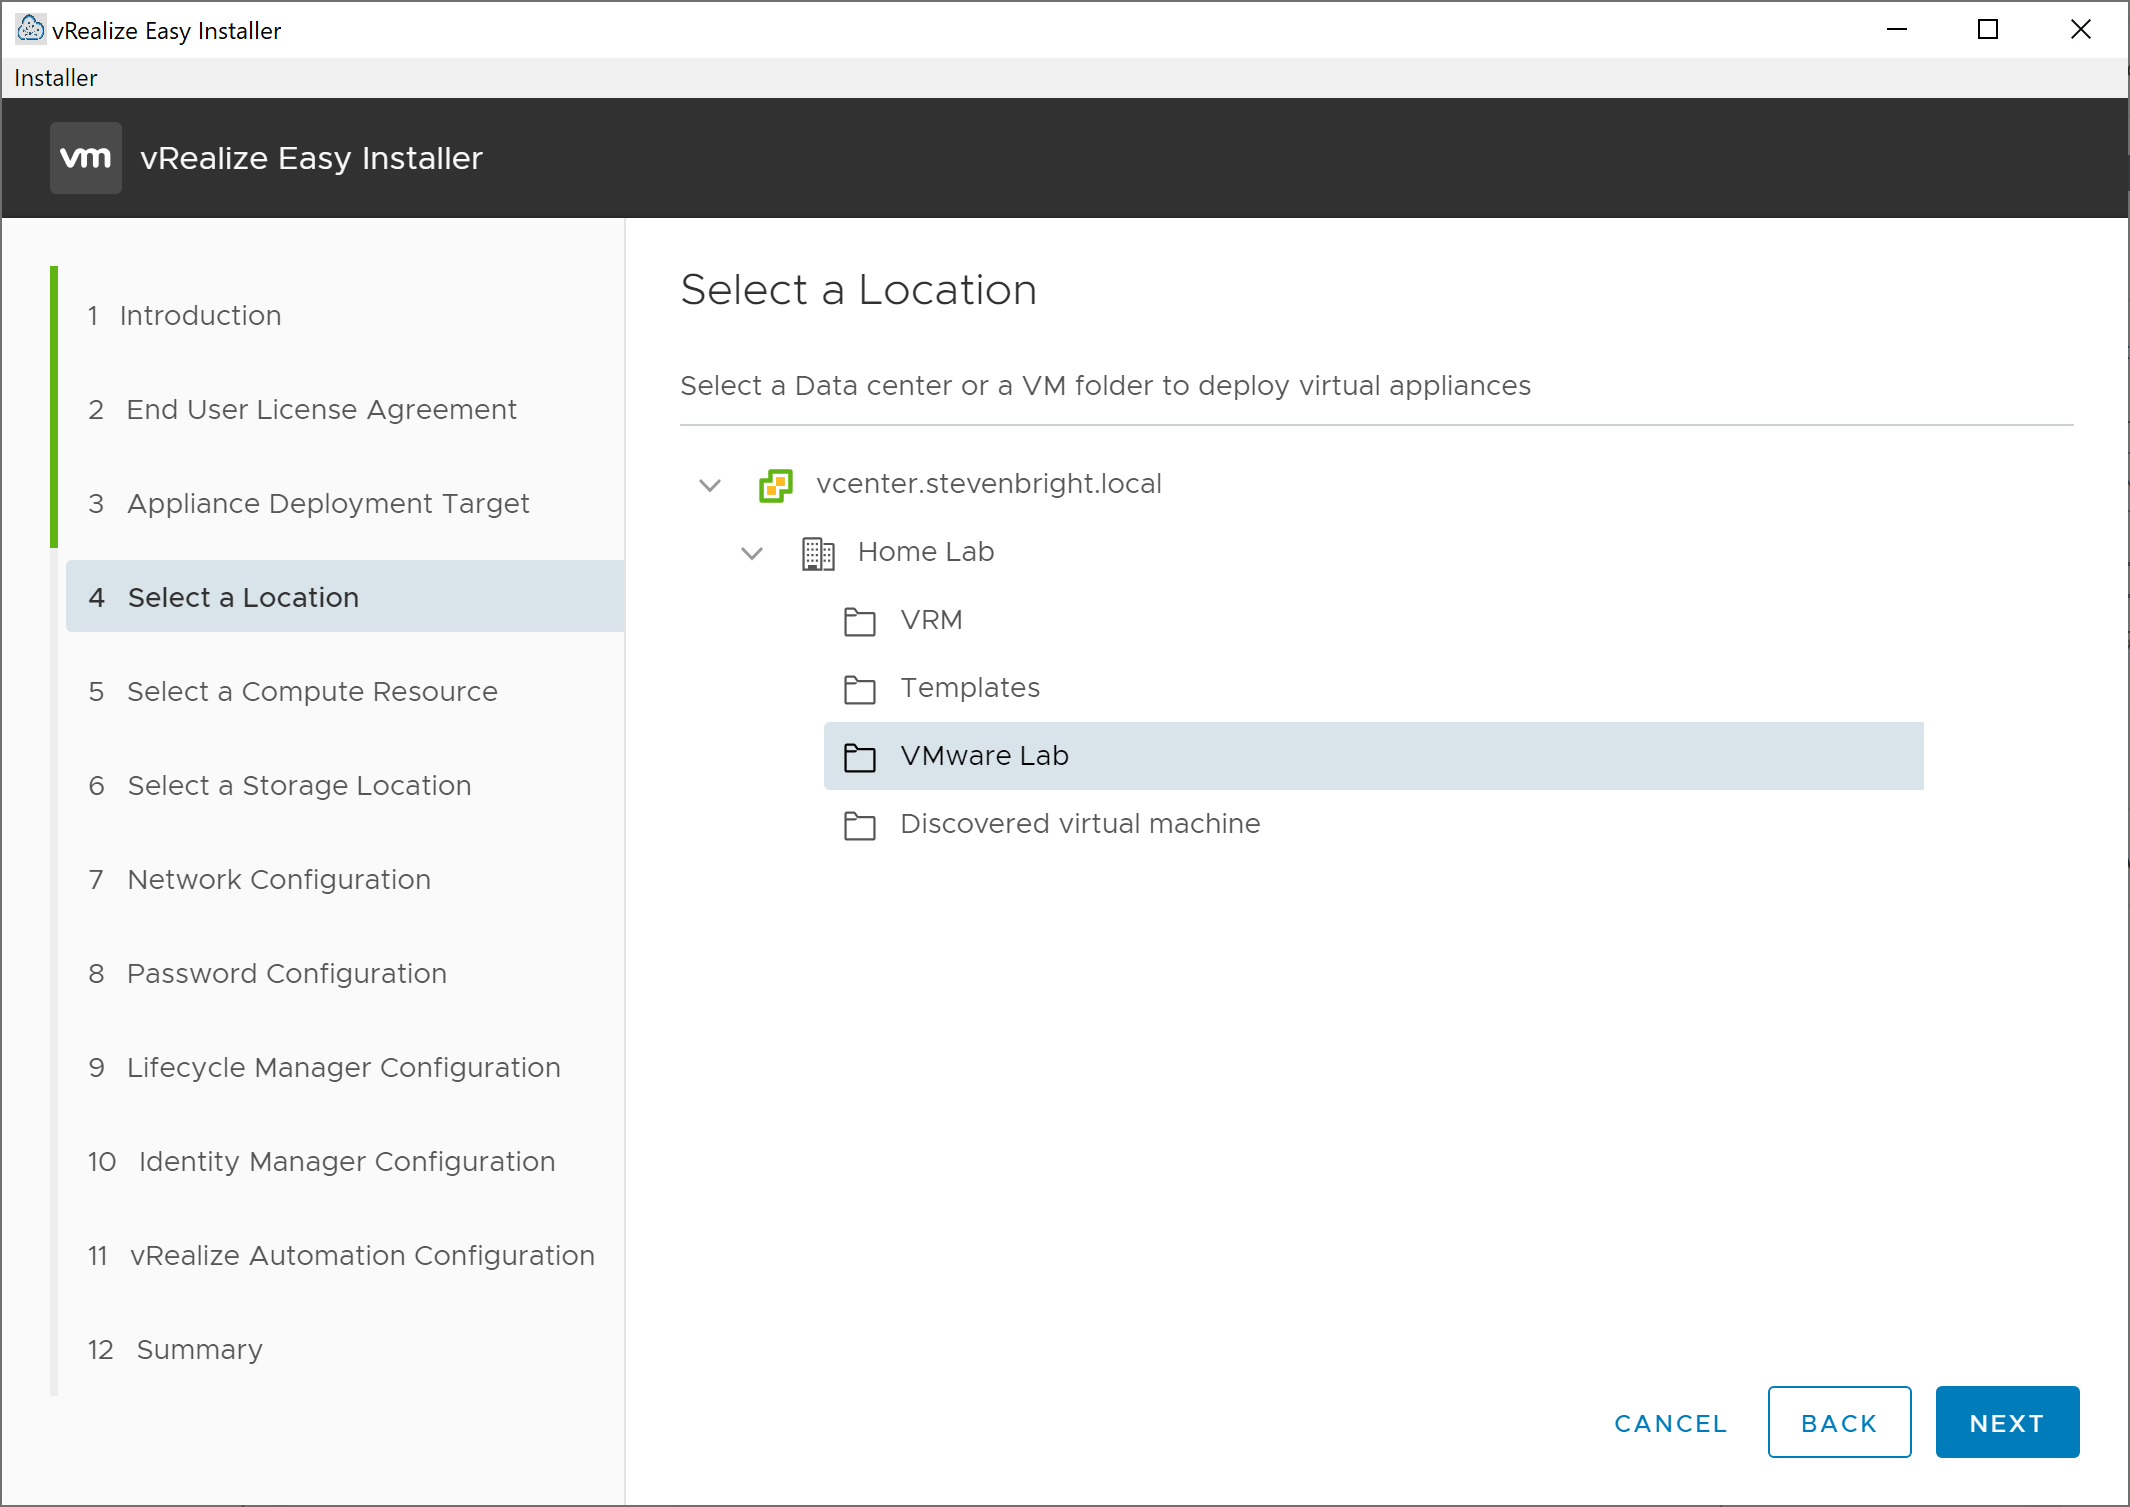
On the Select a Location screen, select the data center and folder where you would like the new virtual appliance located, then click the Next button.
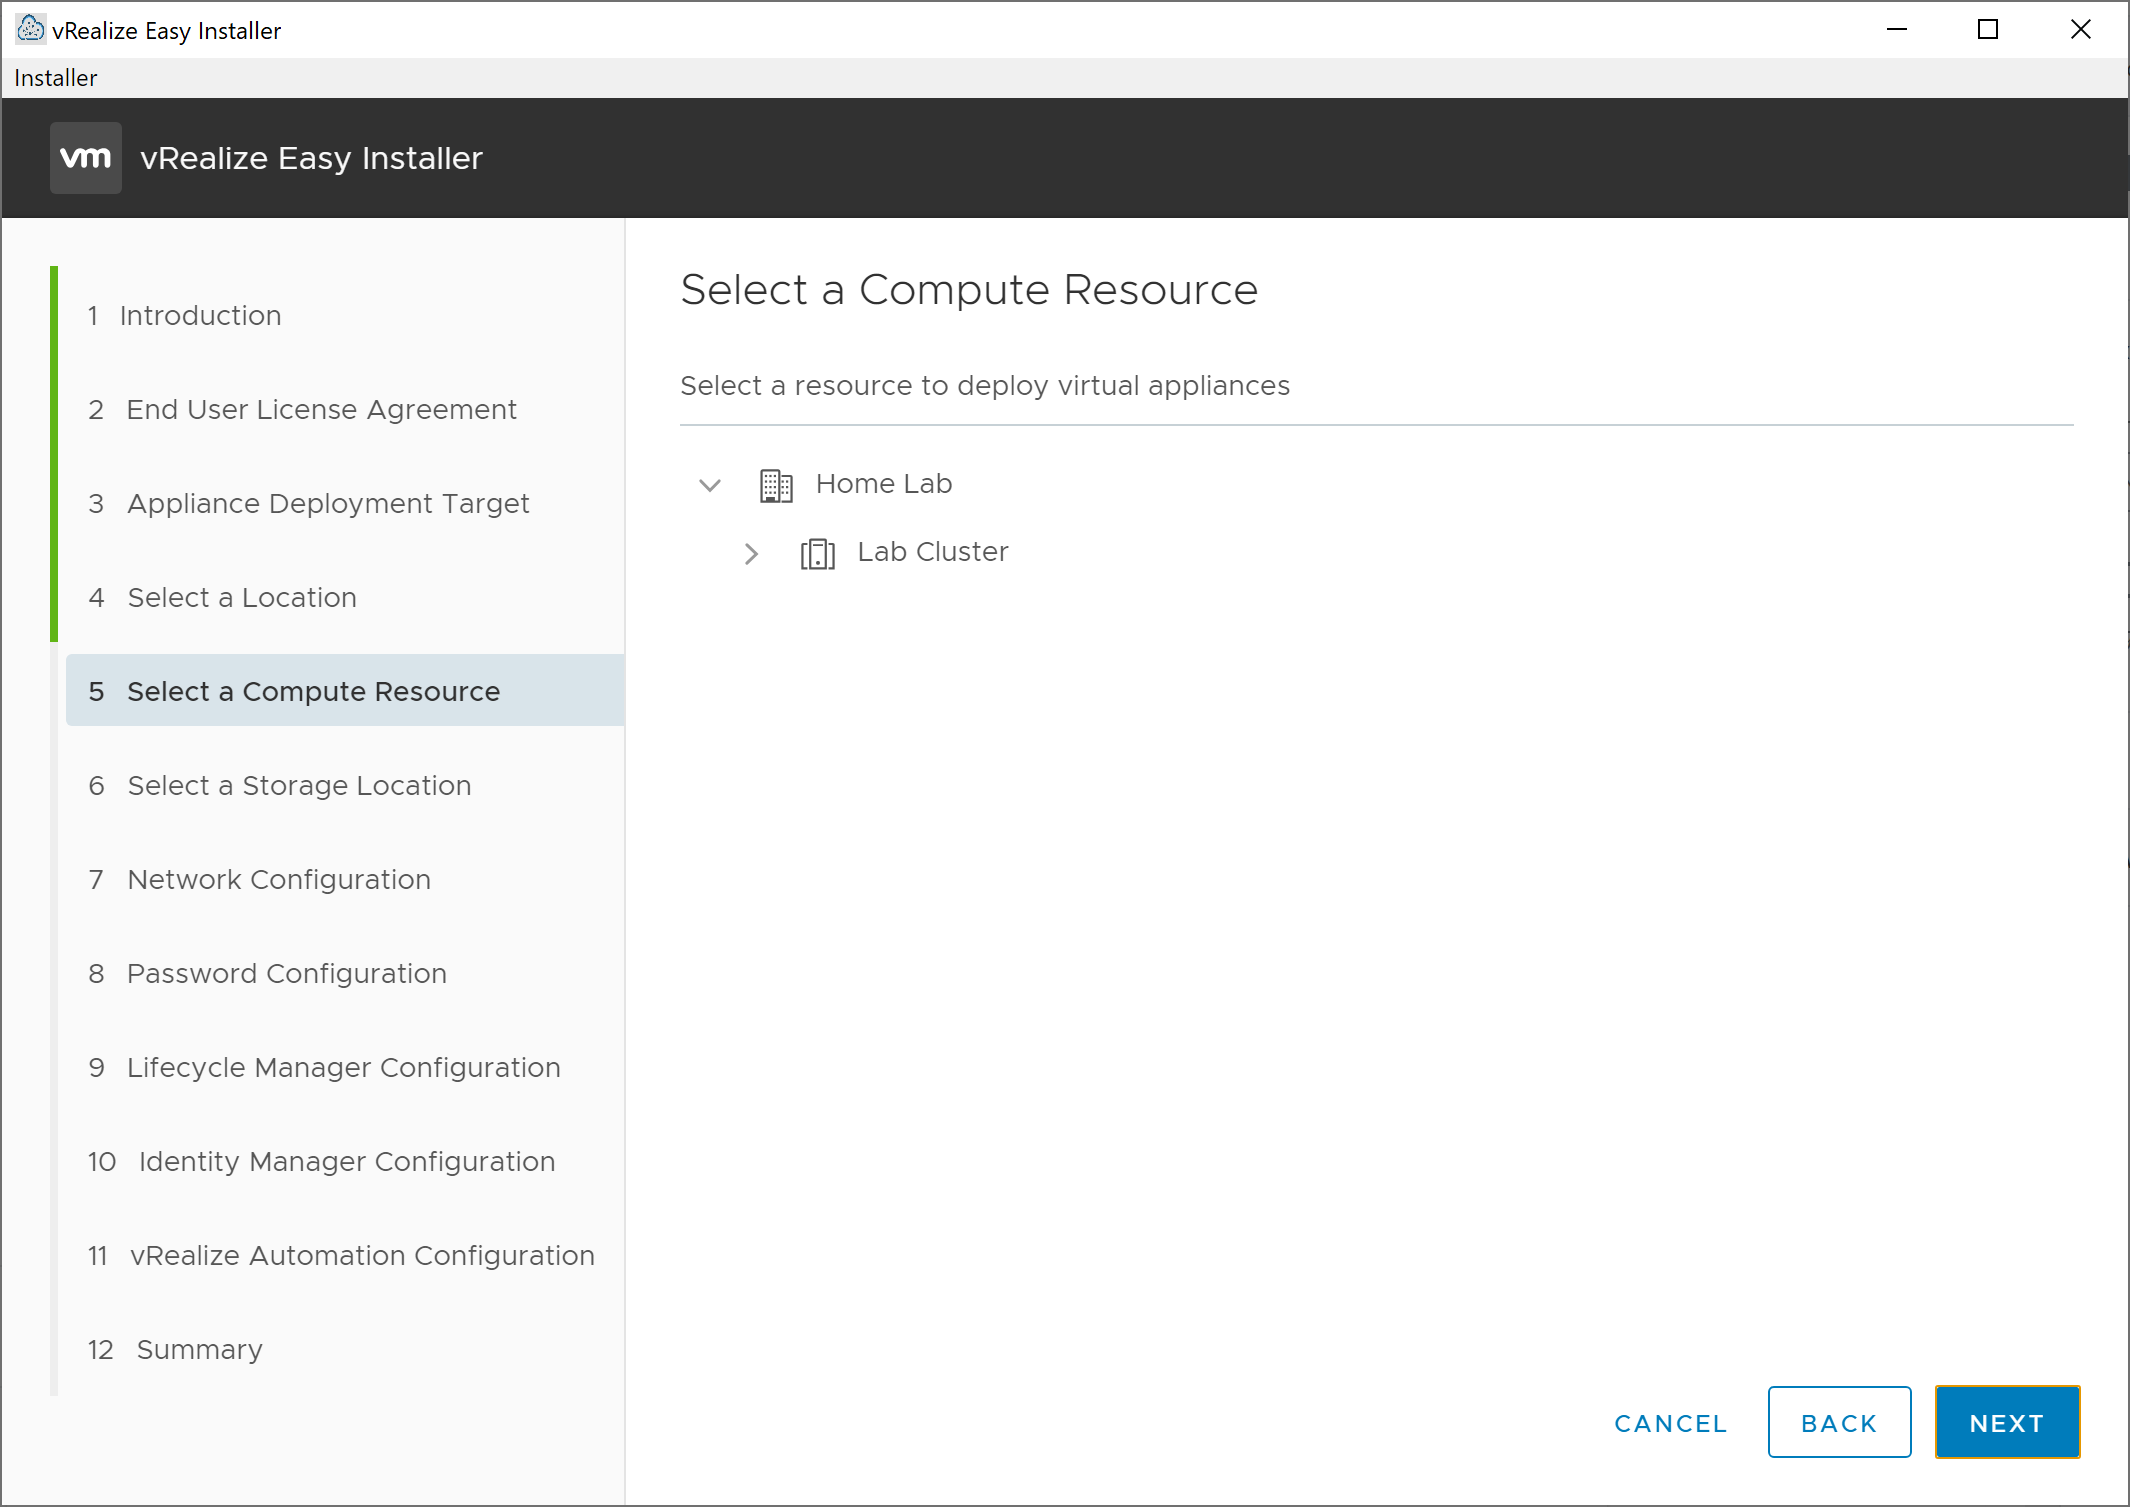
The next screen presented is the Select a Compute Resources screen. From here, select the cluster or host where we would like to deploy the new virtual appliance. Once you have selected the desired resource, click Next to move on to the Select a Storage Location screen.
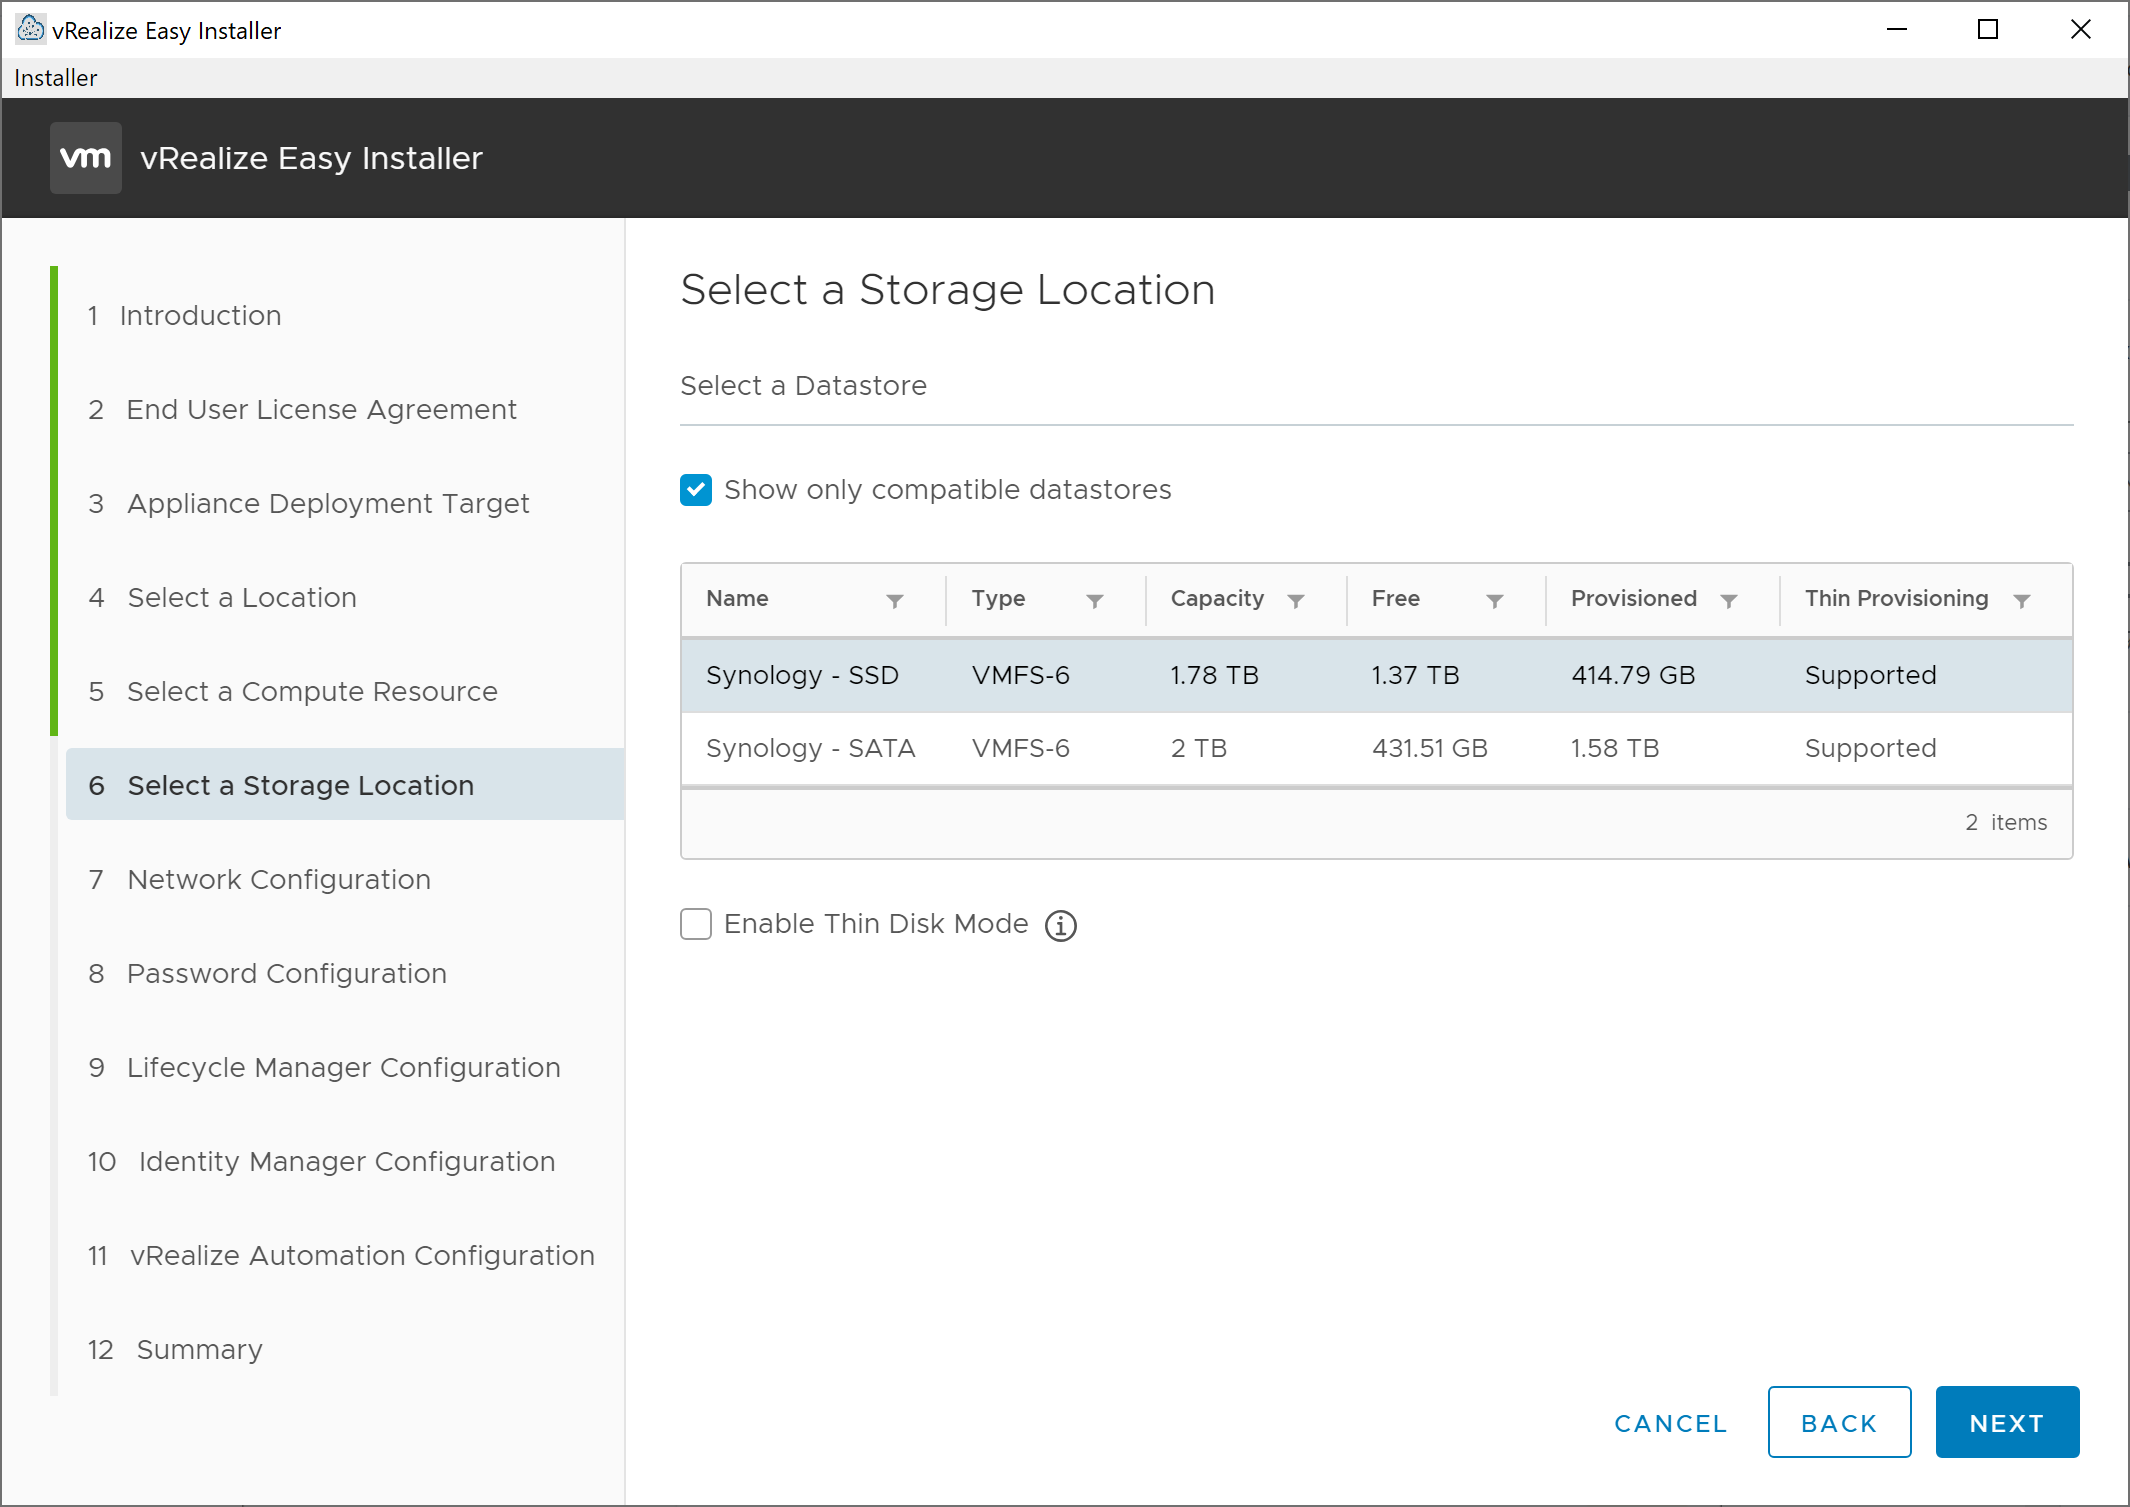
On the Select a Storage Location screen, select the storage location for the new virtual appliance. If desired, select the Enable Thin Disk Mode to deploy the virtual appliance storage using thin provisioning. Click Next to continue.
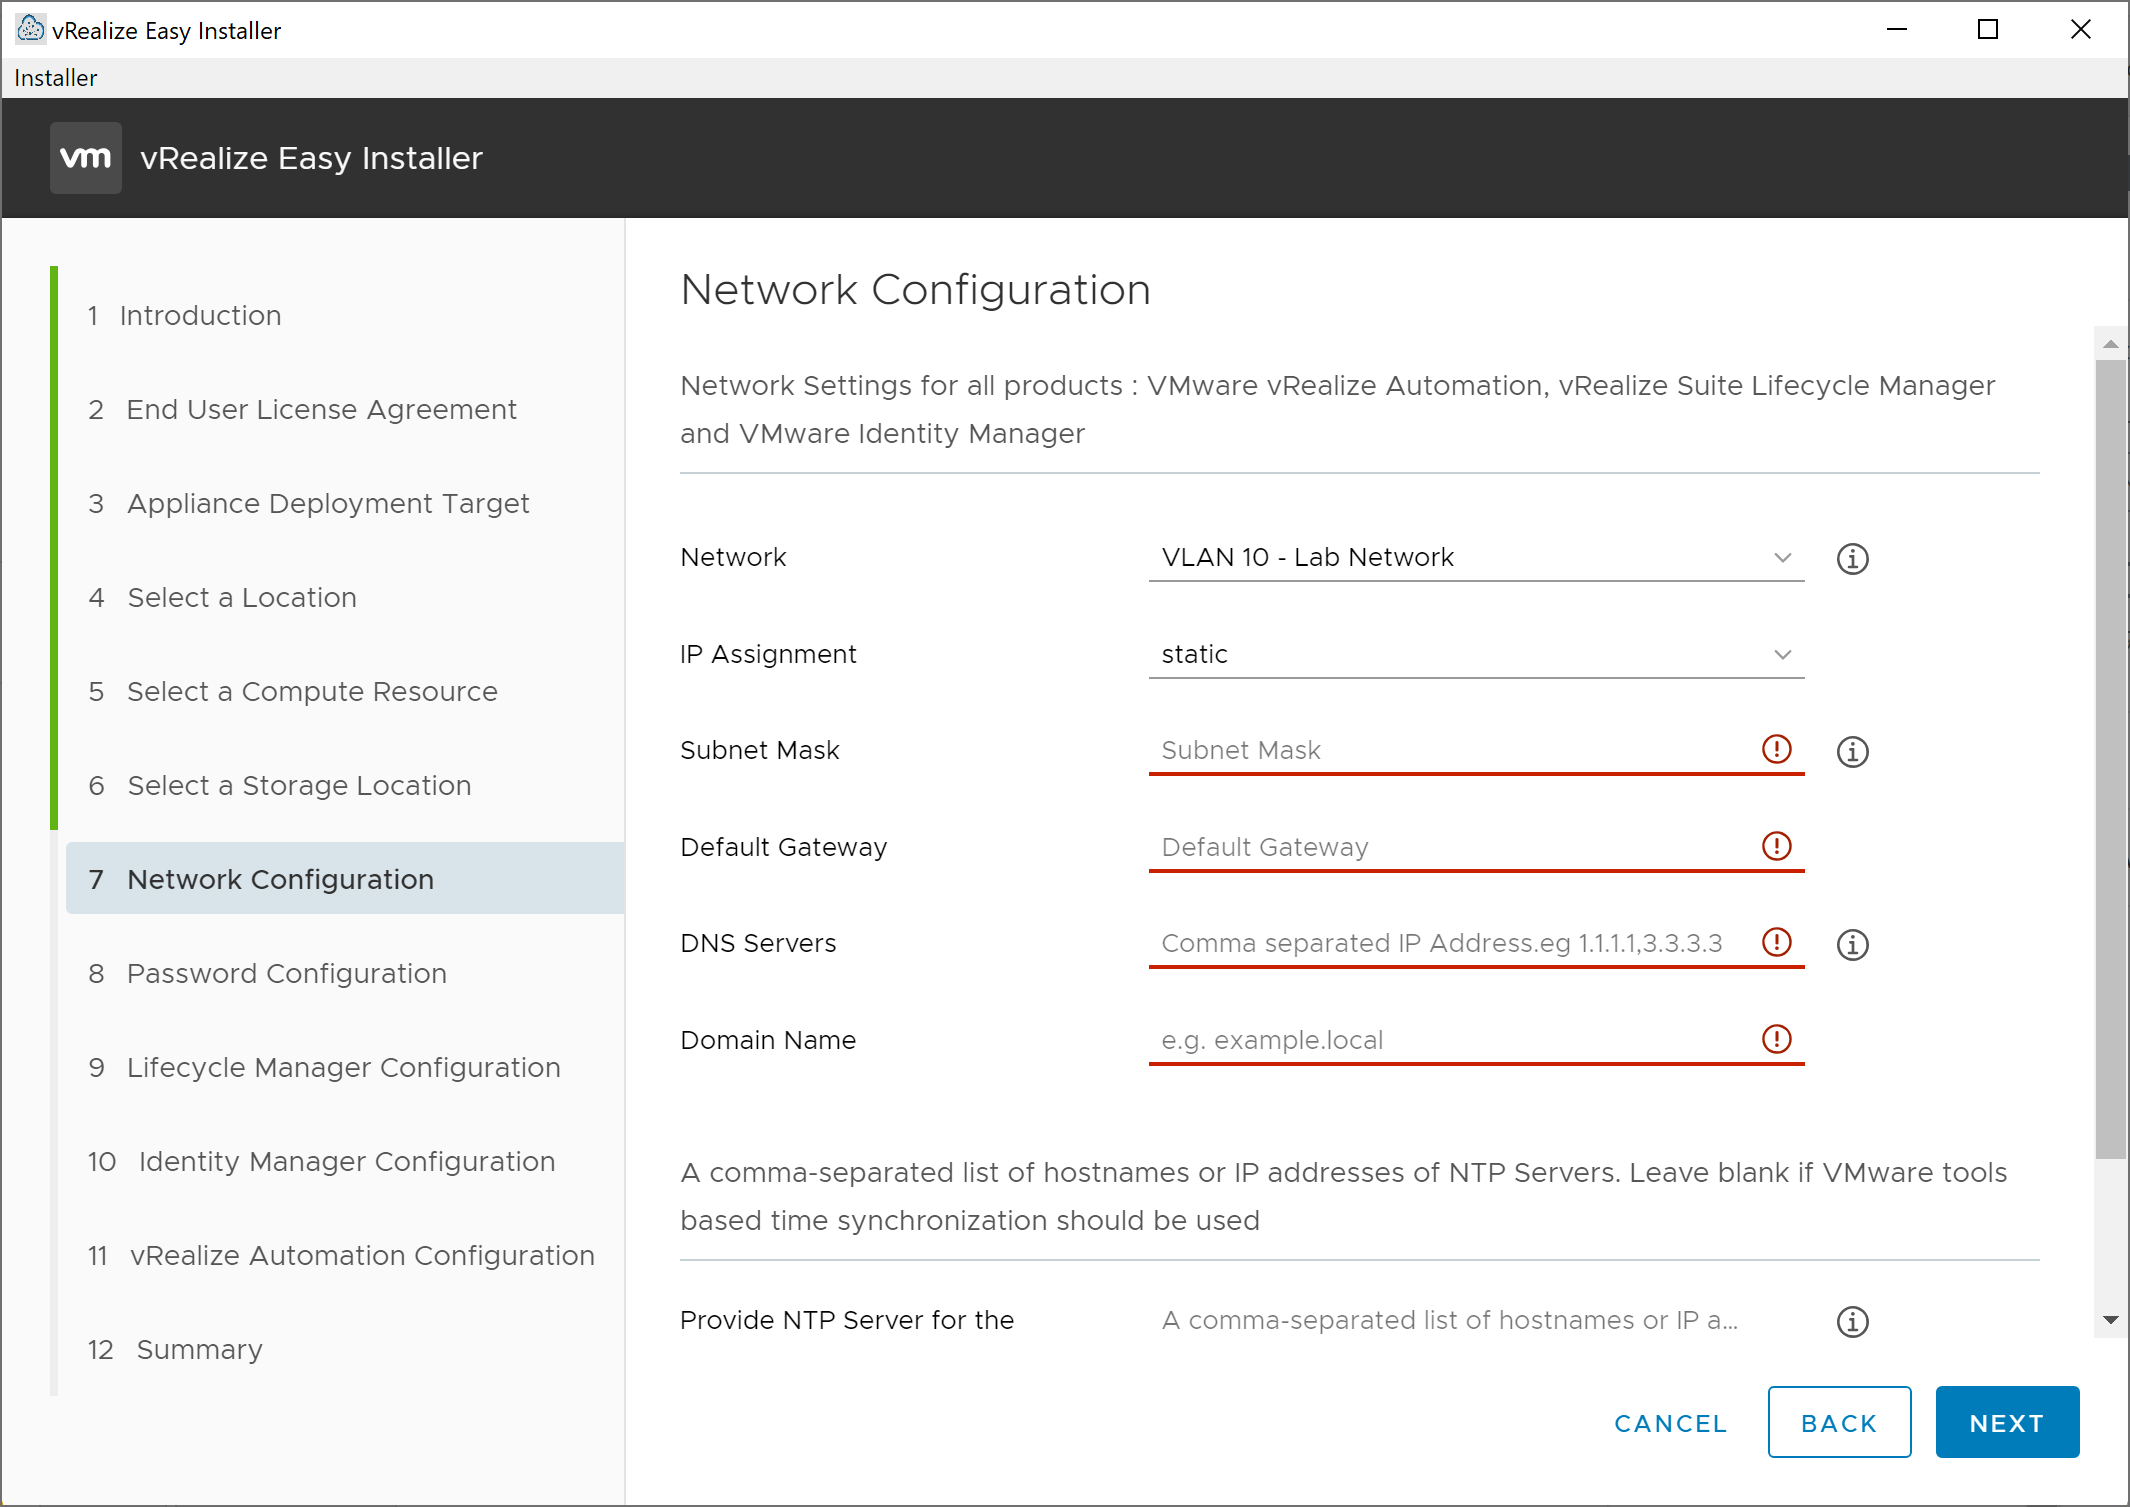
On the resulting Network Configuration screen, select the network, IP address assignment mode (static appears to be the only option at this time), and enter the subnet mask, default gateway, DNS servers, and domain name for the new virtual appliance. Additionally, provide one or more NTP servers in a comma-separated list. At this point, we won’t be providing an IP address or hostname for the appliance as these network settings are used during the deployment of the virtual appliances for all three applications. Click Next to move on to the Password Configuration screen.
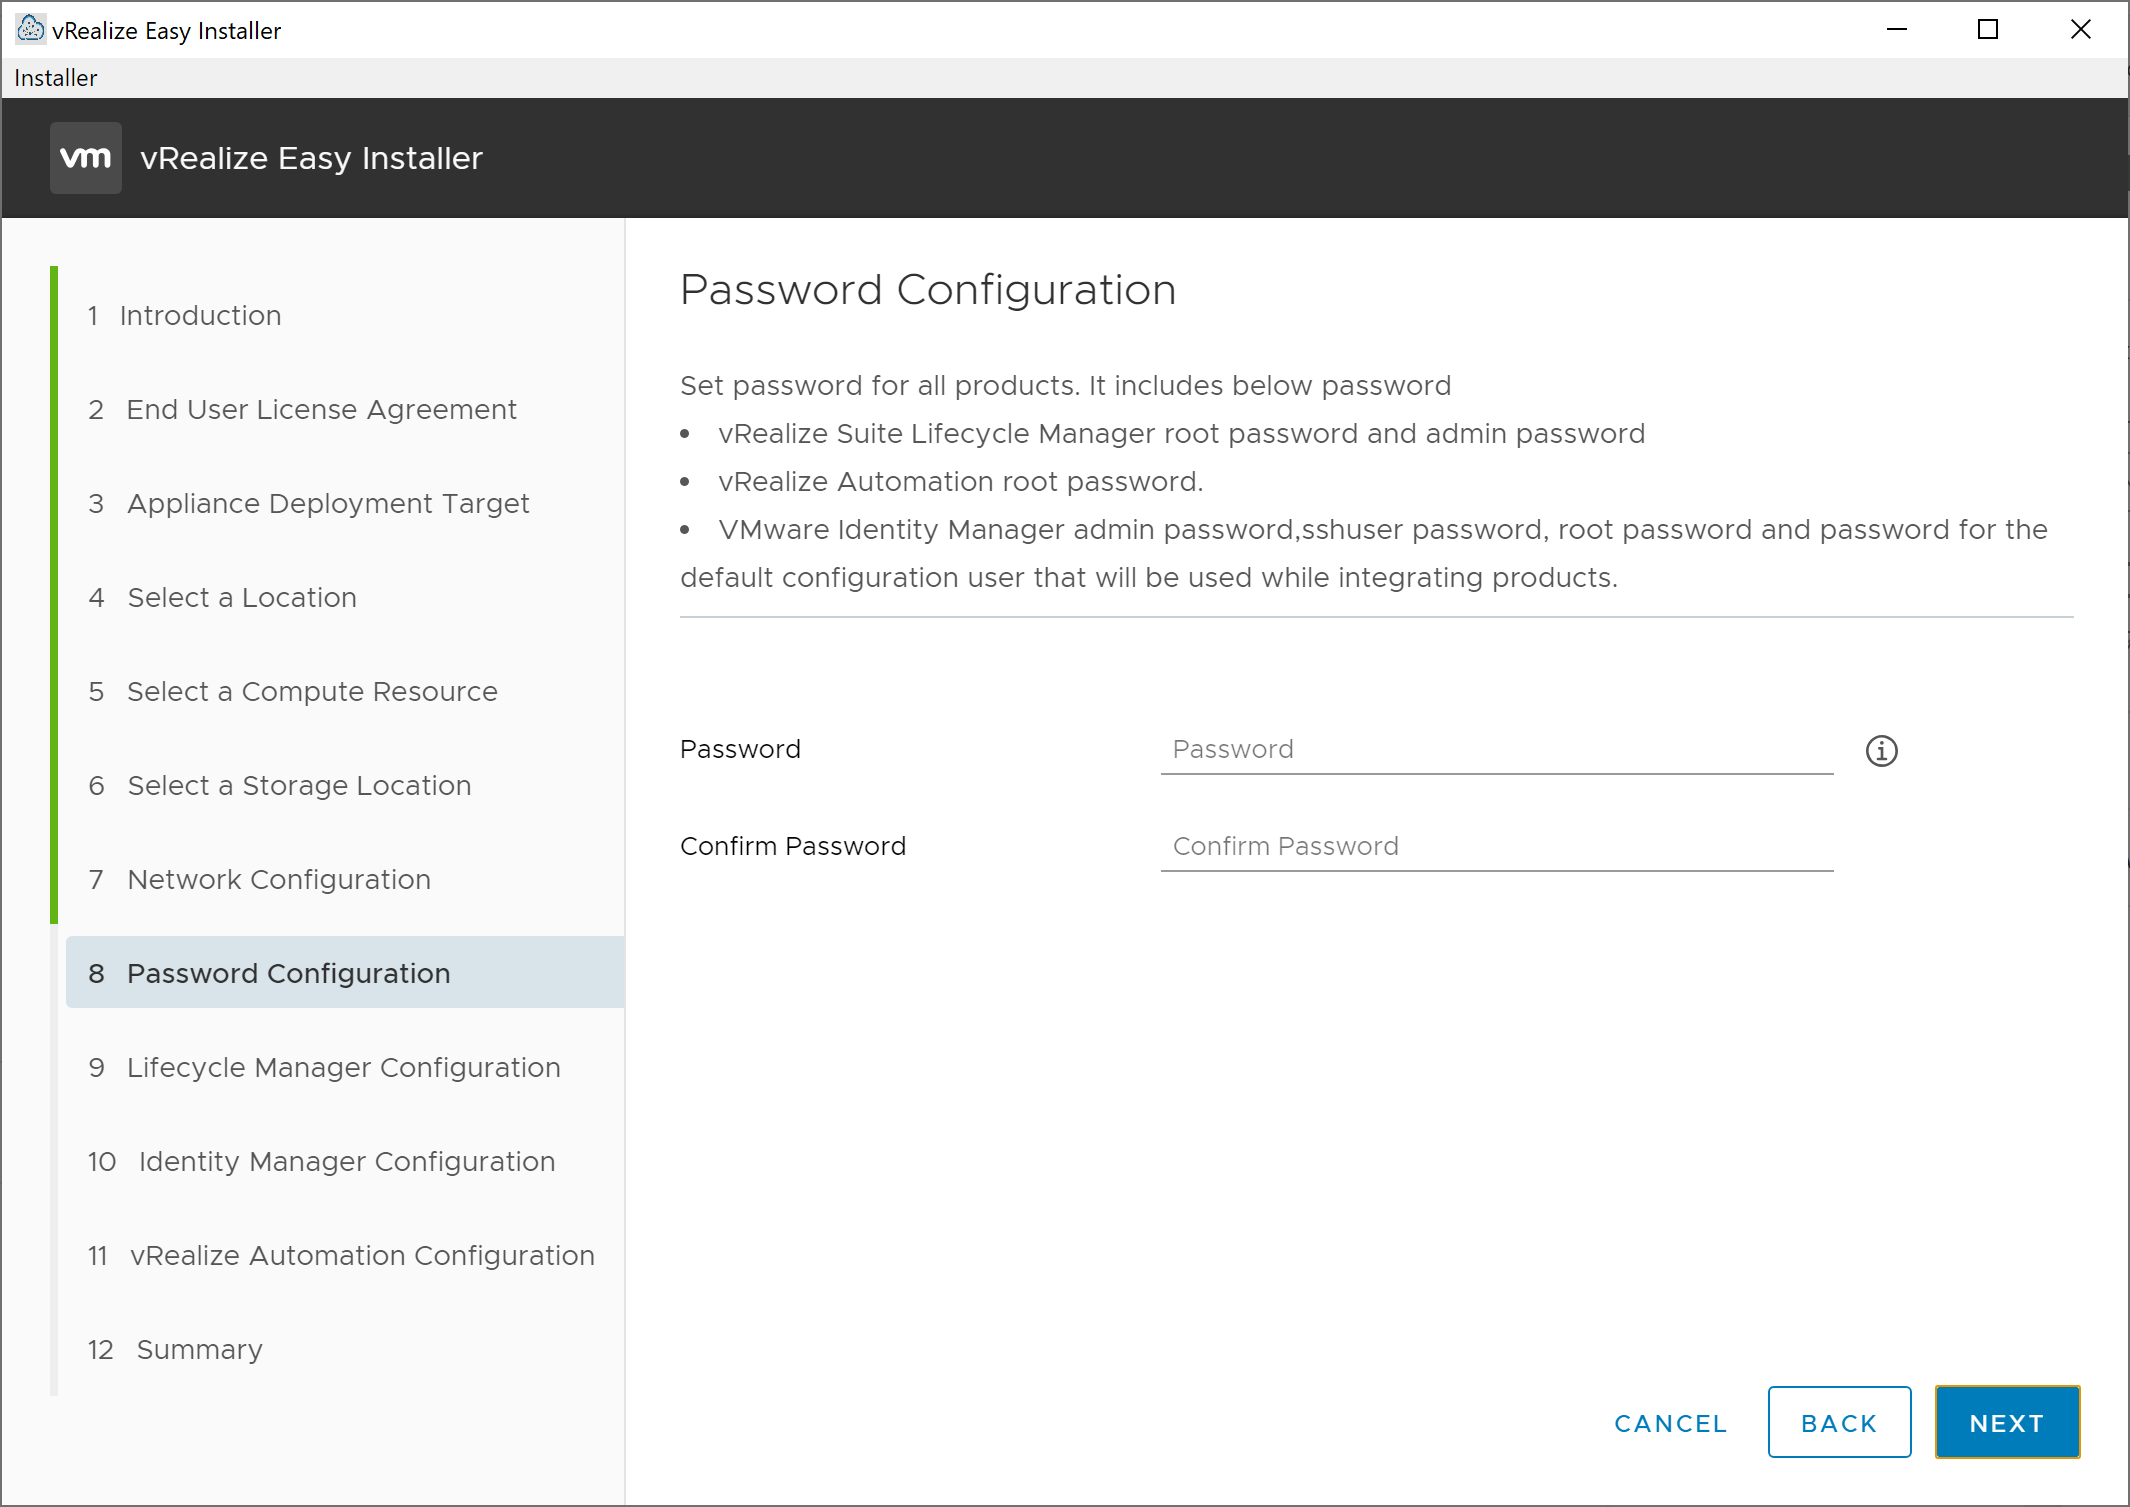
On the resulting Password Configuration screen, enter the password that will be utilized for the root and admin account on the vRealize Suite Lifecycle Manager and Identity Manager appliances, then click Next.
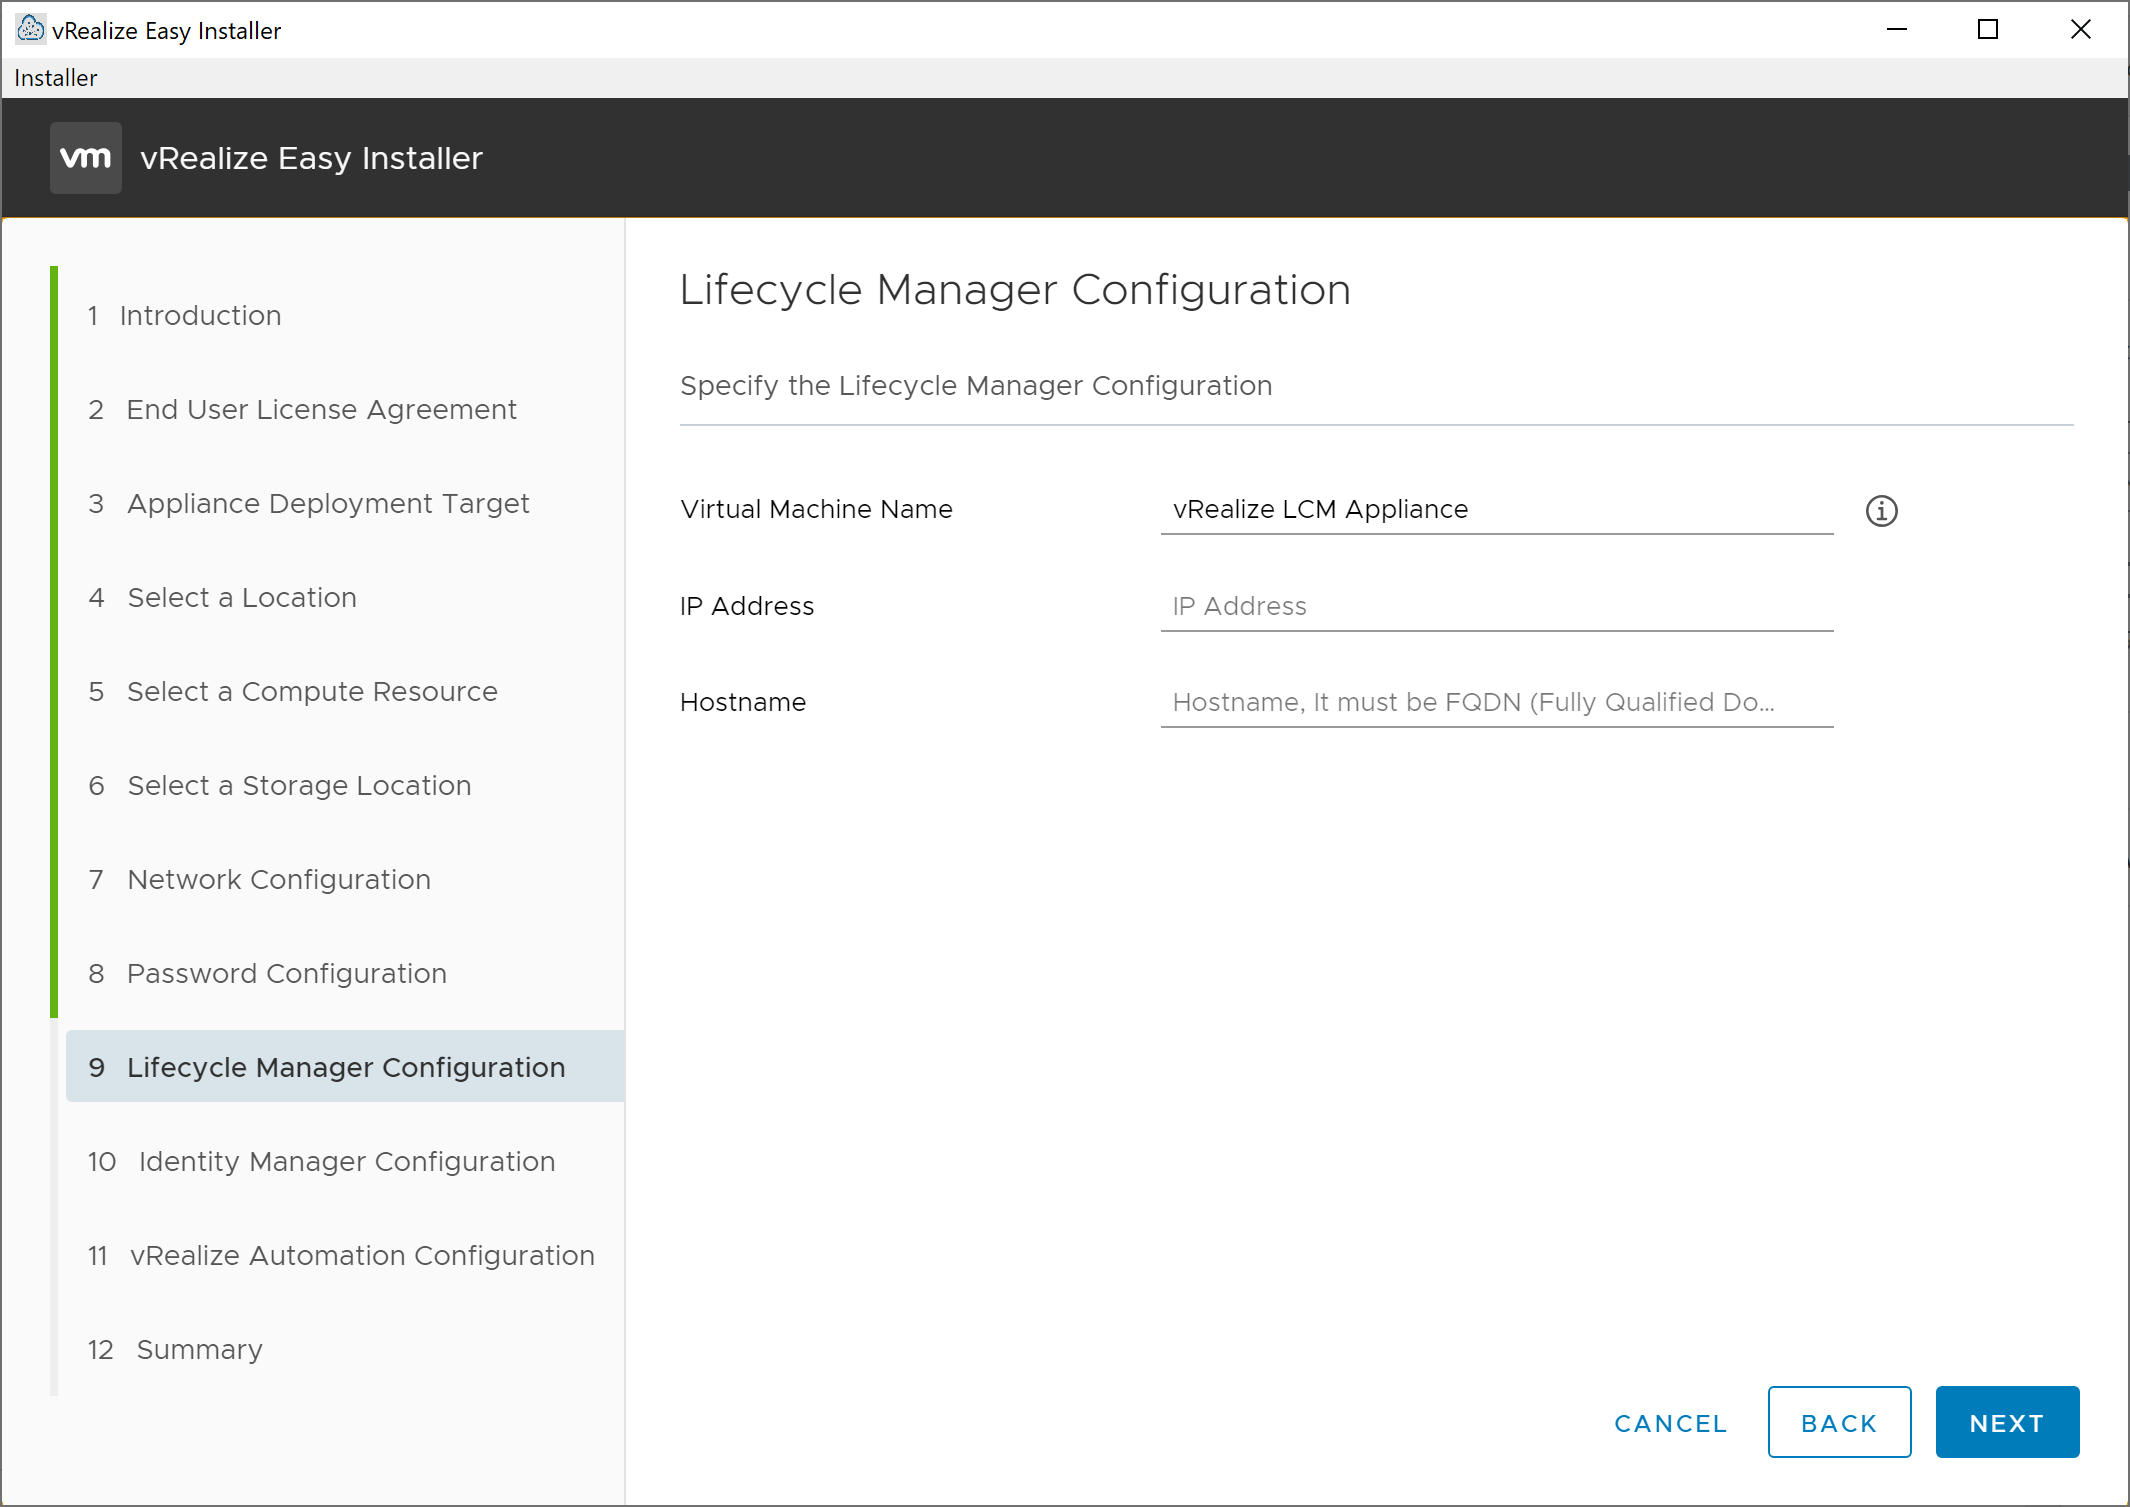
On the resulting Lifecycle Manager Configuration screen, enter the name for the new vRealize Suite Lifecycle Manager Appliance, as well as the desired hostname (enter the FQDN) and IP address. Click Next to continue to the Identity Manager Configuration screen.
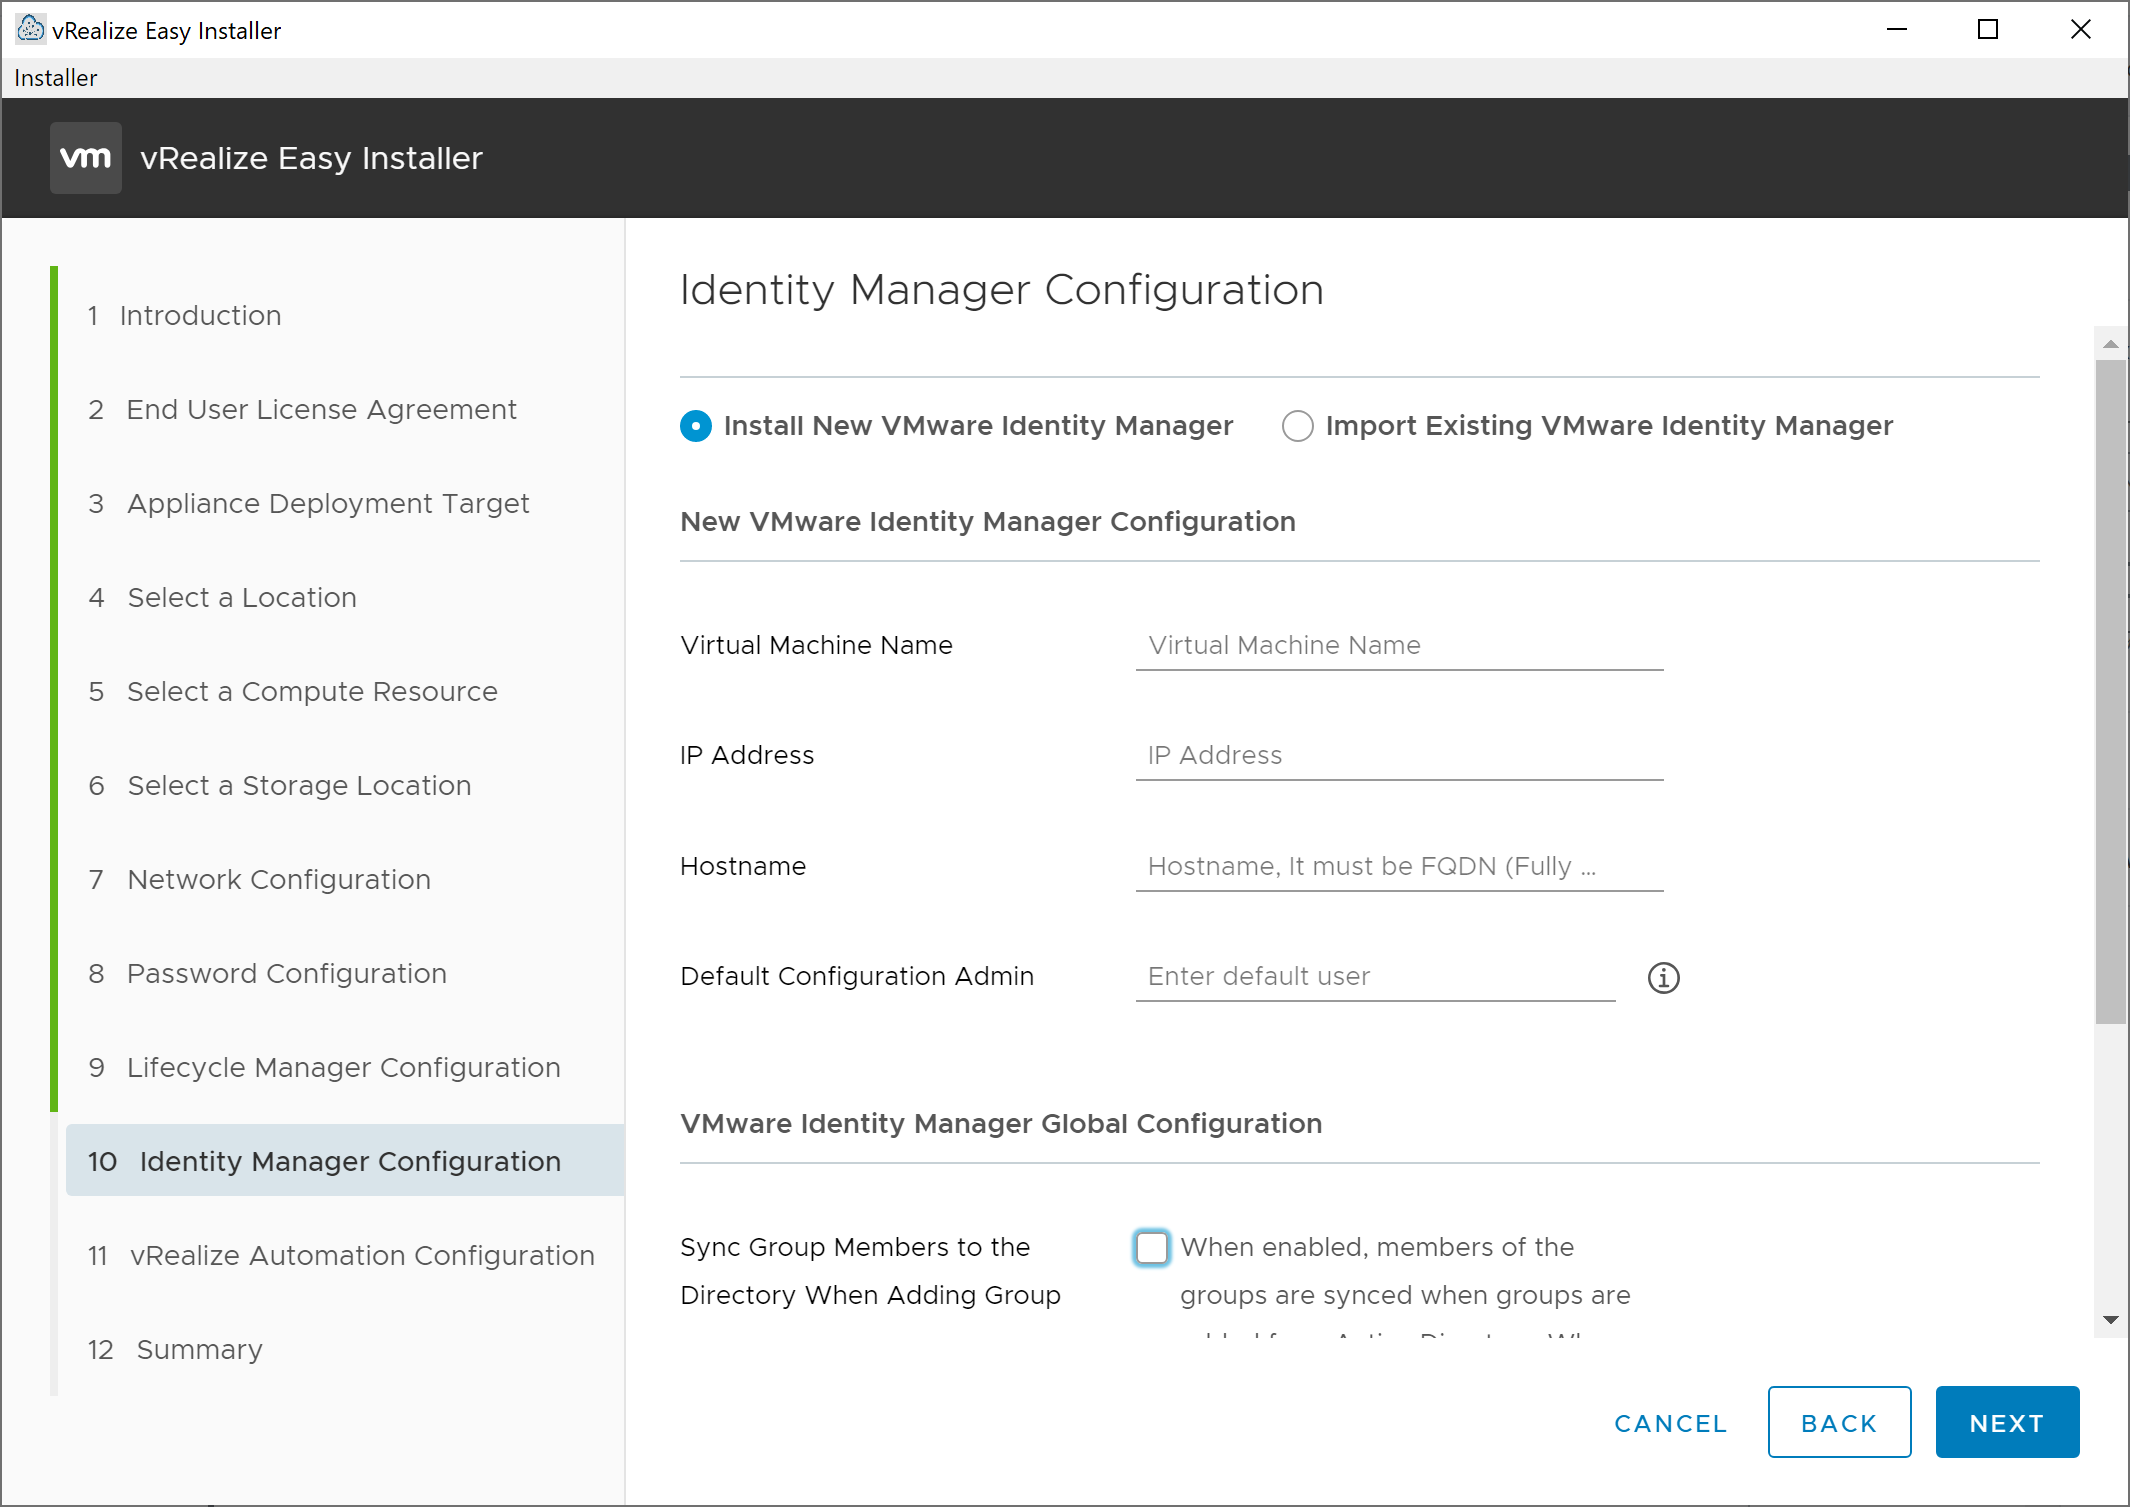
On the resulting Identity Manager Configuration screen, we are provided the option to deploy a new instance of VMware Identity Manager or to import an existing instance. If you will deploy a new instance, provide virtual machine name, IP address, hostname (provide FQDN), a default username that vRealize Suite Lifecycle Manager will utilize as a configuration user (this is the user account you will use to access vRealize Automation the first time), as well select whether or not VMware Identity Manager should sync Active Directory security group members to VMware Identity Manager or only the group itself.
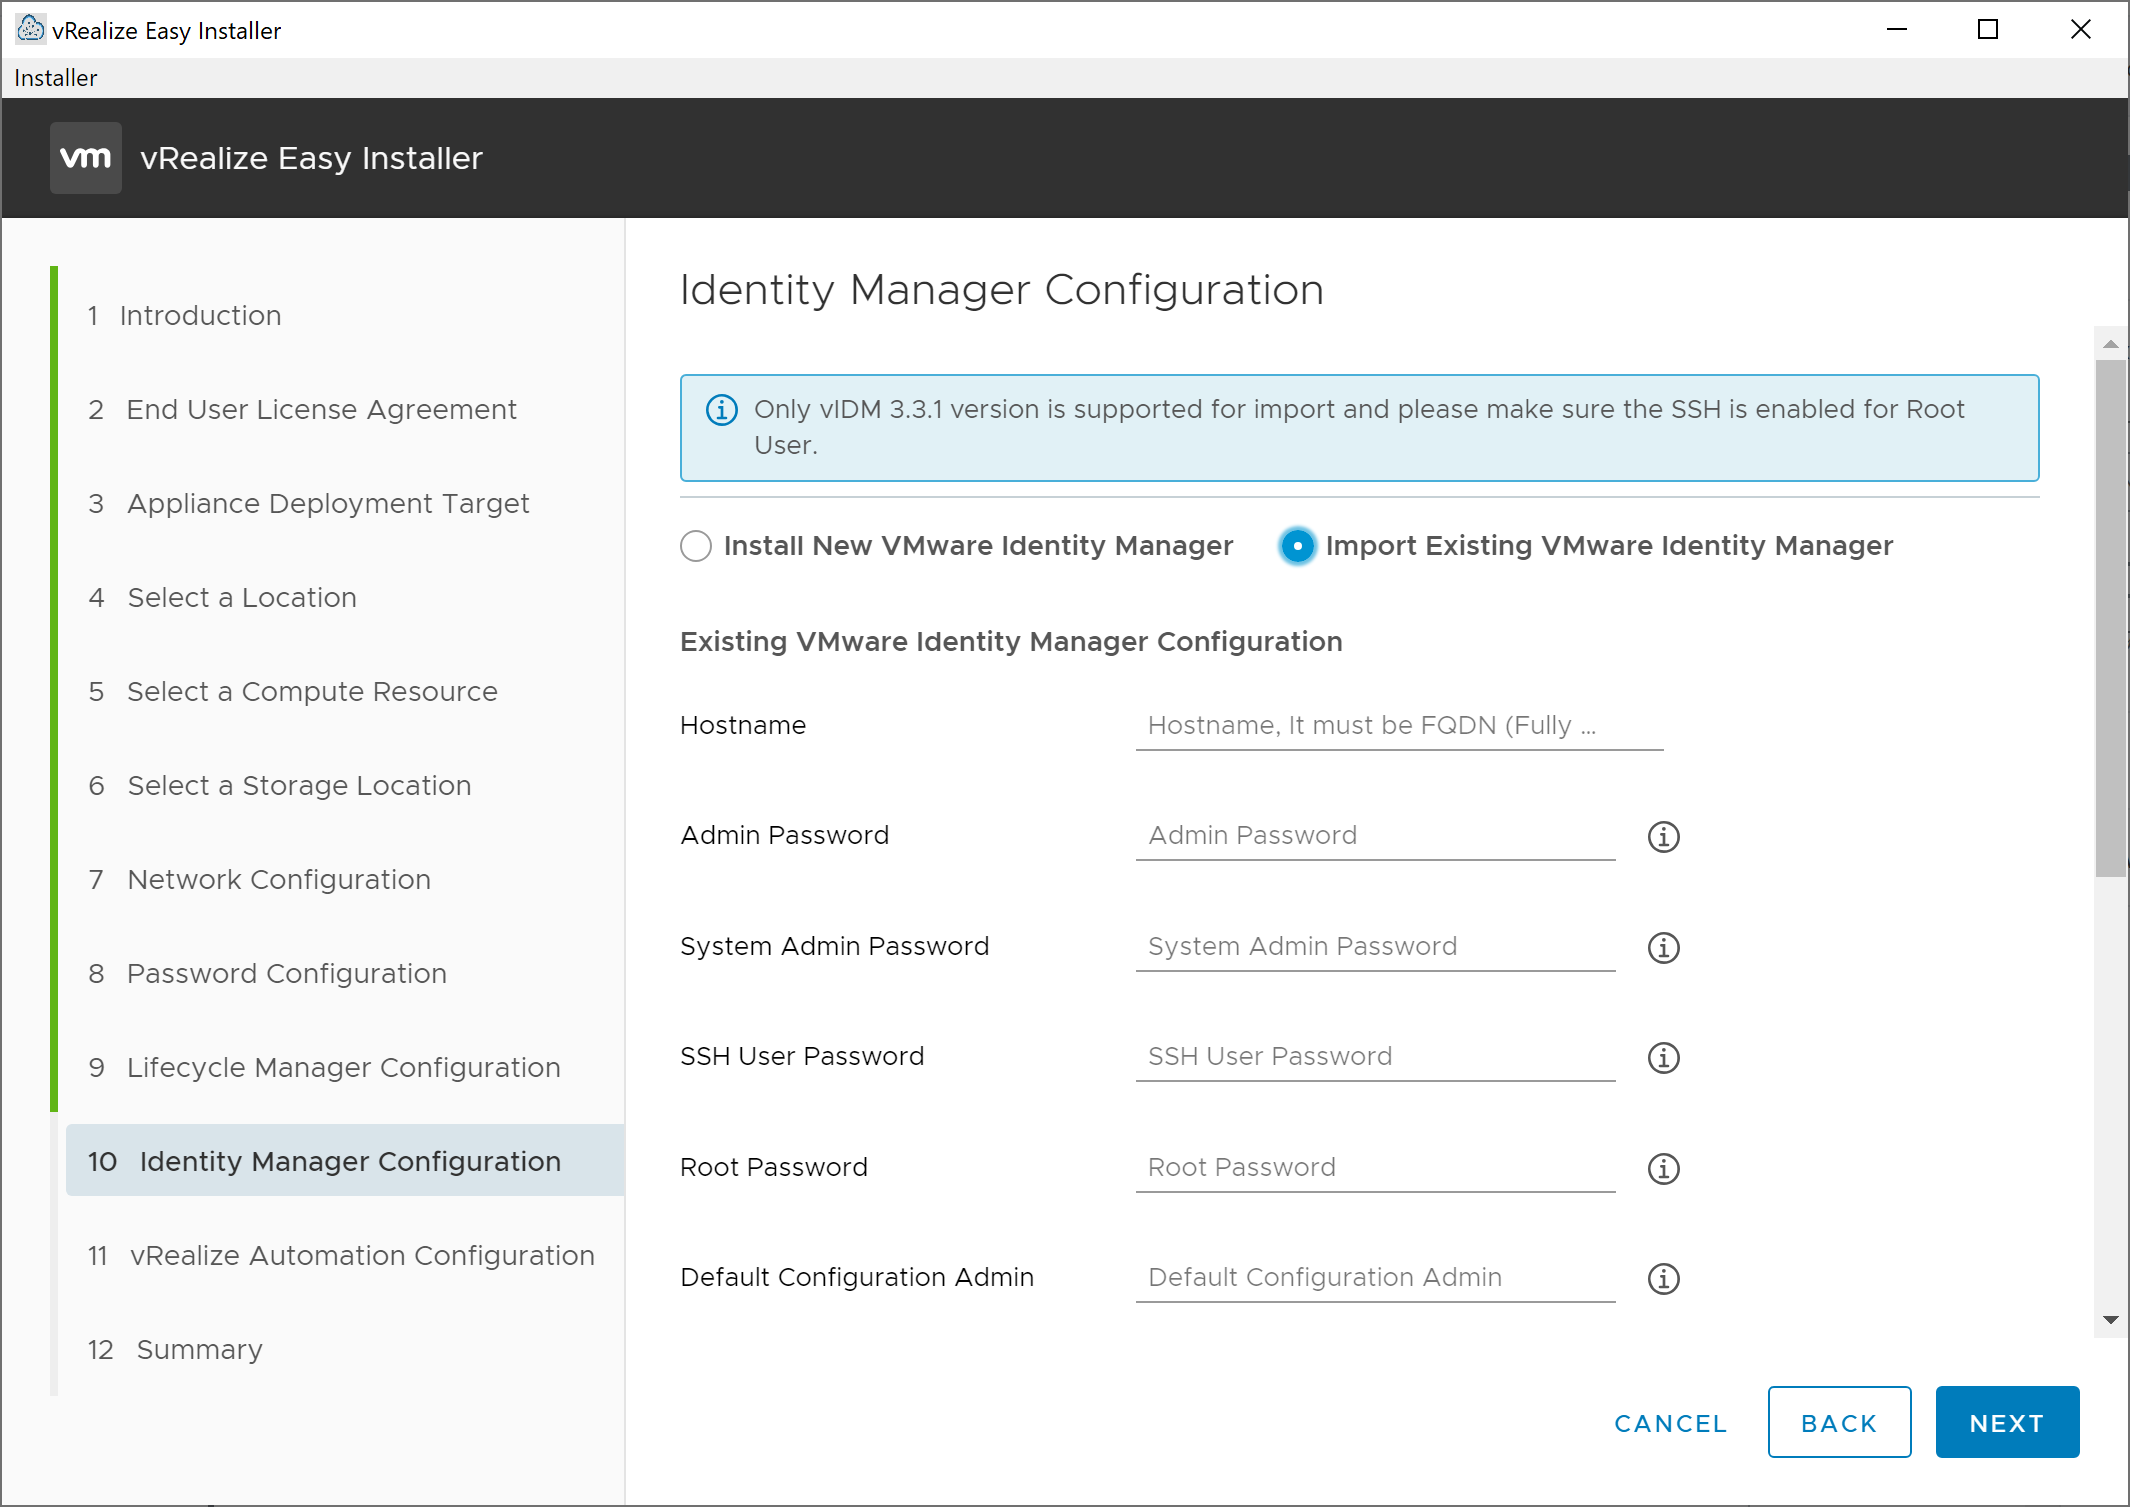
In my case, I do have an instance of VMware Identity Manager deployed and functional. However, I am running release (19.03), which is newer and not supported by vRealize Automation 8.0. Only VMware Identity Manager 3.3.1 is supported. If you do have a deployment of VMware Identity Manager 3.3.1, select the Import Existing VMware Identity Manager option. Provide the hostname, admin user password, system admin user password, SSH user password, root user password, default configuration admin username, default configuration admin user’s password, and whether or not VMware Identity Manager should sync Active Directory security group members to VMware Identity Manager or only the group itself. Click the Next button to continue to the vRealize Automation Configuration screen.
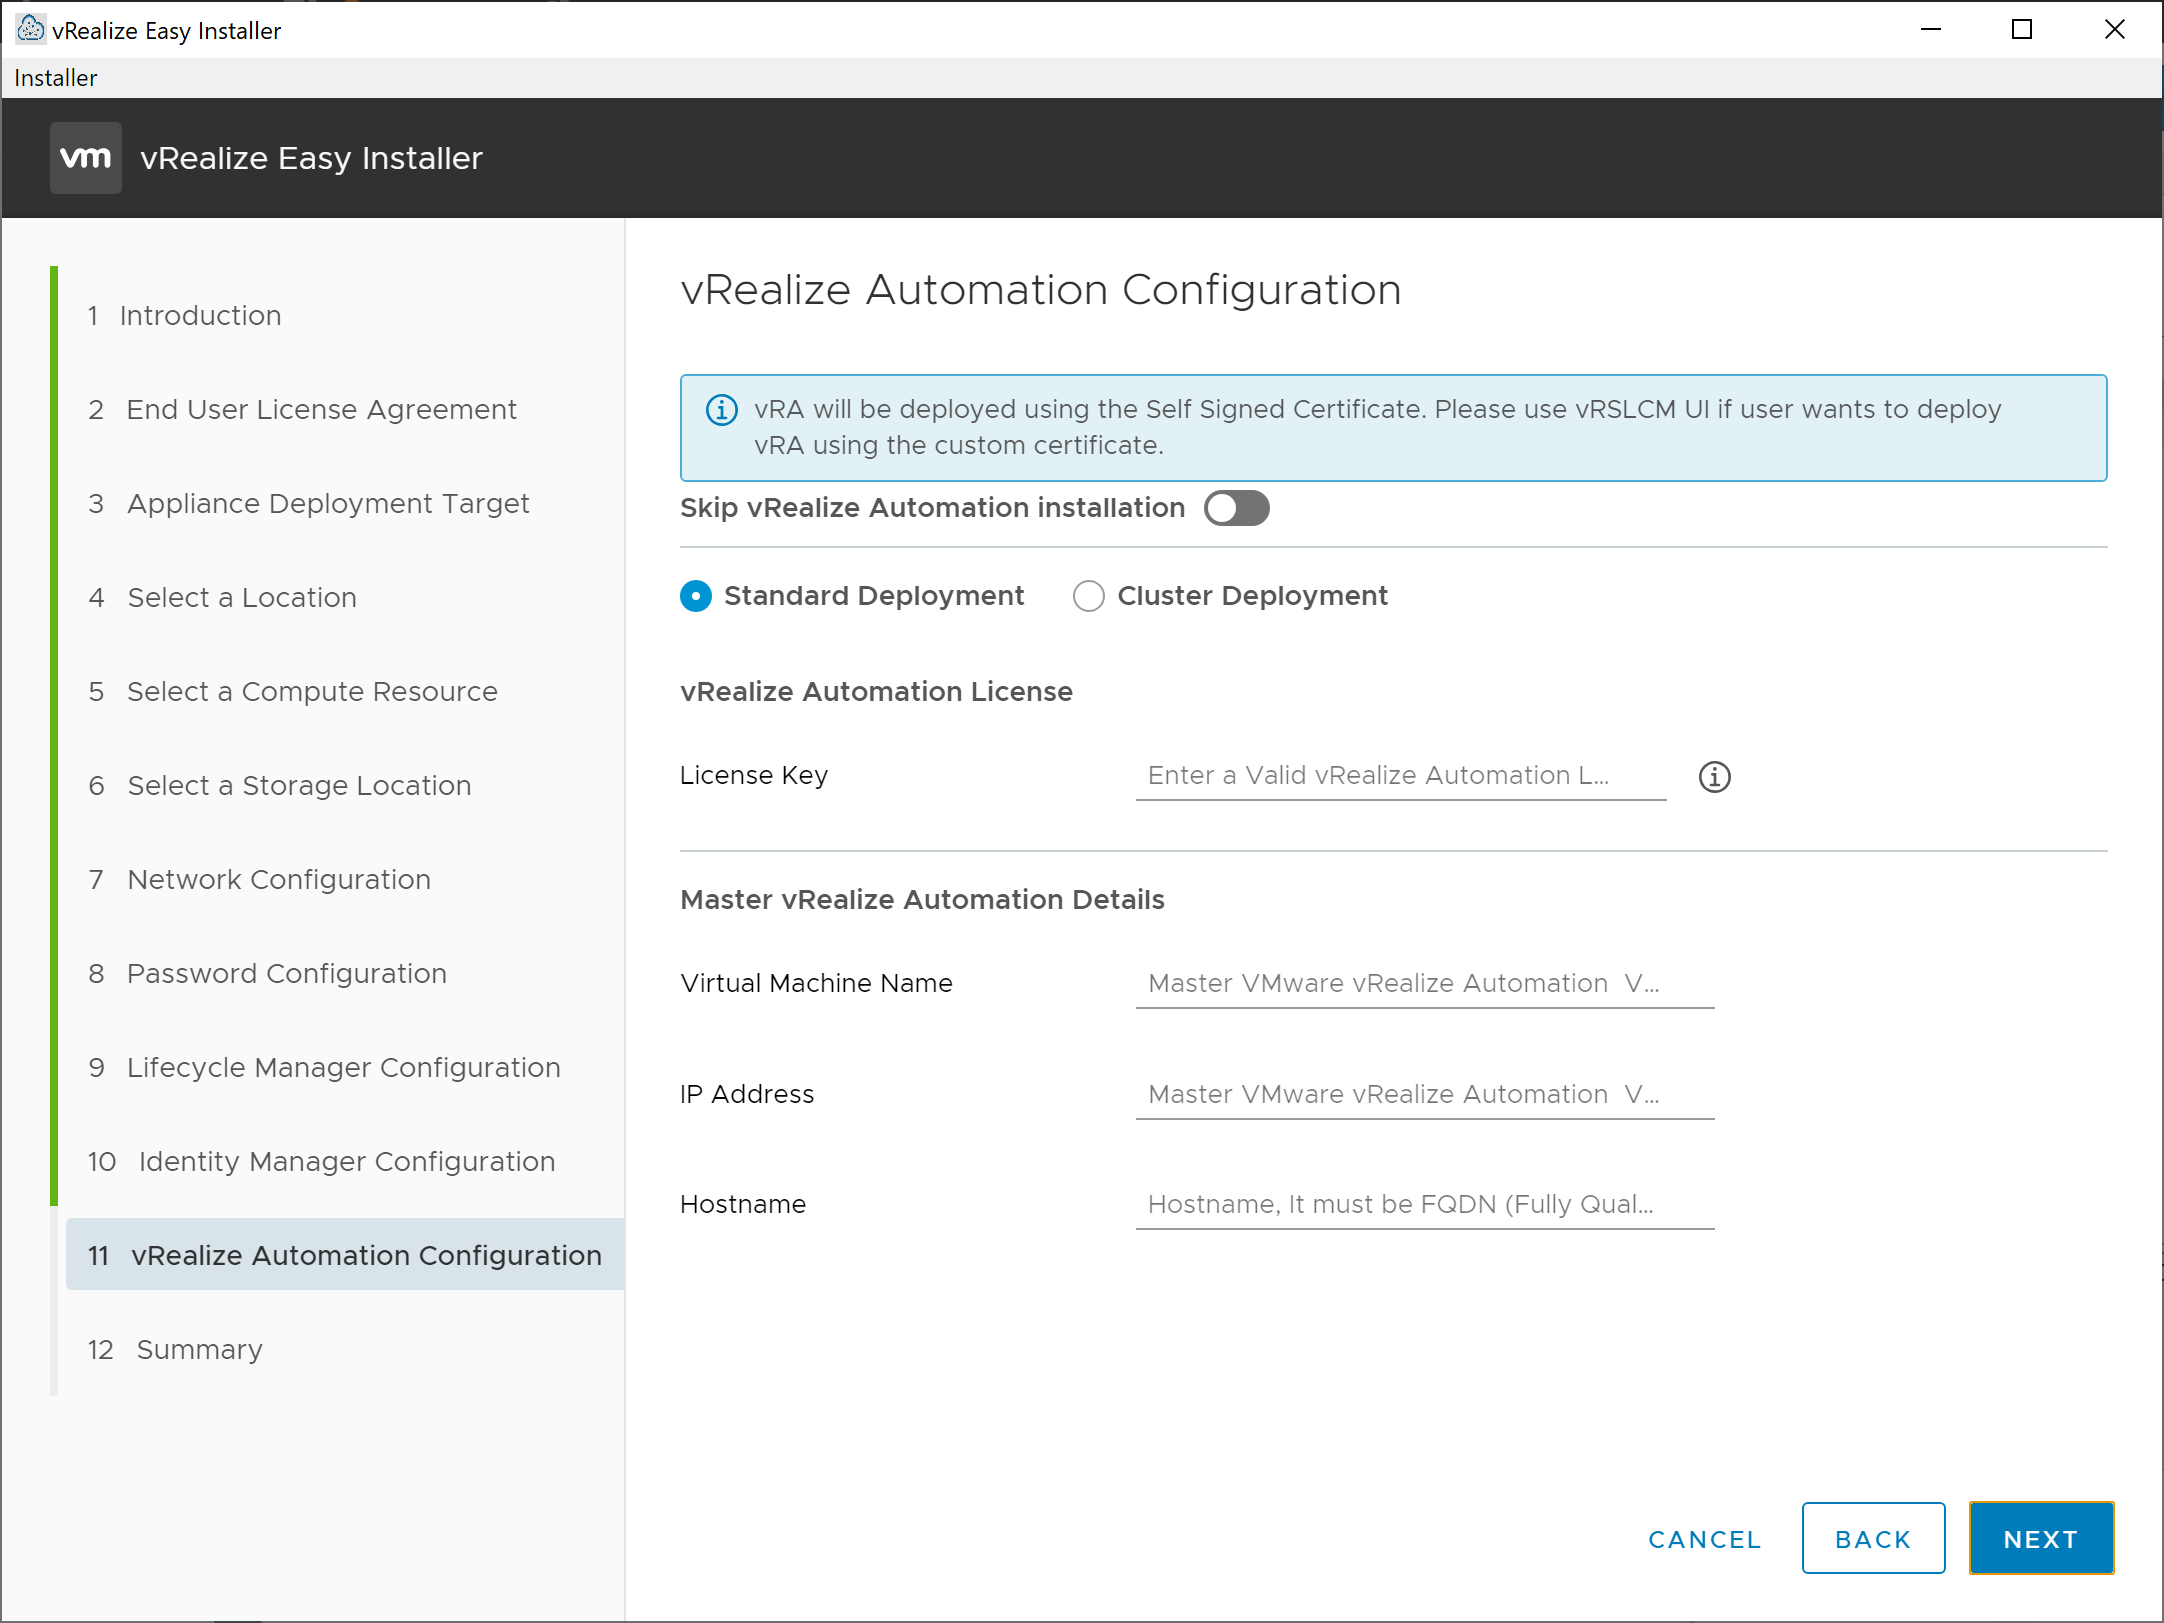
On the vRealize Automation Configuration screen, select whether you wish to deploy a Standard or Clustered deployment (we’ll select Standard for this walkthrough). Enter your vRealize Automation or vRealize Suite license key, a name for the vRealize Automation virtual machine, as well as the IP address and hostname for the VM. Click the Next button to move to the Summary screen.
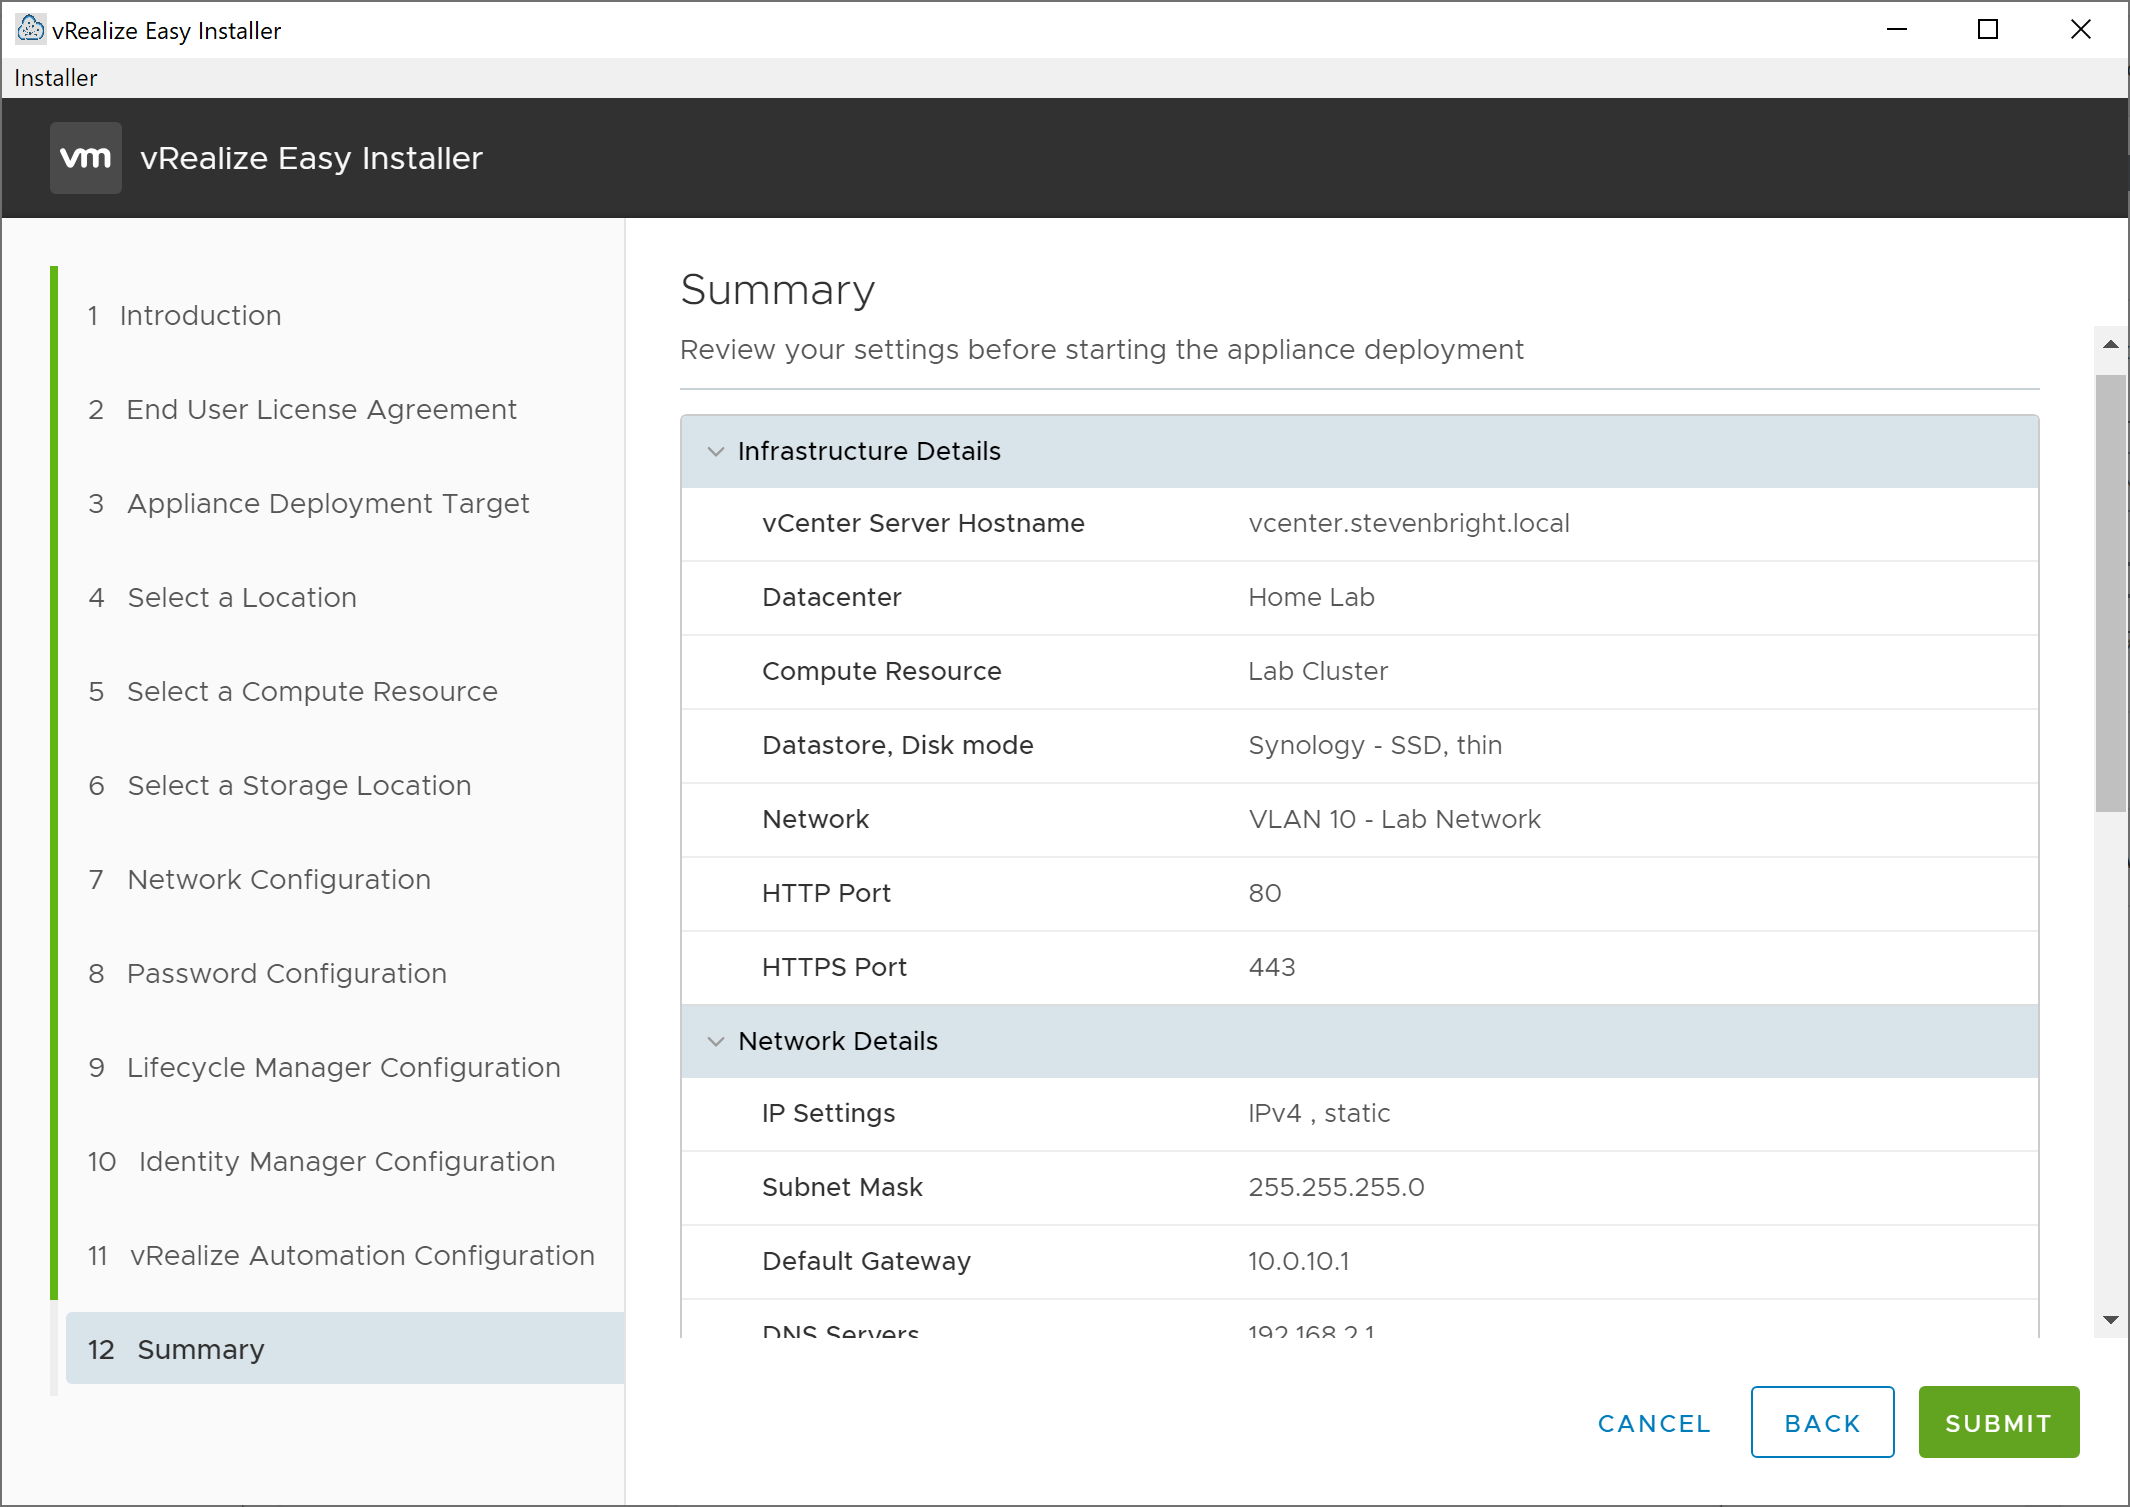
On the Summary screen, verify that all information is correct, then click Submit to initiate the deployment of vRealize Suite Lifecycle Manager, VMware Identity Manager (if you opted for a new deployment of vIDM) and vRealize Automation.
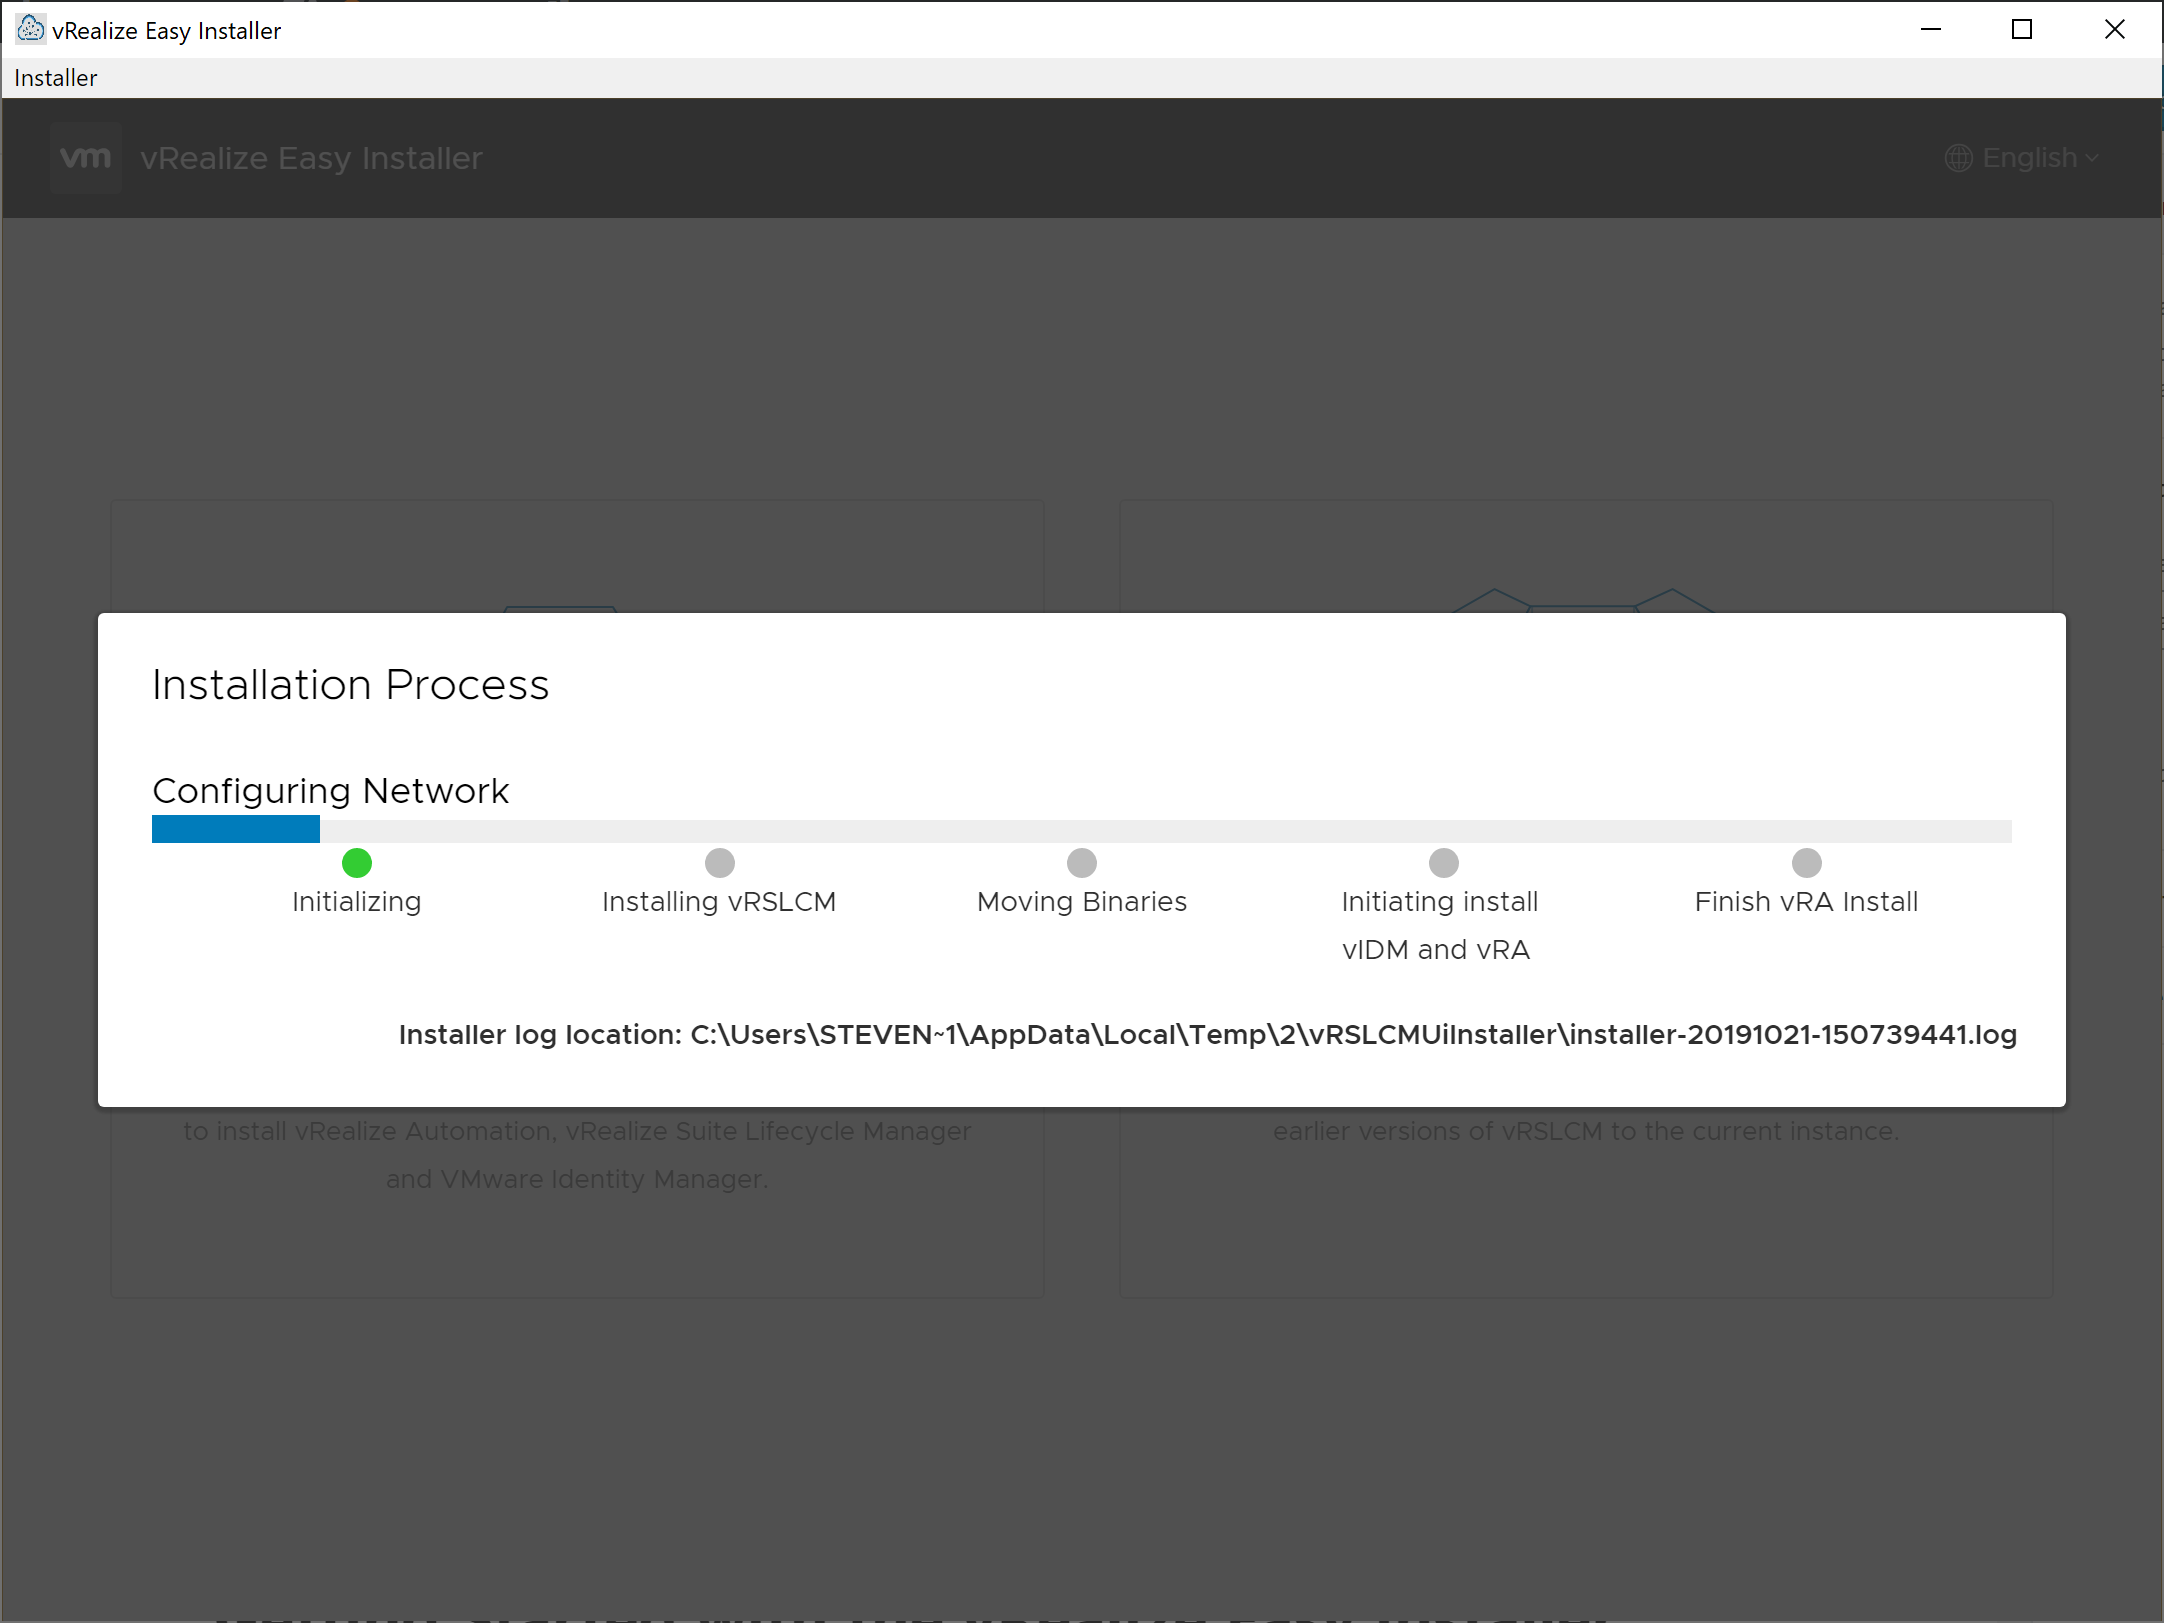
After initiating the installation process, you are provided a screen with the status of the installation process as well as the path to the log file. Each step of the process and the current status of each step are listed.
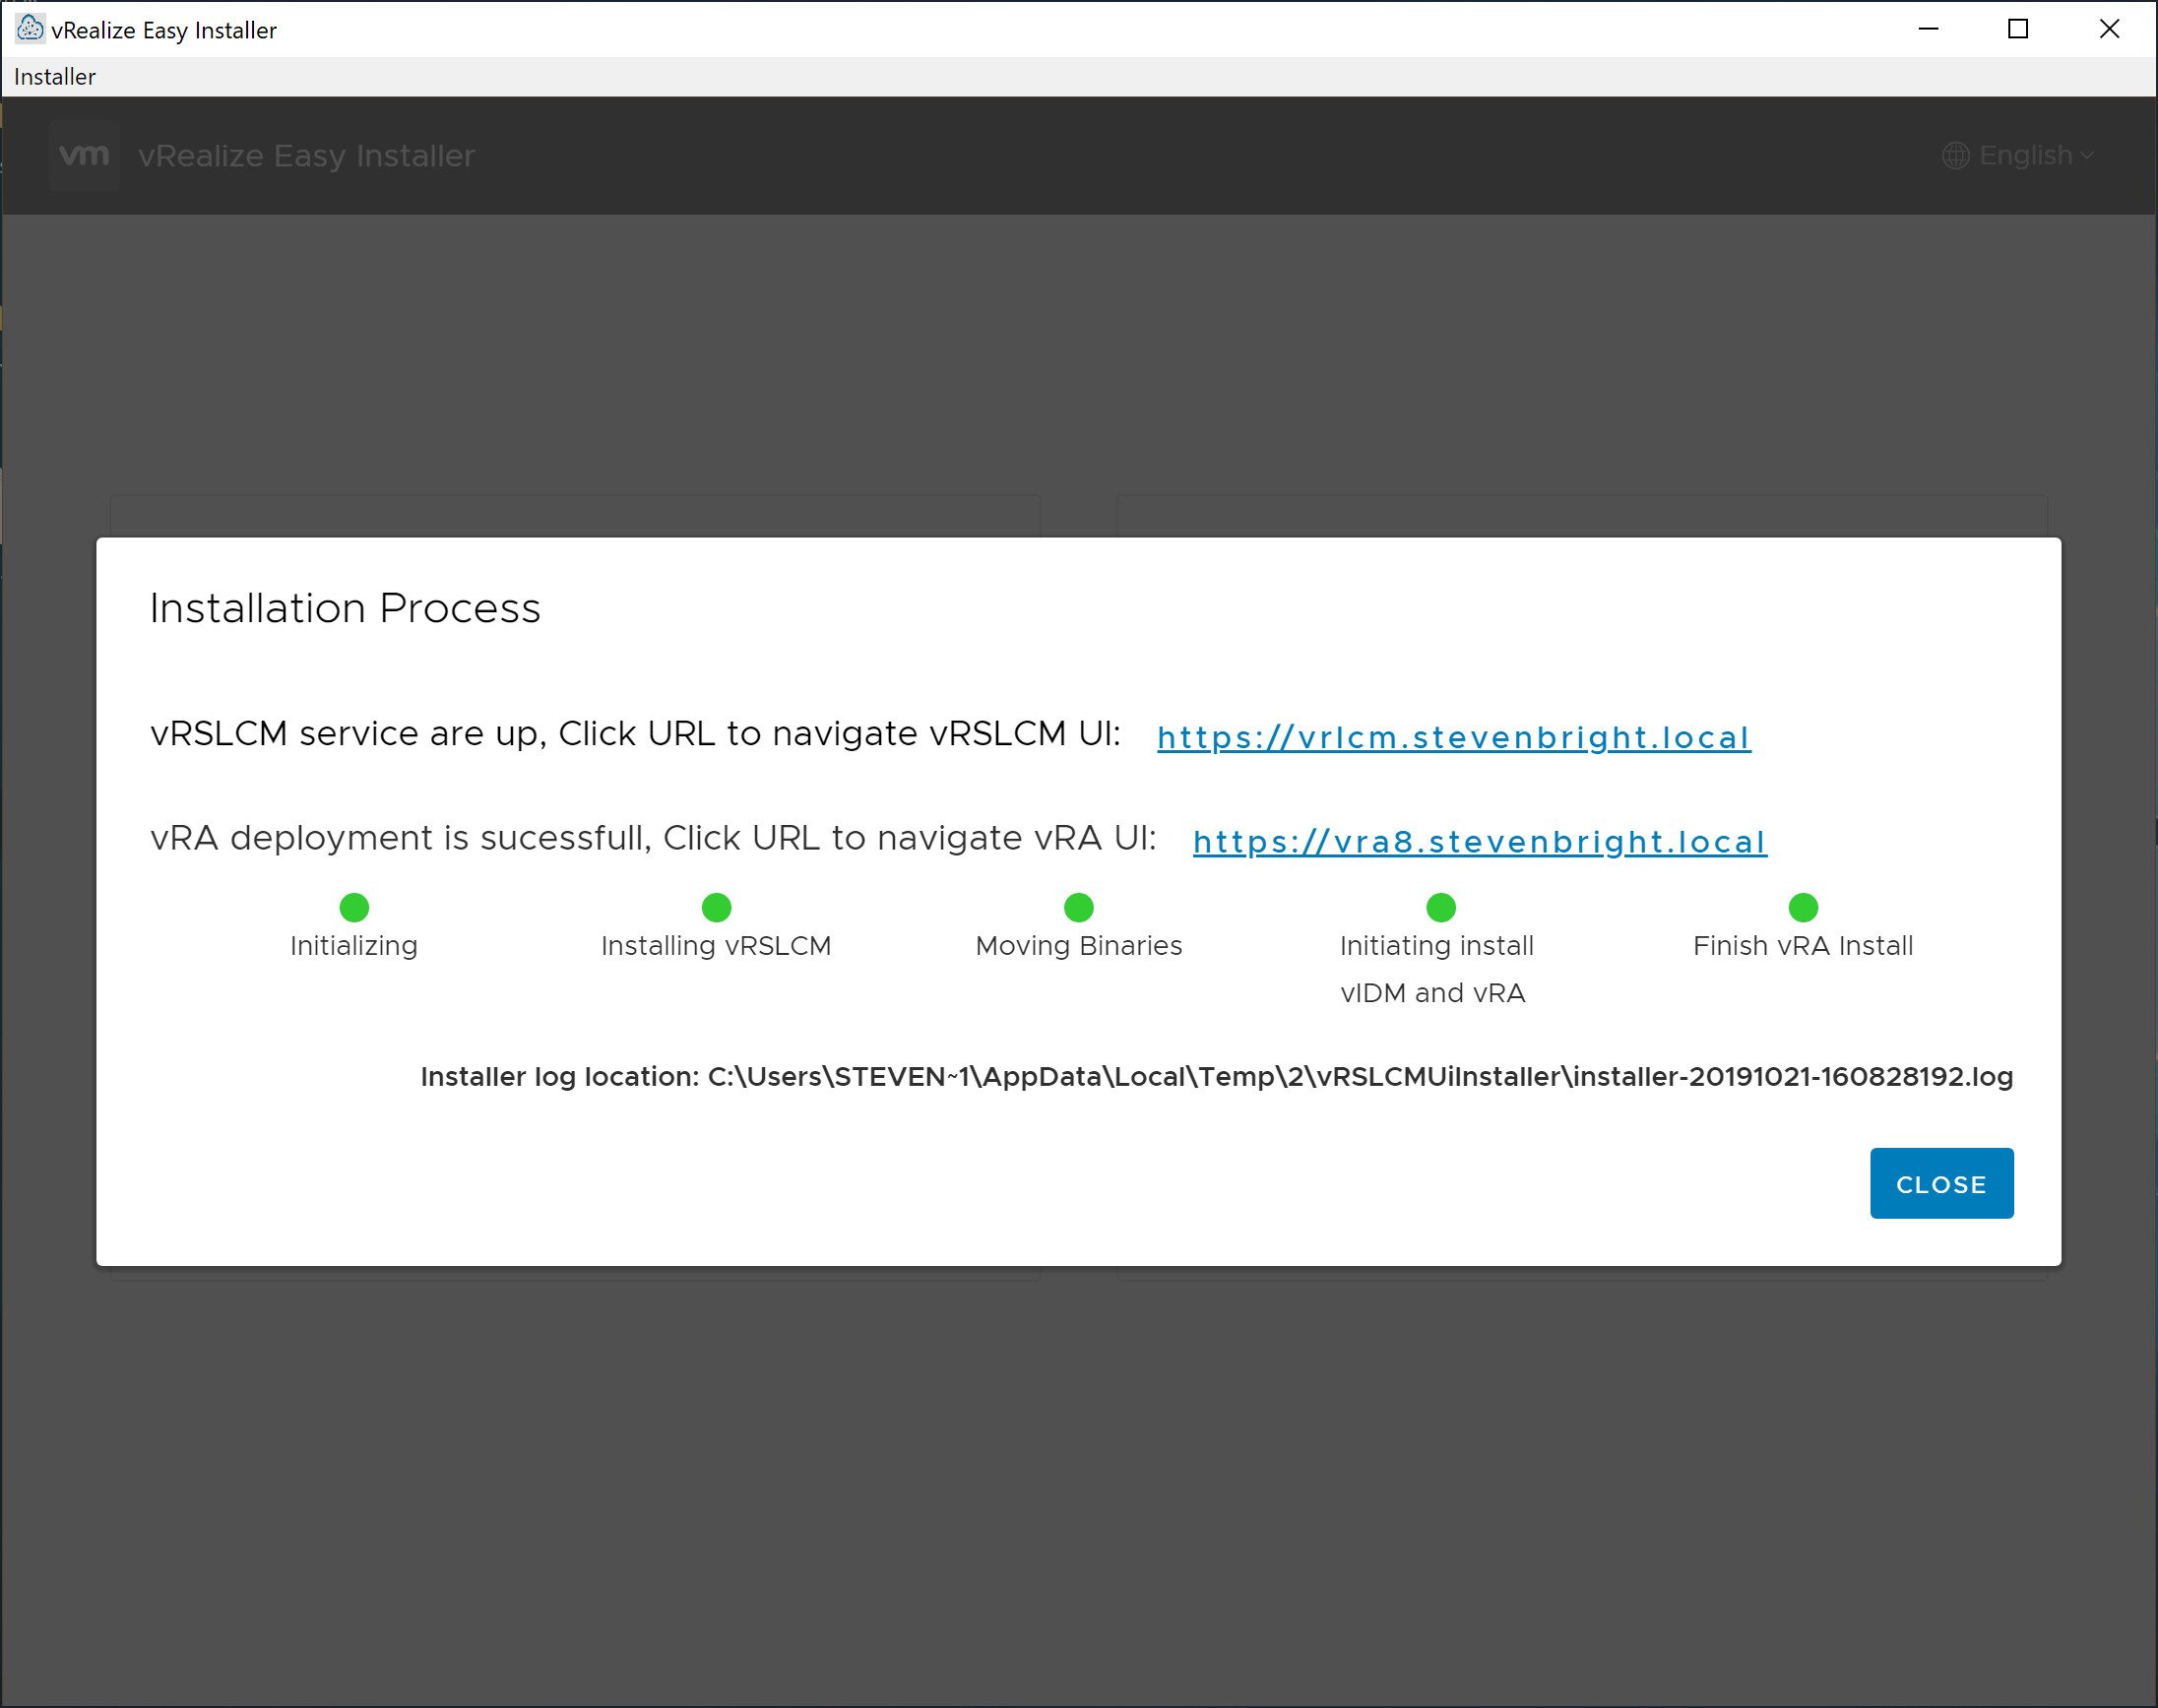
When the installation is complete, you are presented with a screen notifying you that the vRealize Suite Lifecycle Manager services are up, that vRealize Automation was deployed successfully, and providing you with the URL to access both web interfaces.
Logging Into vRealize Suite Lifecycle Manager
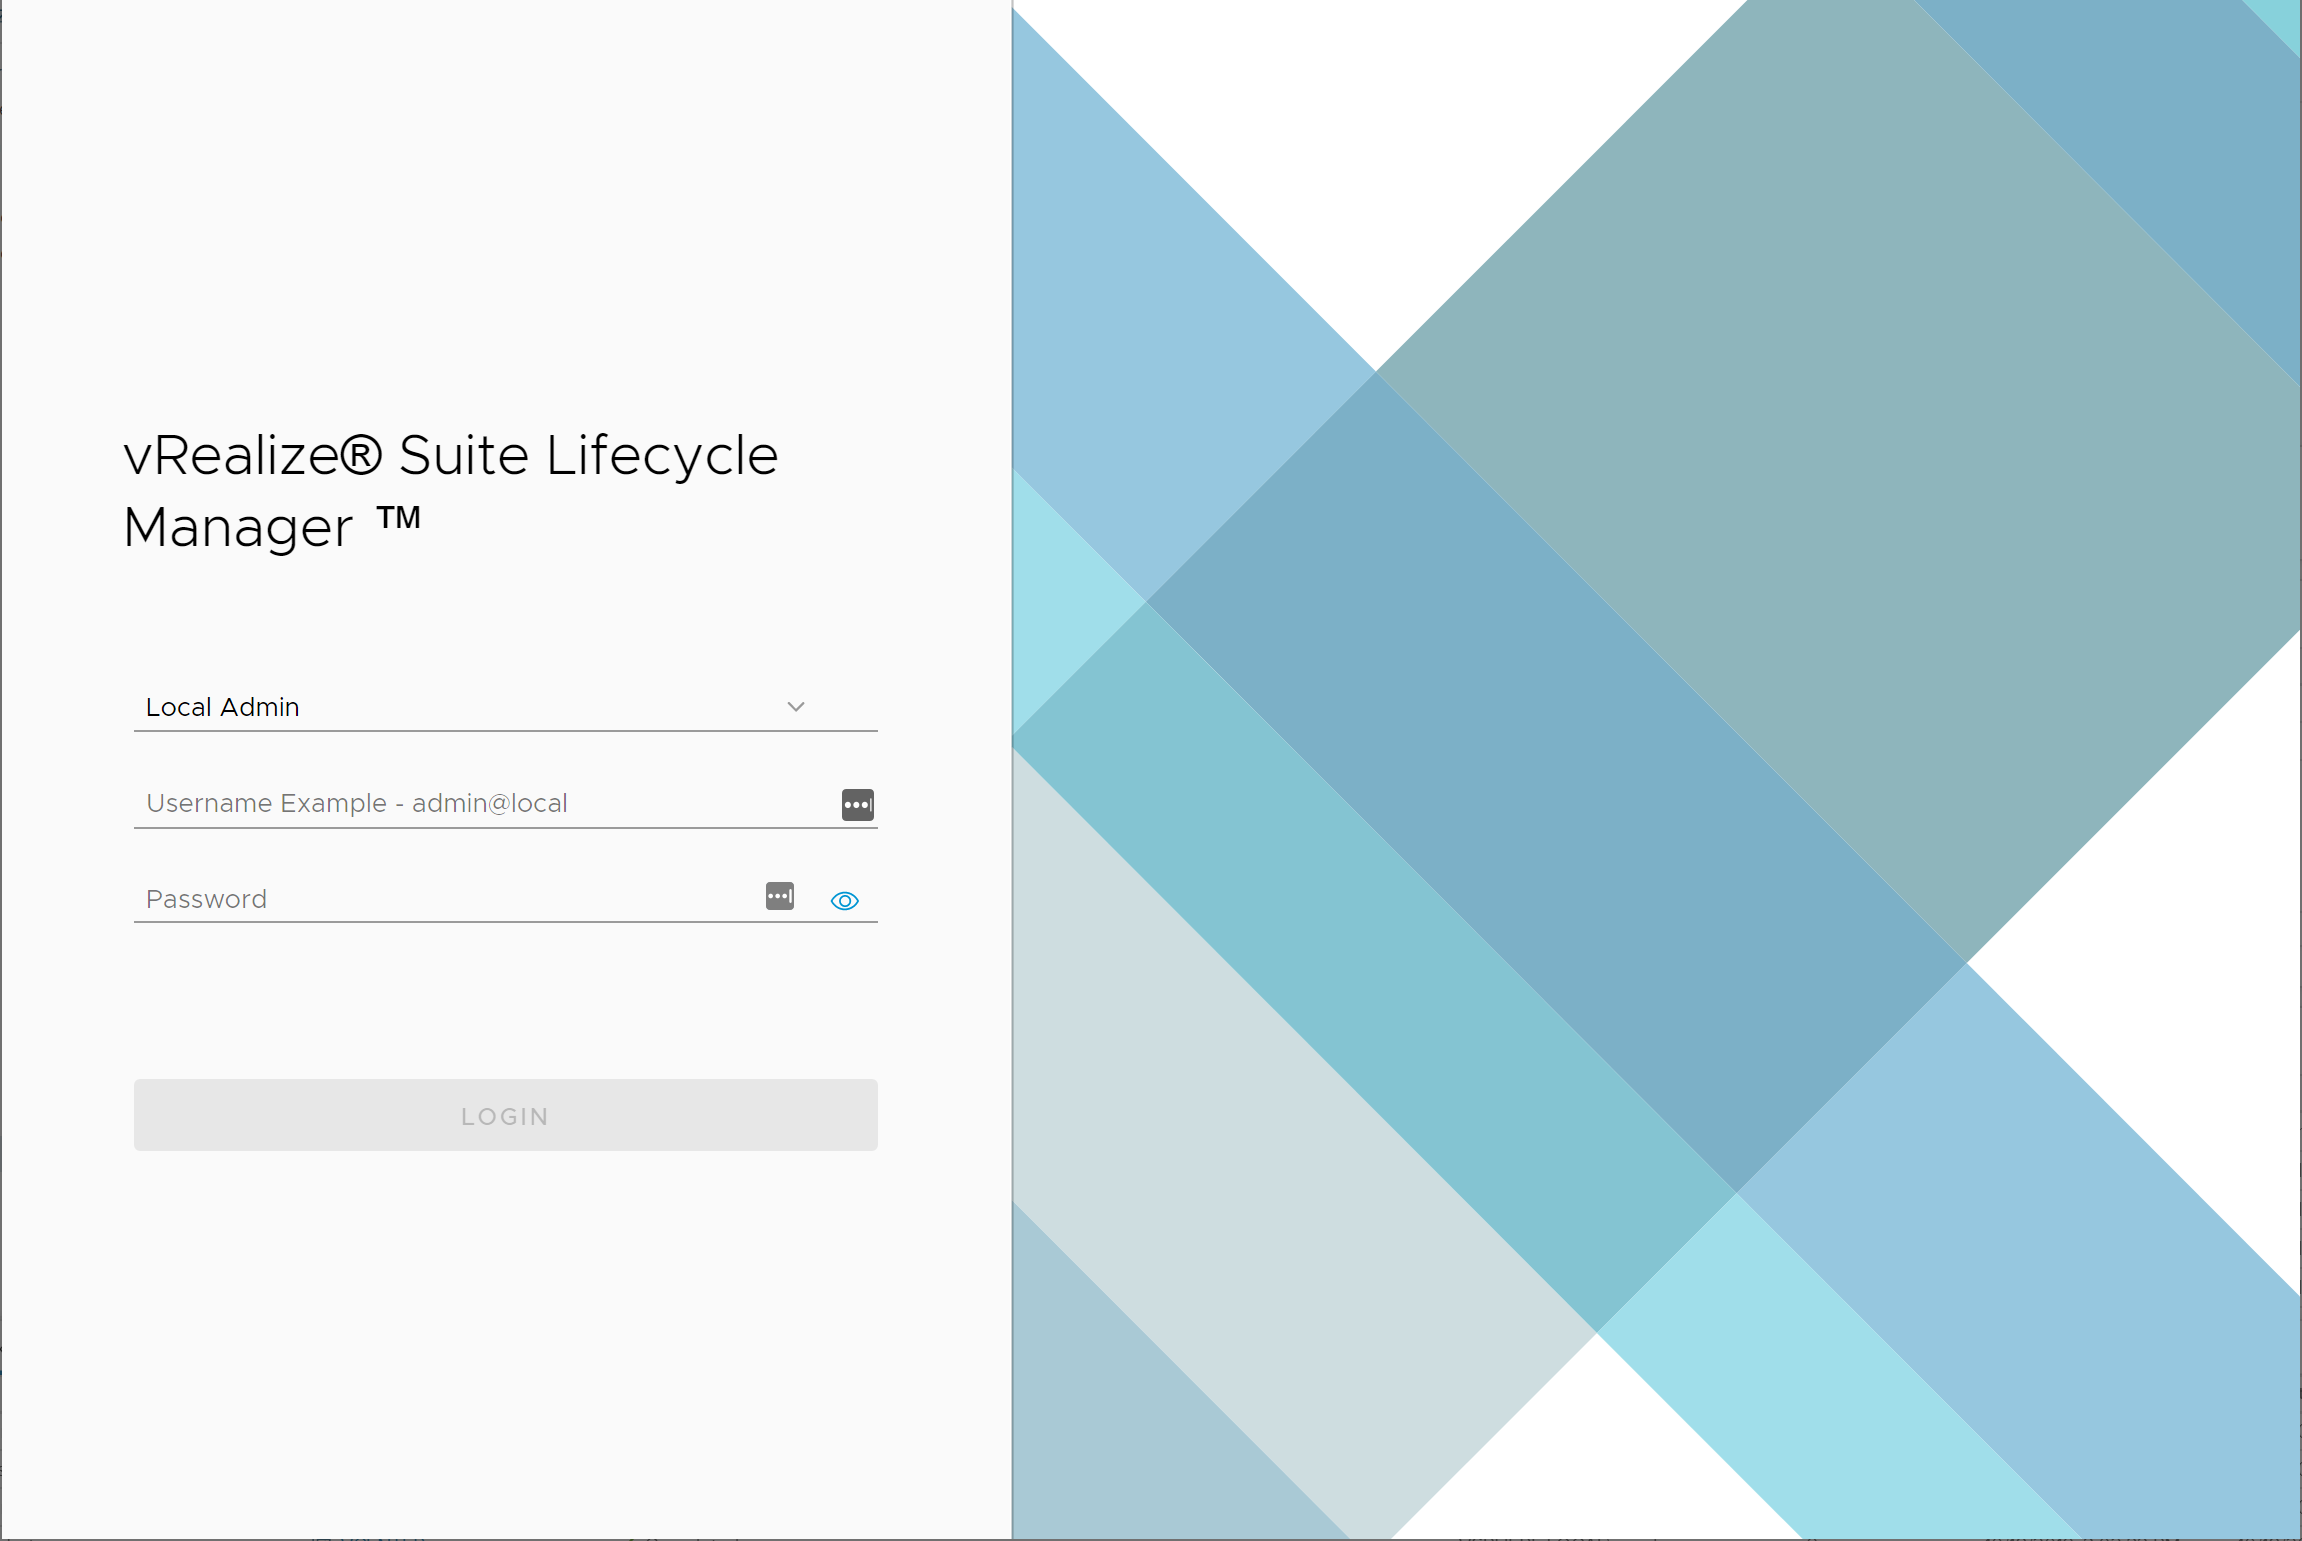
After the deployment of the vRealize Suite Lifecycle Manager, VMware Identity Manager, and vRealize Automation is complete, access the vRealize Lifecycle Manager URL provided at the end of the process. You log in with the username admin@local and use the password that you provided for the root and admin account during the deployment process.
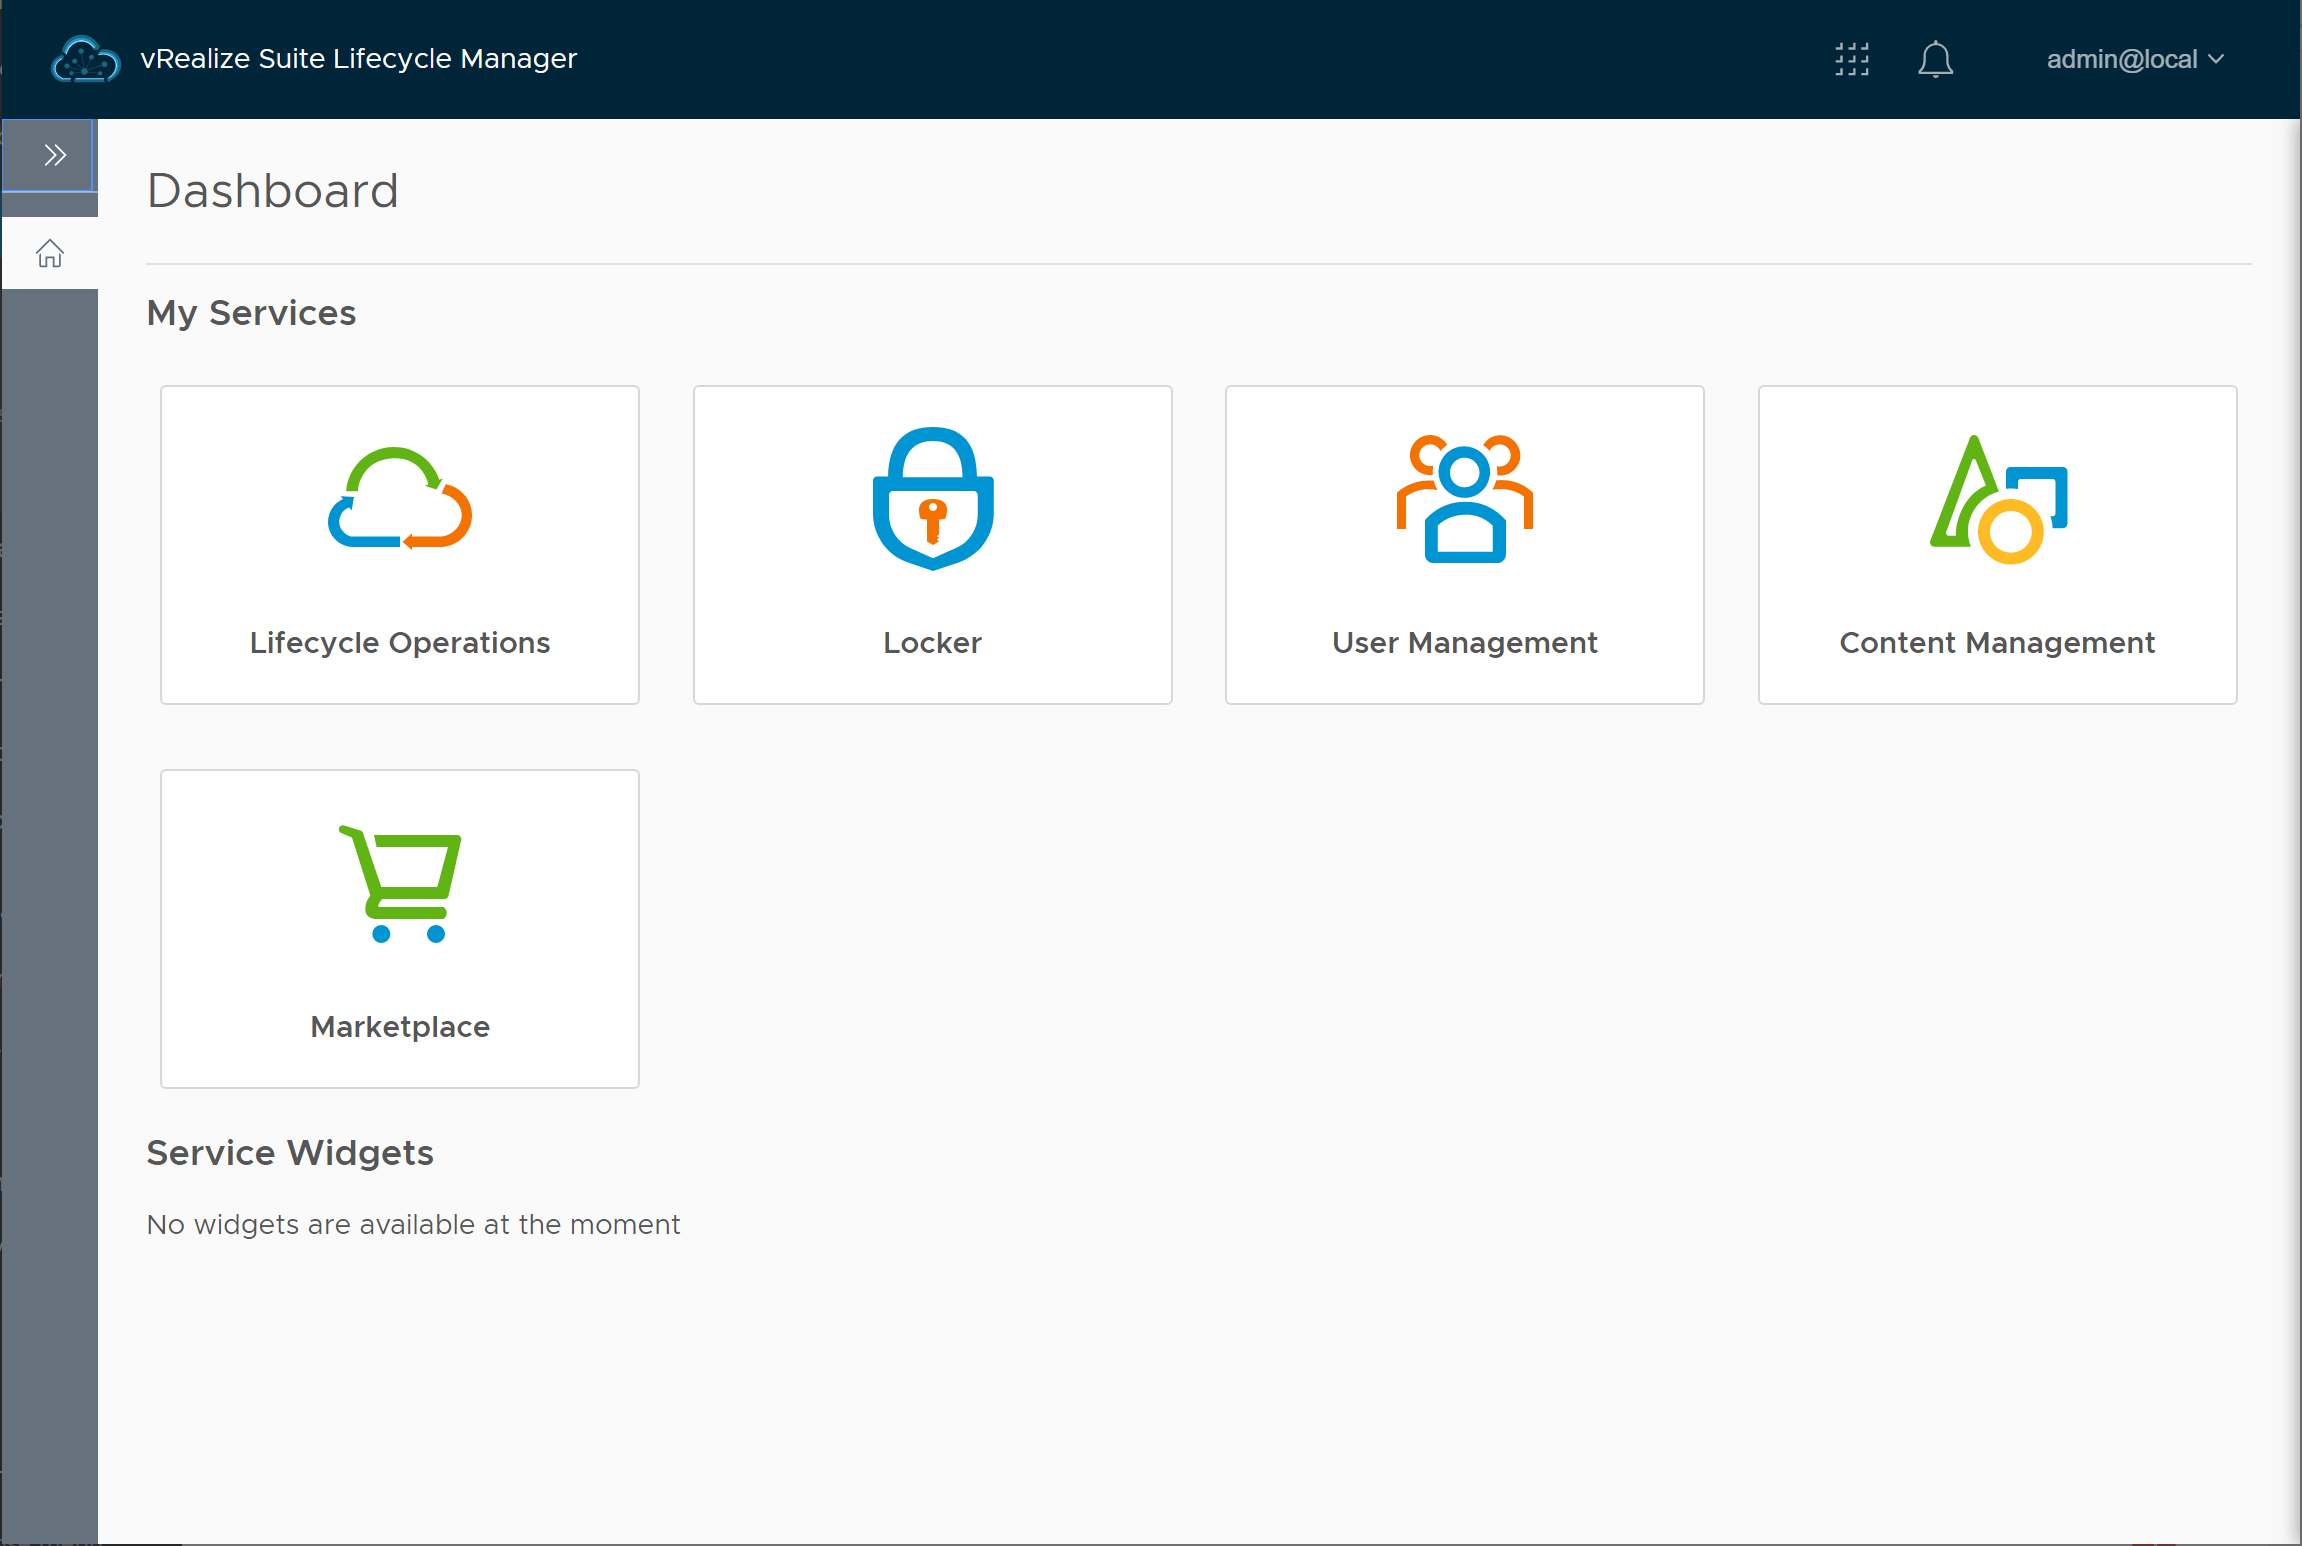
Once you are logged in, you are greeted with the vRealize Suite Lifecycle Manager Dashboard, as shown below.
If you’ve made it this far, congratulations! Next, we walk through the process of configuring VMware Identity Manager to utilize your Active Directory domain using vRealize Suite Lifecycle Manager 8.0.
Configuring Active Directory Authentication
Adding the Active Directory Configuration
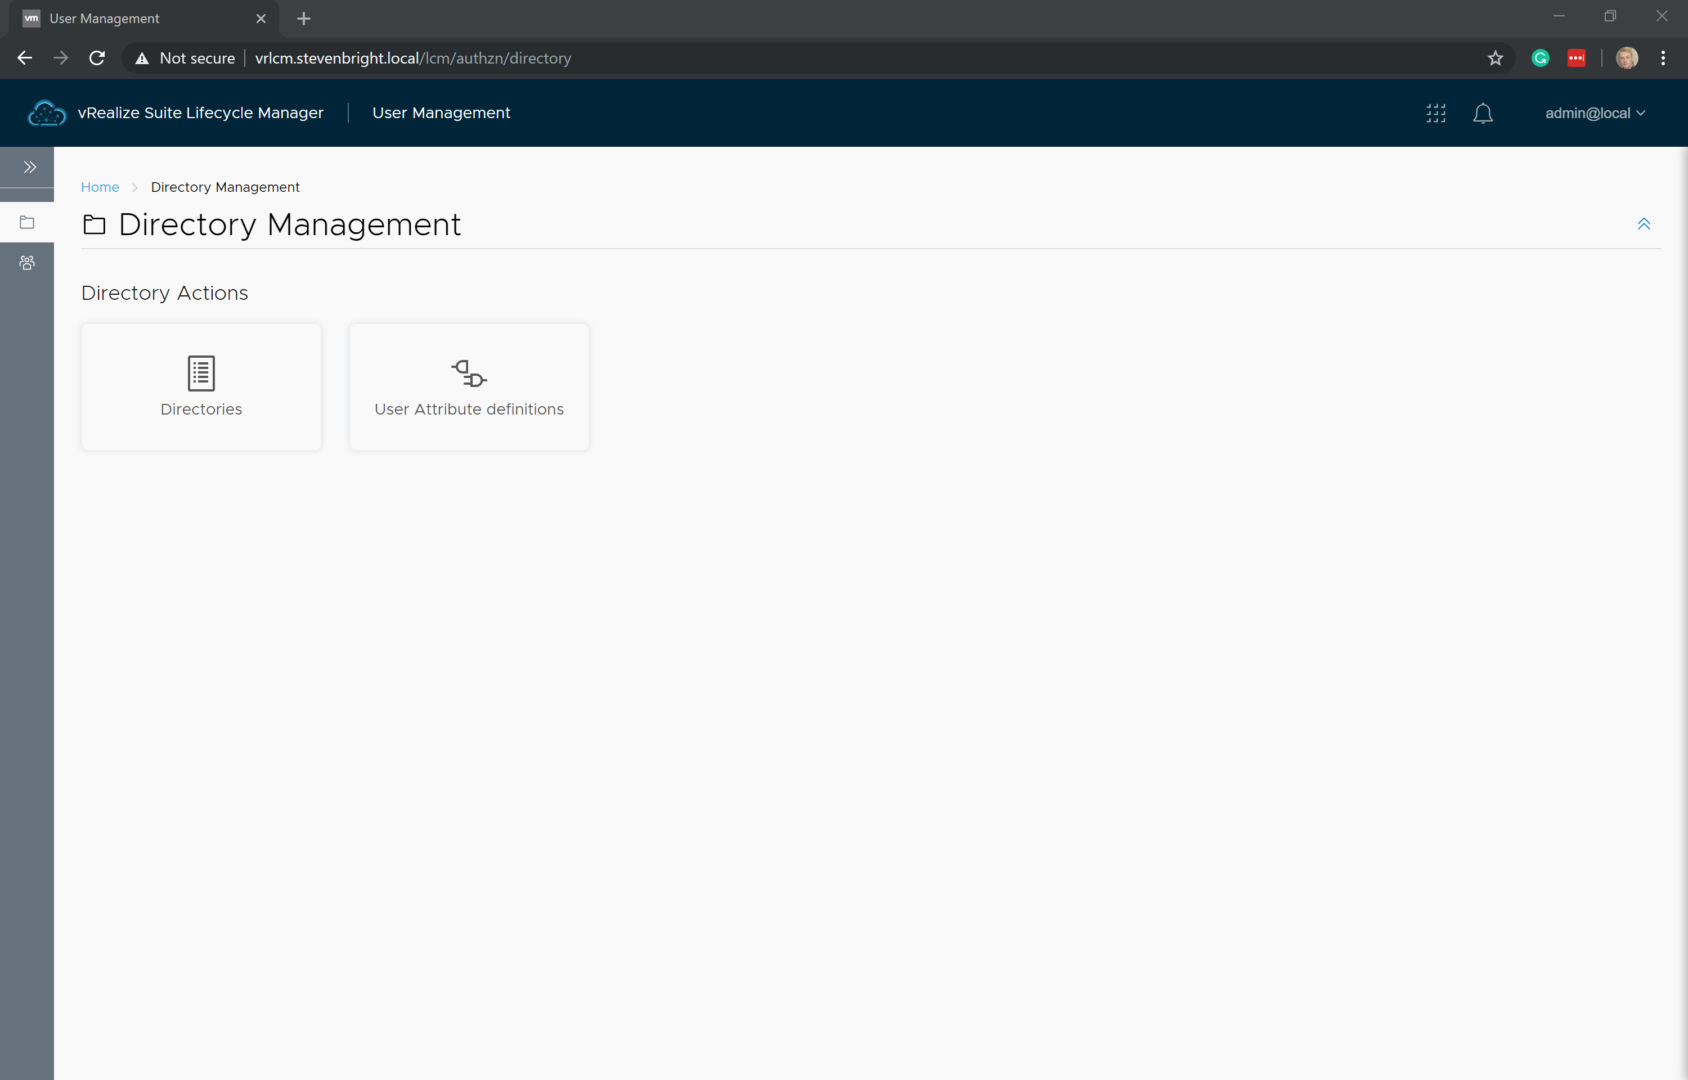
If you aren’t still logged in to vRealize Suite Lifecycle Manager, logged back in using the admin@local user account and the password that you provided to the vRealize Easy Installer. From the vRealize Suite Lifecycle Manager Dashboard, click on the User Management icon. This loads the Directory Management portion of the vRealize Suite Lifecycle Manager.
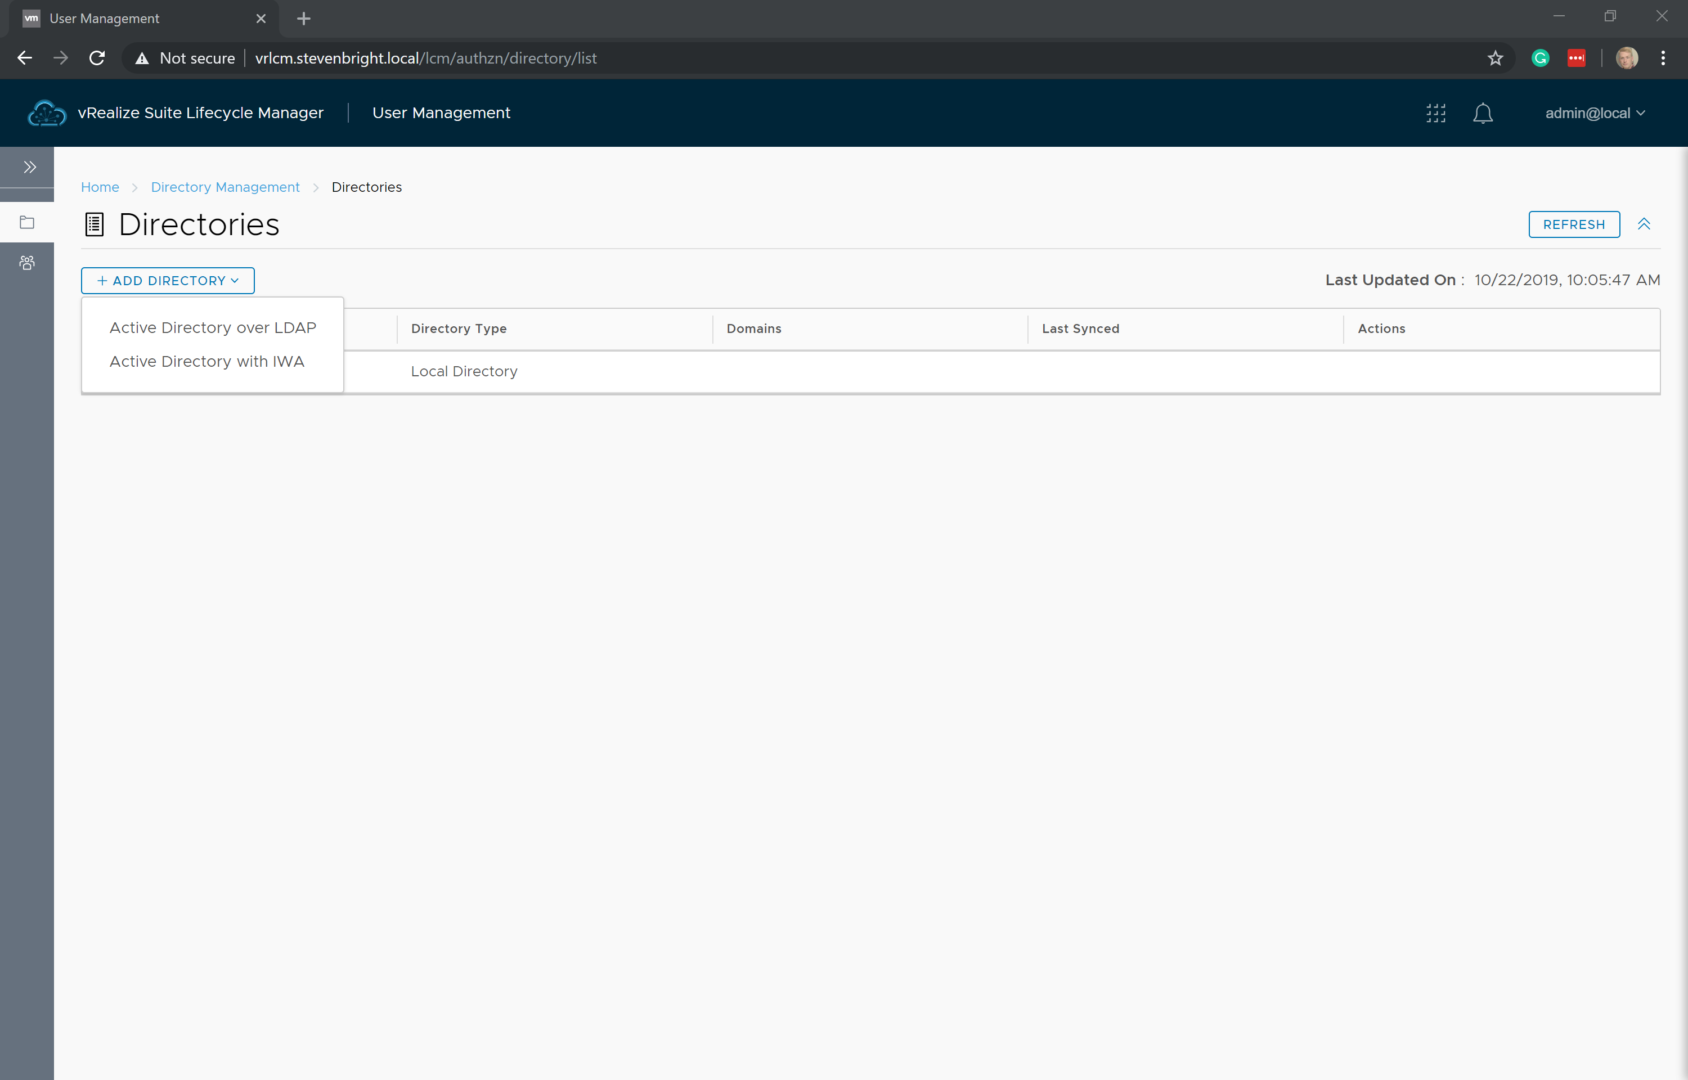
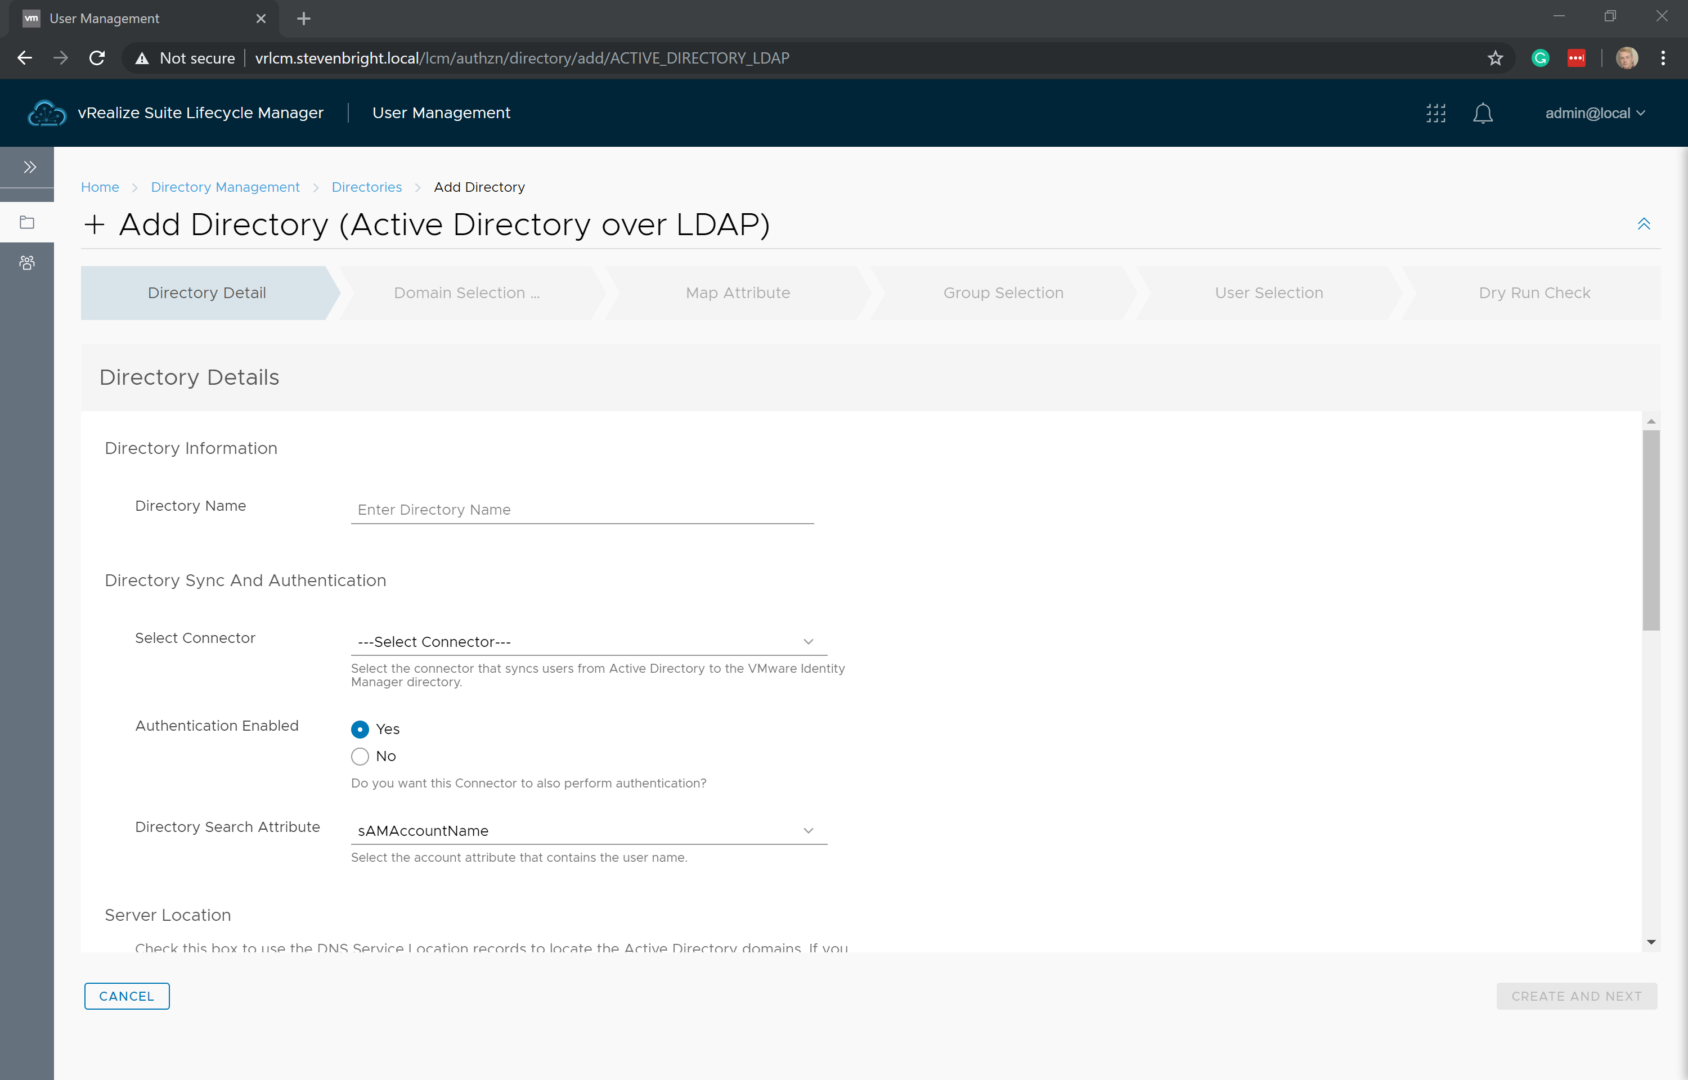
Next, click the Directories button, then on the resulting Directories page, click the + Add Directory button and select the type of directory you are adding (Active Directory over LDAP or Active Directory with IWA).
For this walkthrough, I’ll select Active Directory over LDAP. This loads a wizard for adding the directory to vRealize Suite Lifecycle Manager. Fill in in all of the required details, then click the Create and Next button to move to the Domain Selection portion of the wizard.
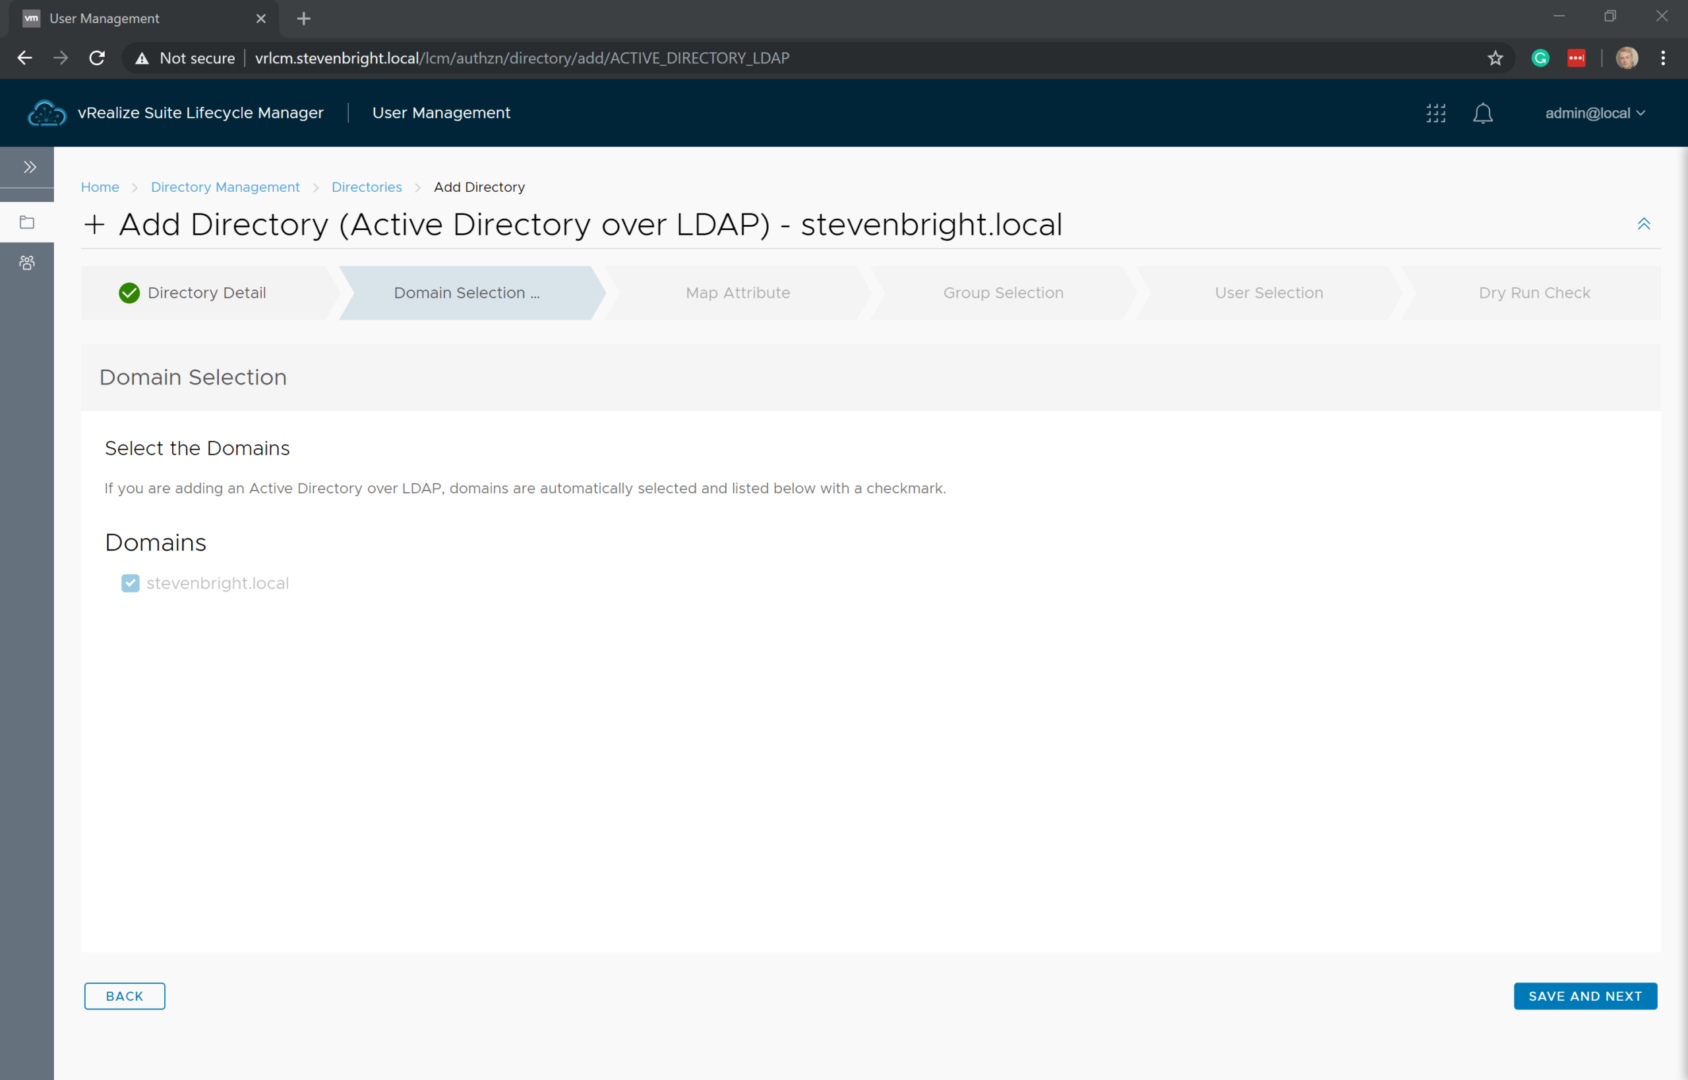
The Domain Selection portion of the wizard lists the domain names that correspond to the information you provided. Verify that the information is correct, then click Save and Next to move on to the Map Attribute portion of the wizard.
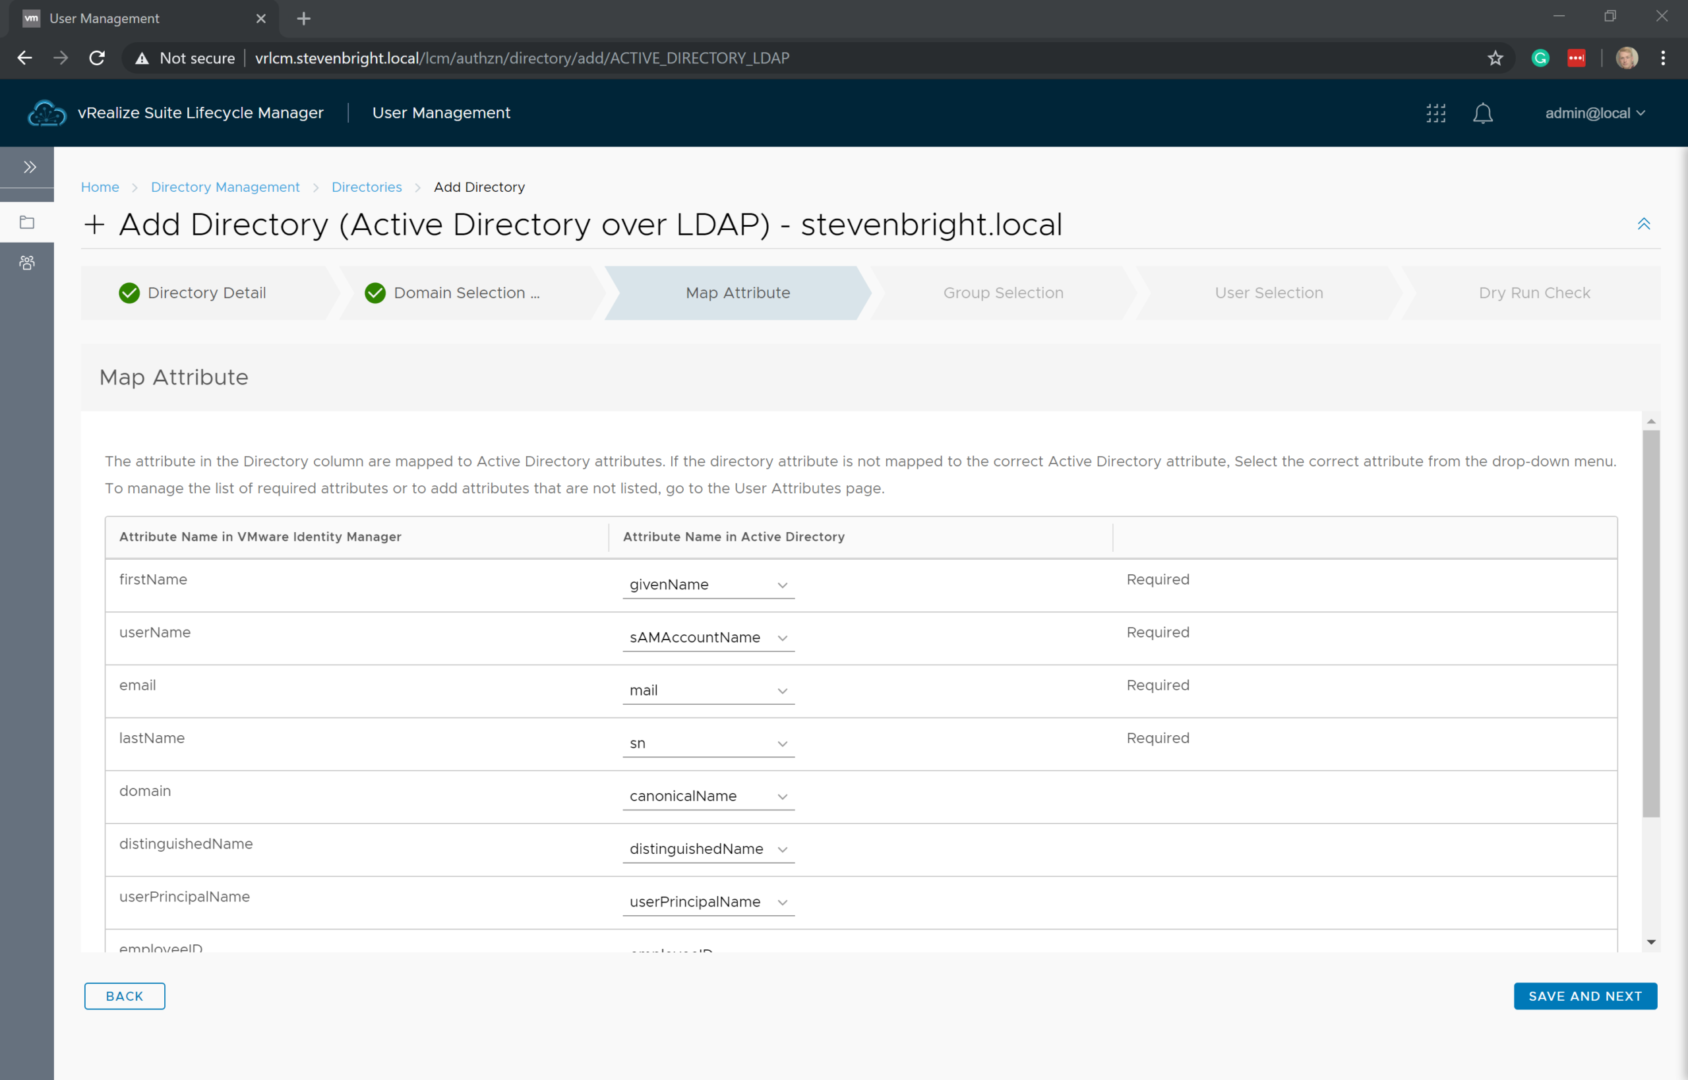
The Map Attribute portion of the wizard allows you to map information from your Active Directory to the user accounts that will be stored in VMware Identity Manager. By default, all required attribute mappings are shown on this screen. If you need to change any of the values, do so now, then click Save and Next to continue.
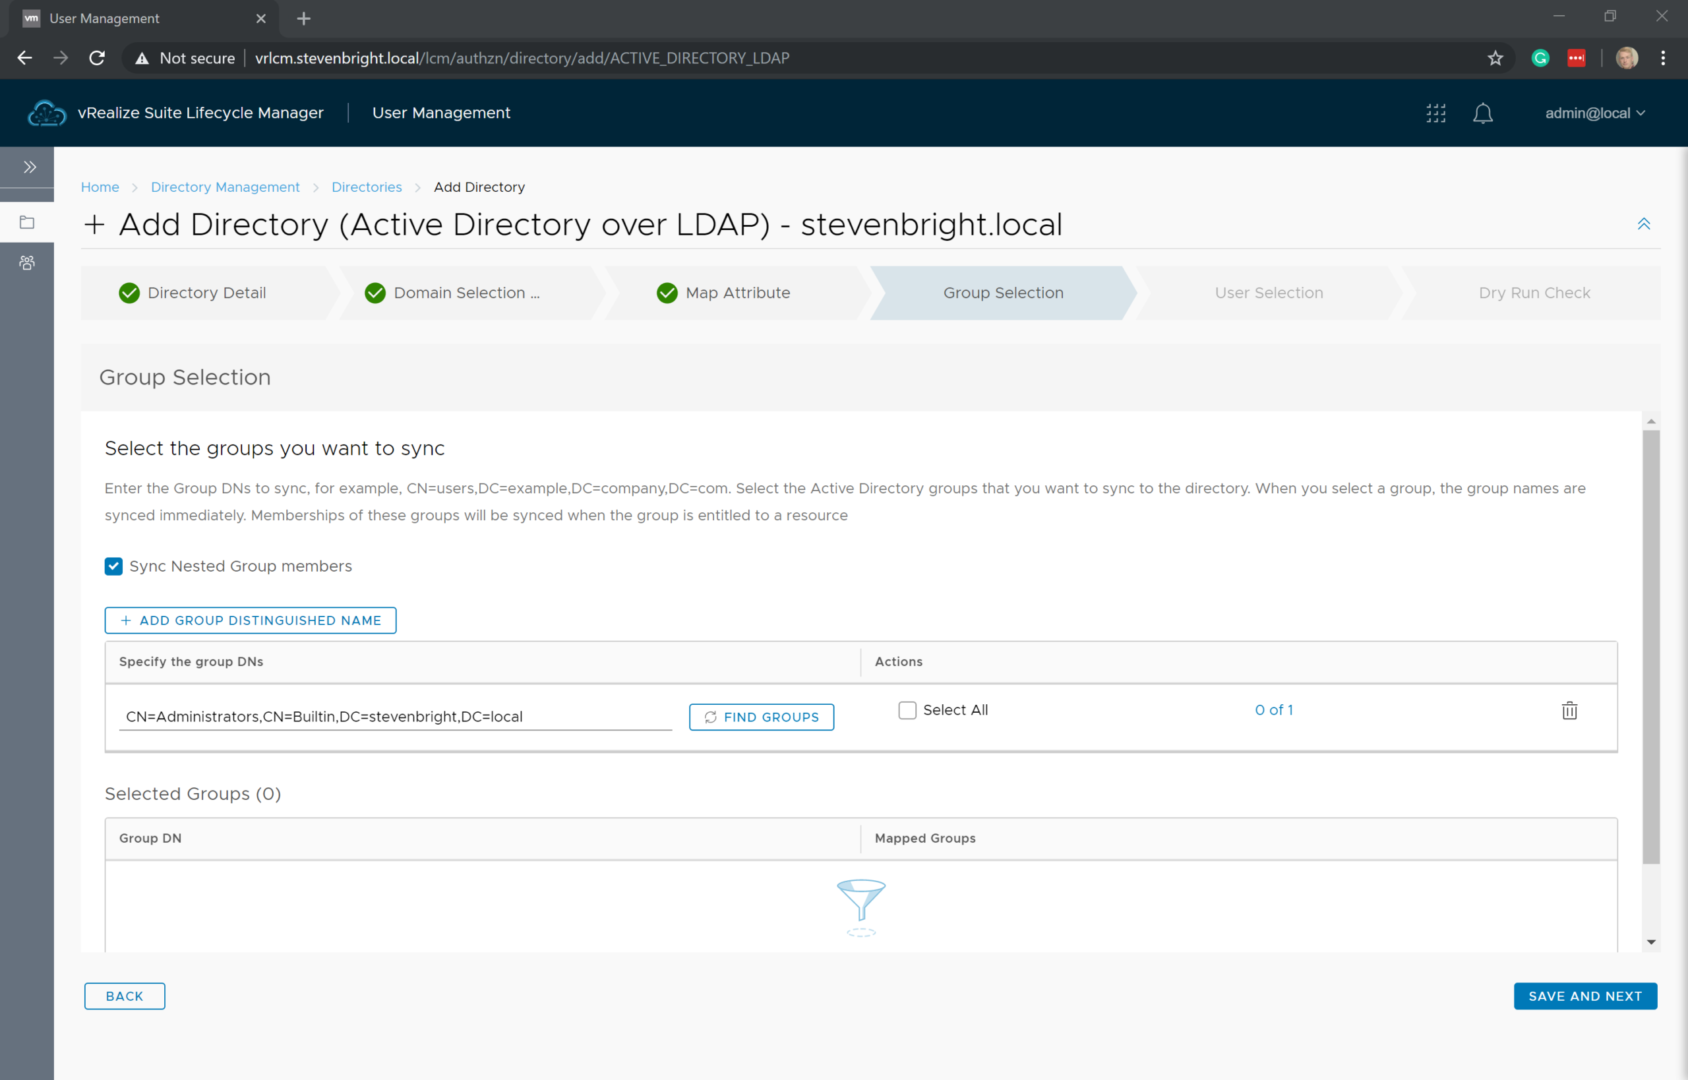
Next up is the Group Selection portion of the wizard. On this screen, you add any Active Directory security groups that you wish to utilize within vRealize Automation. The groups are added by clicking the + Add Group Distinguished Name button and then providing DN of the group or OU where the security groups are stored. Once you provide the DN, click the Find Groups button to query Active Directory for any security groups that match the DN. If you wish to include all of the groups that match the DN, click the Select All checkbox to add the groups to the list to be synchronized. If you wish only to add certain groups that were found by the DN query, click on the x of x link to the right of the checkbox to load the subgroup selection screen, providing you the option to select individual groups to be added. Select the groups you wish to add, then click the Done button. After you have selected all desired security groups, click the Save and Next button to continue to the User Selection portion of the wizard.
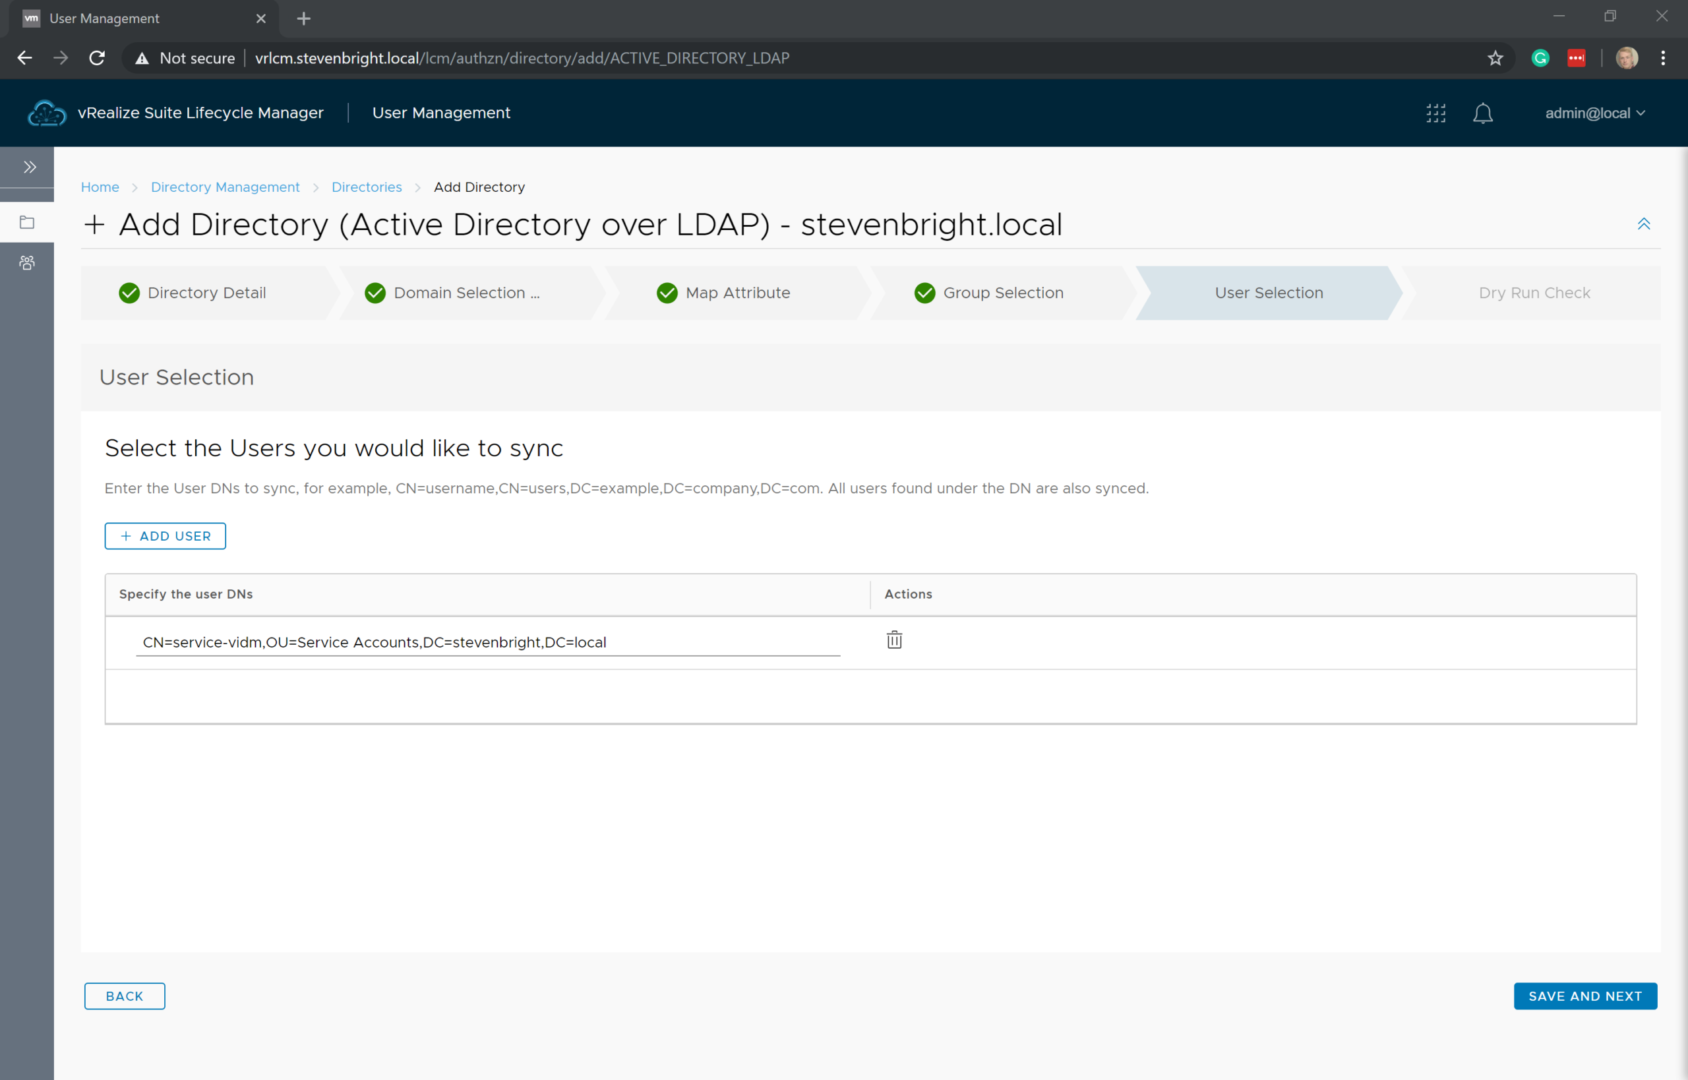
The User Selection portion of the wizard is very similar to the Group Selection portion. By default, the user account used to communicate with Active Directory is listed. If you wish to add additional users that are not already part of the security groups you selected, click the + Add User button and provide the DN for the user account. When you are finished adding your users, click Save and Next to move on to the Dry Run Check portion of the wizard.
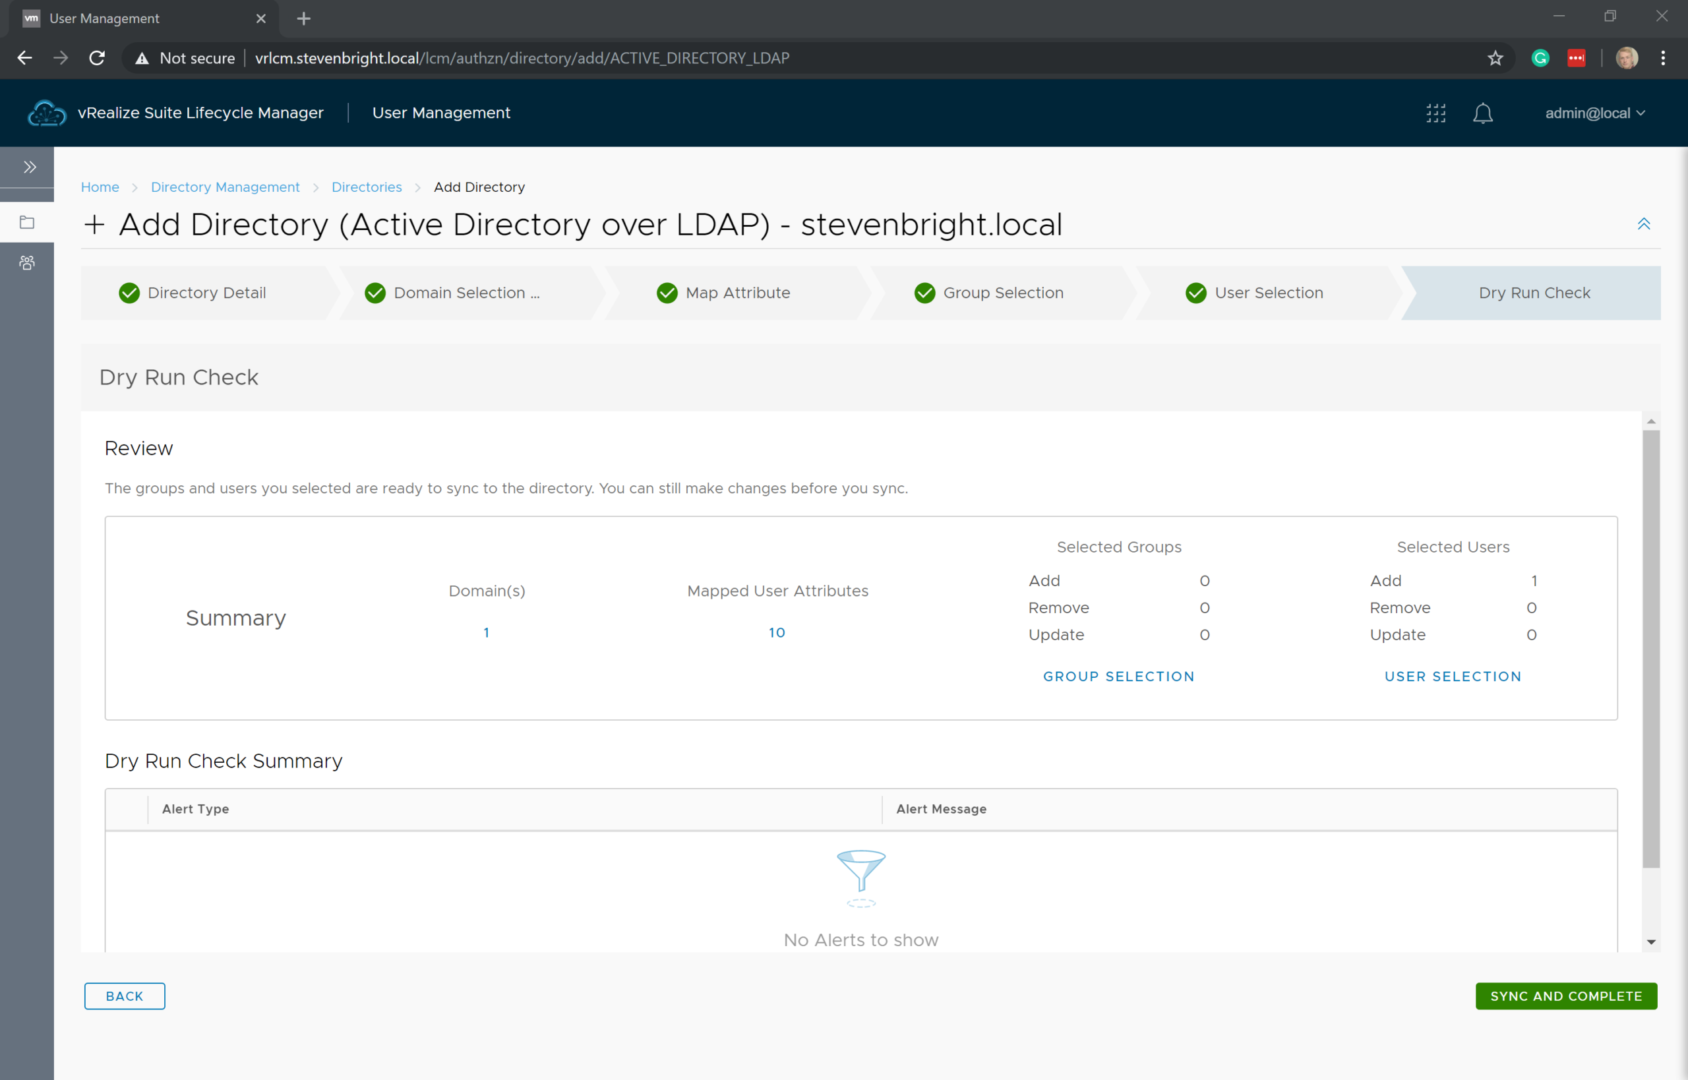
When the Dry Run Check portion of the wizard loads, it will automatically initiate a dry run check of your configuration. Any issues found with your configuration are provided to you at this time. If everything looks good, click the Sync and Complete button to kick off the process of adding your directory and syncing your users/groups from Active Directory.
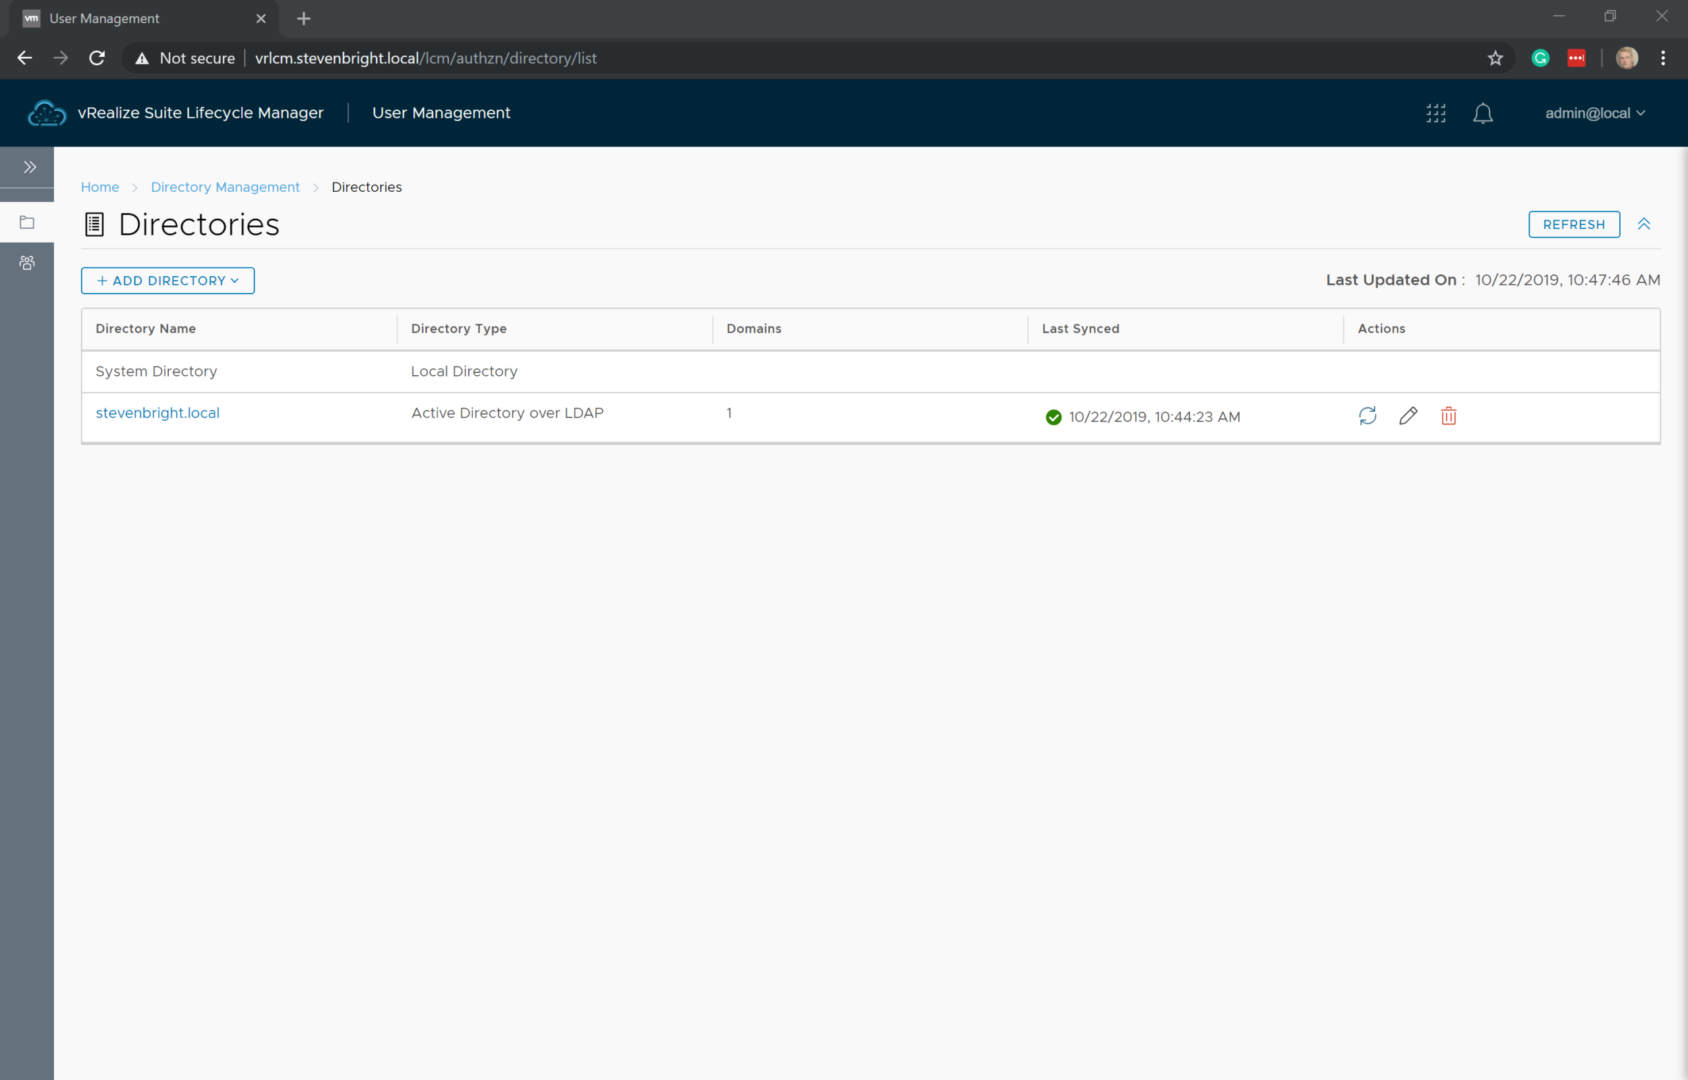
You are returned to the Directories listing; only this time, your Active Directory is listed as well a Last Synced date/time. If you see a green checkbox in the Last Synced column, then you’ve successfully added your Active Directory domain. Congratulations!
Getting Started In vRealize Automation 8.0
So far, we’ve completed a lot of work, including deploying vRealize Suite Lifecycle Manager, VMware Identity Manager (VMware Workspace ONE Access), and vRealize Automation 8.0 as well as configuring VMware Identity Manager to utilize Active Directory. Now we begin the process of assigning access rights to our Active Directory users and security groups.
Logging In To vRealize Automation 8.0 for the First Time
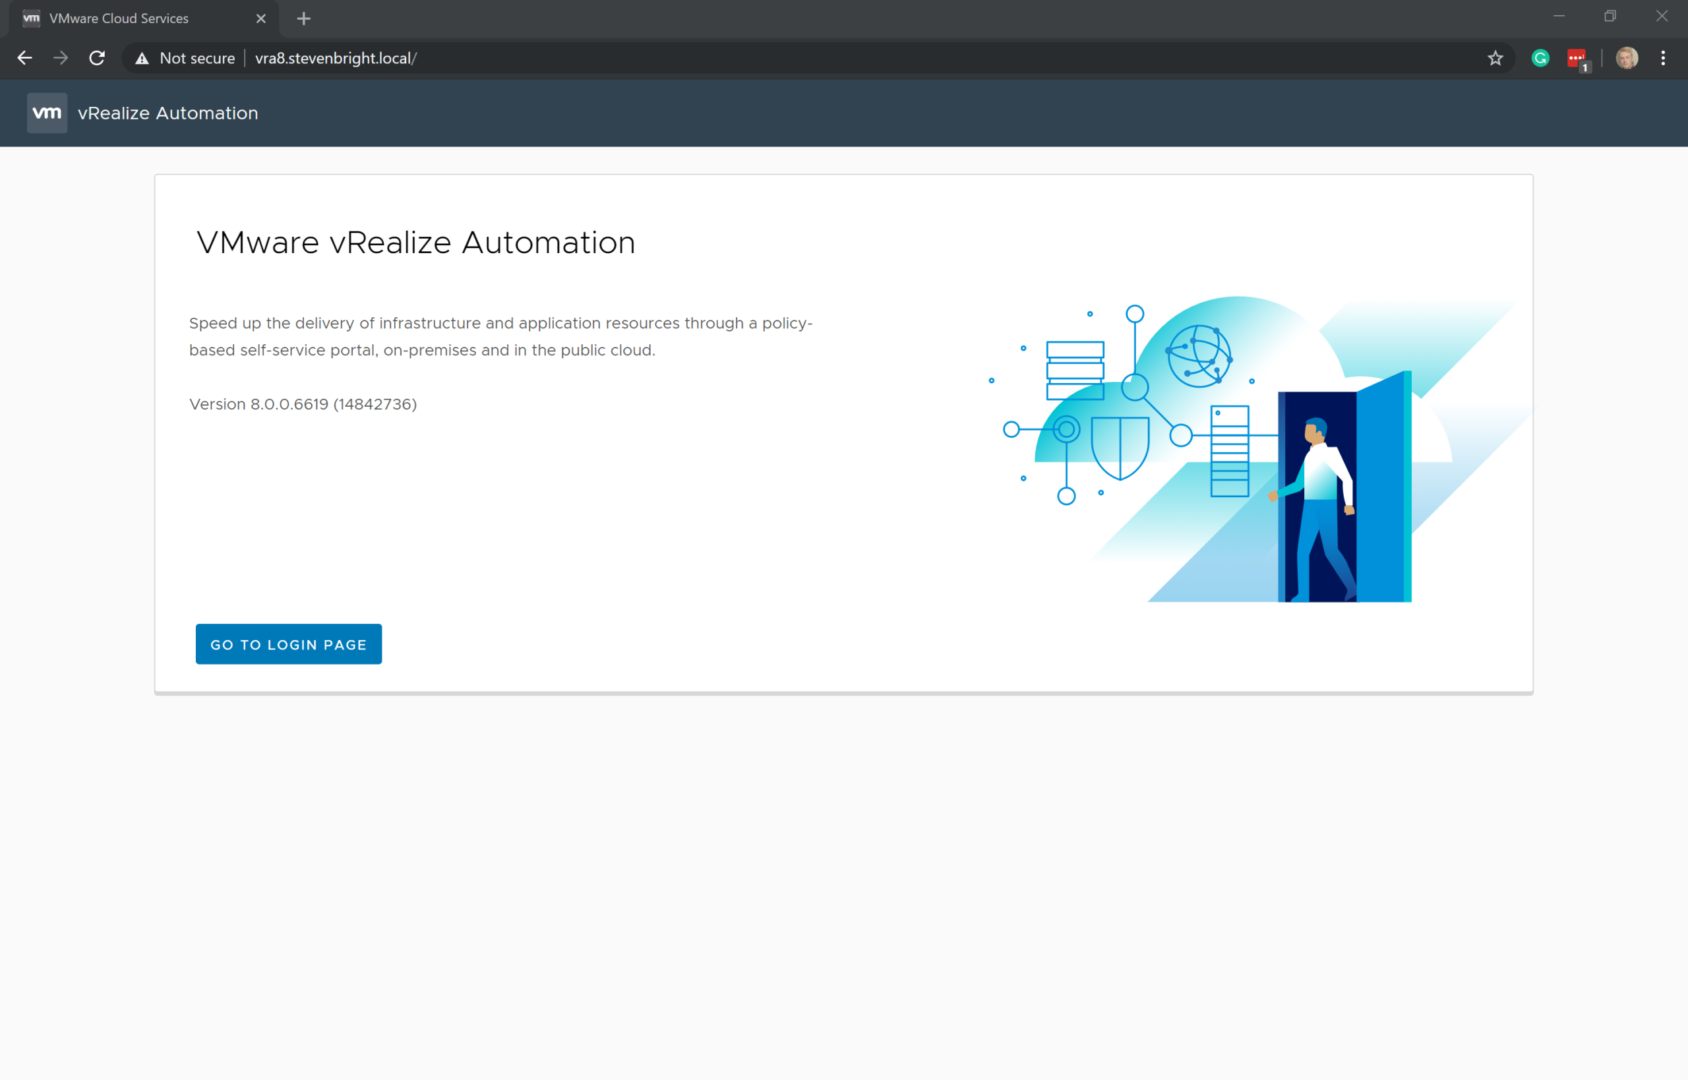
Up to this point, we haven’t touched our new vRealize Automation 8.0 environment. It’s now time to log in for the first time to begin the process configuring vRealize Automation 8.0 for use. To begin, access the URL of your new vRealize Automation 8.0 deployment. You’ll be greeted by a product splash screen that is accompanied by a button labeled Go To Login Page. Click this button to begin.
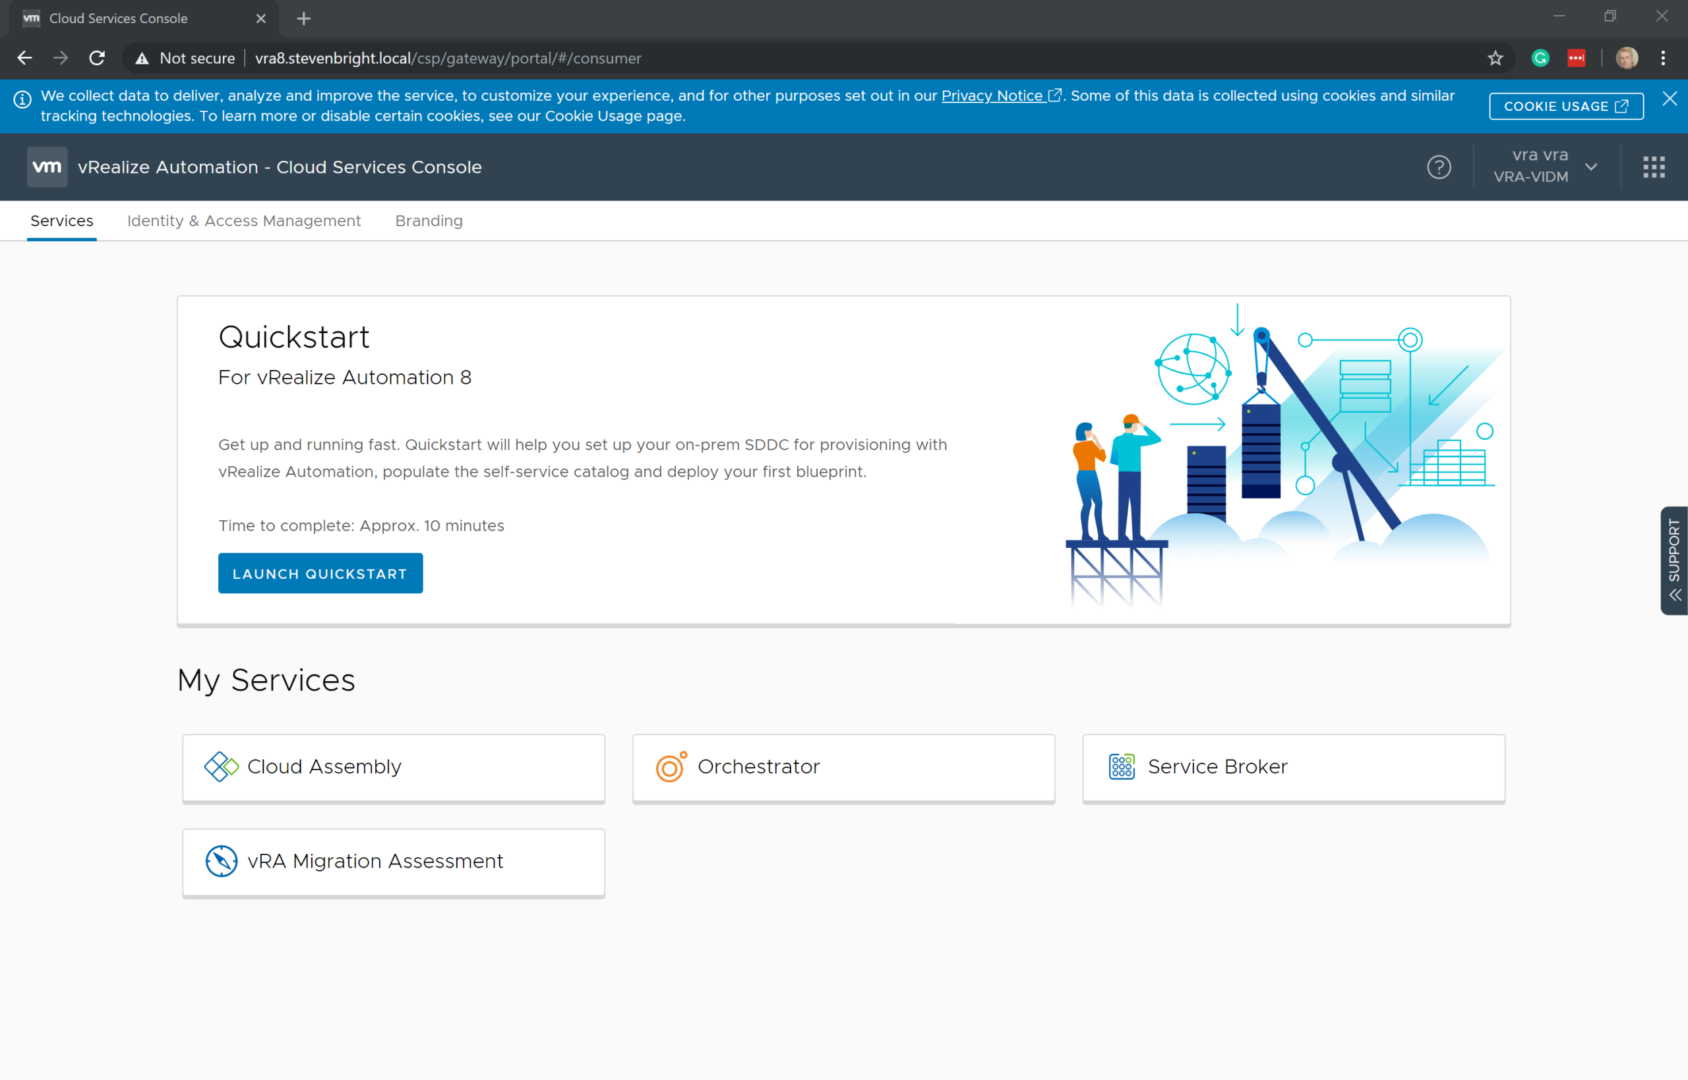
After clicking the button, you directed to the following URL https://[vRA 8 FQDN]/csp/gateway/portal. This URL will redirect you to the VMware Identity Manager to begin the login process. Since this is our first time logging in and we haven’t assigned roles to any additional users, from the login screen, select System-Domain under the Select a domain prompt. This allows us to log in using the configuration account created by the vRealize Easy Installer. Click the Next button to continue the authentication process. On the resulting screen, enter the configuration account’s username and password, then click Sign in to log in to vRealize Automation 8.0. You will now be greeted with the vRealize Automation 8.0 dashboard.
Assign Access Rights to Active Directory Users and Security Groups
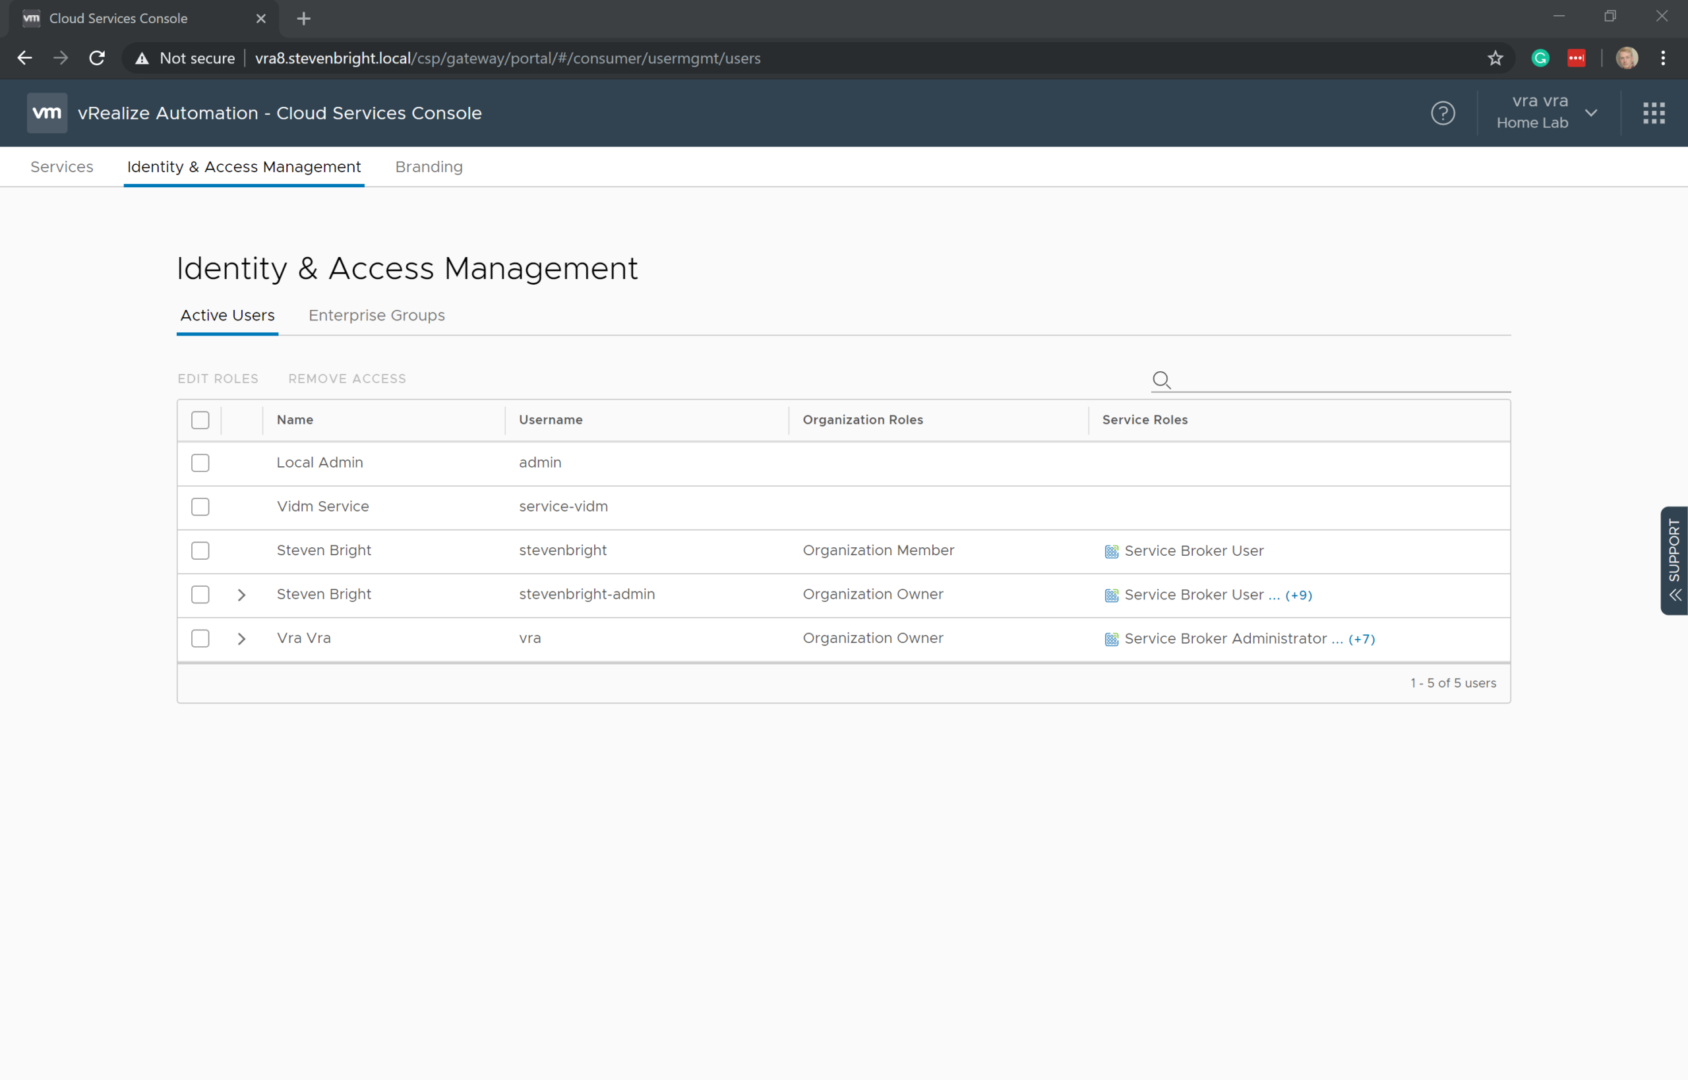
To begin assigning roles and permissions to your Active Directory users and security groups, click on the Identity & Access Management tab at the top of the Cloud Services Console.
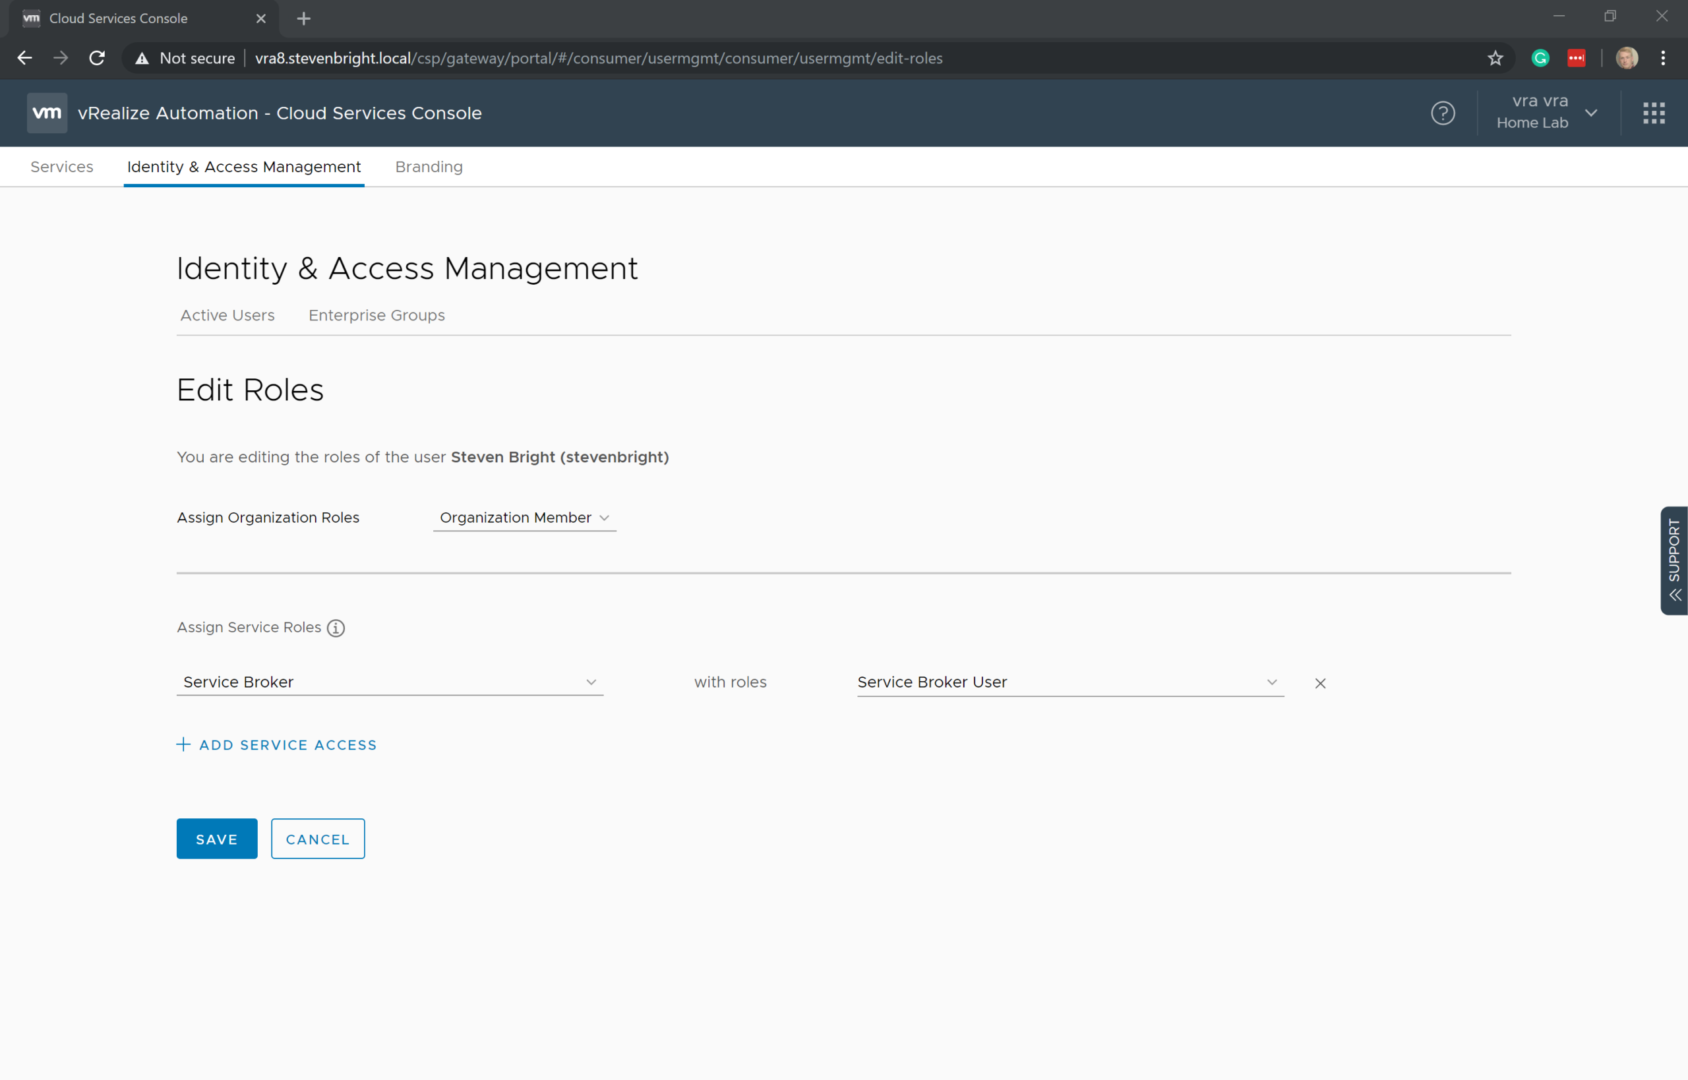
To edit the Role(s) assigned to a user or set of users, select the checkbox next to the users you wish to assign the Role(s), then click the Edit Roles button at the top of the list. On the resulting Edit Roles screen, select the desired values to assign an Organizational Role as well as Service Roles. Click the Save button to save your changes.
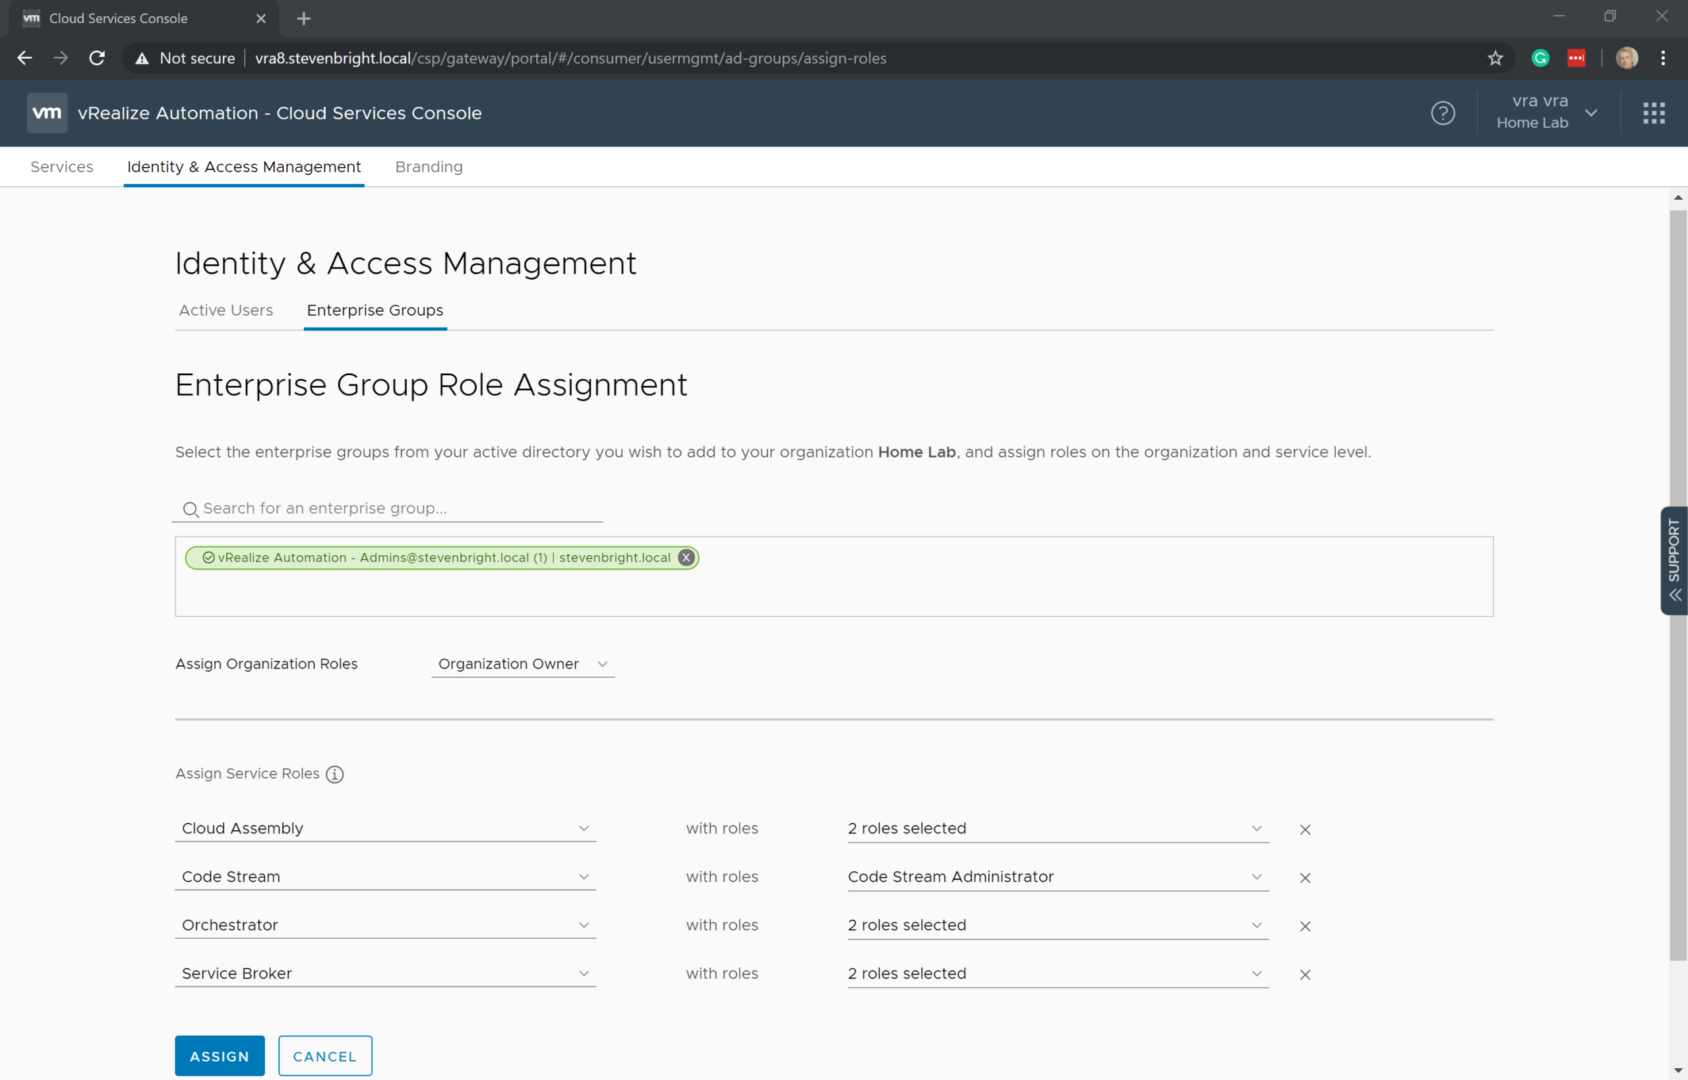
Assigning Roles to security groups is slightly different. First, from the Identity & Access Management screen, click on the Enterprise Groups. Next, click the Assign Roles button to load the Enterprise Group Role Assignment screen. From here, search for your security group’s name. When you select the group, it is added to the list groups. Next, select any Organization Roles or Service Roles that you wish to assign to the security group, then click the Save button to apply your changes.
Conclusion
That’s all there is to it! You’ve deployed a new instance of vRealize Automation 8.0 and configured user access to the environment. In future posts, I will walk through the process of utilizing various features within vRealize Automation 8.0.
See Also
Search
Get Notified of Future Posts
Recent Posts
